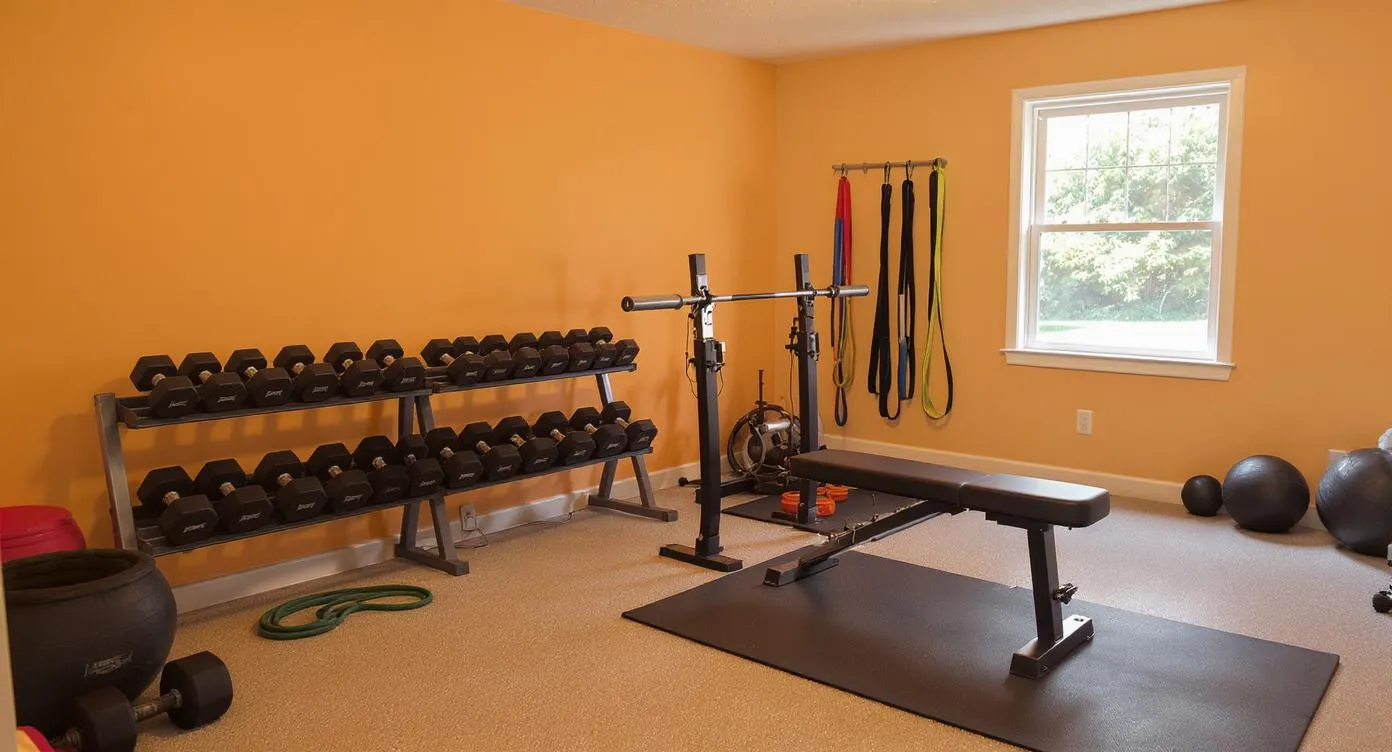
Building a Home Gym After 40: Equipment & Training Guide
How to build and use a home gym when you're over 40. Joint-friendly equipment choices, training modifications, and realistic programming advice.
Starting a home gym after 40 is one of the most consequential health decisions you can make. Research from the British Journal of Sports Medicine confirms that adults who begin resistance training in midlife reduce all-cause mortality by up to 15%, improve bone mineral density by 1-3% annually, and significantly lower their risk of type 2 diabetes, cardiovascular disease, and sarcopenia. But your equipment needs, programming, and recovery protocols should look fundamentally different from a 22-year-old chasing one-rep maxes.
This comprehensive guide covers exactly what to buy, how to set up your space, how to program your training intelligently, and how to stay injury-free for decades of productive training.
Why a Home Gym Is Ideal for Lifters Over 40
The home gym advantage compounds with age. Here is why training at home becomes increasingly superior to a commercial gym after 40:
- Extended warm-up freedom — you need 15-20 minutes of warm-up, not the 5 minutes younger lifters get away with. No one is waiting for your rack.
- Schedule alignment — train when your body feels best. Many over-40 lifters perform best at 9-10 AM after joints have loosened up, not at 6 AM or after a long workday.
- Privacy for rehab work — band pull-aparts, face pulls, hip circles, and foam rolling are critical but awkward in crowded gyms.
- Temperature control — cold muscles and tendons are injury-prone. Control your training environment year-round.
- Zero commute barrier — the 20-minute drive to the gym that kills consistency at age 25 becomes an absolute dealbreaker at 45 when life is busier.
- Equipment customization — choose tools that accommodate your specific joint issues, not whatever the gym purchased in bulk.
Essential Equipment: What to Buy First
Your purchasing priority should emphasize safety, joint health, and versatility. The goal is building a setup that keeps you training consistently for 20+ more years.
Tier 1: Safety and Foundation (Months 1-2)
Power rack with adjustable safety bars — this is non-negotiable for solo training. Look for racks with Westside hole spacing (1-inch increments) through the bench zone so you can dial in safety bar height precisely. The ULTRA FUEGO Power Cage is an excellent entry point at under $400, with 800-pound capacity and 19 levels of adjustable safeties.
Rubber flooring — 3/4-inch horse stall mats (4x6 feet, approximately $45 each from Tractor Supply) protect both your joints and your floor. The density absorbs impact during deadlifts and provides stable footing for squats. You need at minimum a 6x8-foot area for a rack setup. Check our complete flooring guide for detailed recommendations.
Adjustable bench with back pad support — a bench with a stable, supportive pad reduces spinal stress during pressing movements. The FLYBIRD Adjustable Bench offers 7 back positions and 3 seat positions at under $150, weighing only 32 pounds for easy repositioning.
Tier 2: Joint-Friendly Strength Tools (Months 2-3)

FLYBIRD WB2 Weight Bench, Utility Adjustable Weight Bench
Capacity
800 lbs (ASTM Certified)
Steel
Commercial-Grade Steel Frame
Footprint
48.4" L x 16.5" W x 17" H (folded)
Price
$109.99
- 4.6+ star rating on Amazon with 25,000+ reviews
- Unbeatable value under $120
- ASTM-certified 800 lb weight capacity
- 8 backrest angles (90° to -30° FID)
- Folds flat for easy storage in small spaces
- Quick 10-minute assembly
- Gap between seat and backrest at steep inclines
- No decline position on some variants
- Pad is narrower (10.2") than premium benches (12")
- Feet can slide on smooth concrete without rubber mats
Price and availability may change
Adjustable dumbbells (5-52.5 lbs per hand minimum) — single-arm dumbbell work allows natural joint rotation through the movement arc, dramatically reducing shoulder and elbow stress compared to fixed barbell paths. The Bowflex SelectTech 552 adjusts from 5 to 52.5 lbs in 2.5-lb increments, perfect for the gradual progressions that over-40 lifters need. See our best adjustable dumbbells roundup for all top options.
Resistance bands (set of 5 tensions, 10-150 lbs total) — bands provide accommodating resistance that is easier on joints at the bottom of movements where you are most vulnerable. Use them for warm-ups, face pulls, pull-aparts, assisted pull-ups, and banded deadlifts.
Foam roller (high-density, 36-inch) and lacrosse ball — daily soft tissue work is non-negotiable after 40. A 5-minute foam rolling session before training reduces perceived joint stiffness by up to 40% according to research published in the Journal of Athletic Training (Cheatham et al., 2015).
Trap bar (hex bar) — the single best barbell variation for over-40 lifters. The elevated handles reduce spinal loading by 8-10% compared to conventional deadlifts while allowing you to lift similar loads. Most trap bars weigh 45-60 lbs and accommodate 400+ pounds of plates.
Tier 3: Programming Variety (Months 3-6)
Kettlebell (single, 35 lbs for men / 18 lbs for women to start) — goblet squats, Turkish get-ups, and swings build functional strength with built-in mobility requirements. The best kettlebells guide covers top picks by material and handle finish.
Pull-up bar or power tower — dead hangs decompress the spine, and pull-up progressions build back strength that protects posture. Band-assisted pull-ups are excellent for building toward bodyweight reps.
Air bike or rowing machine — low-impact conditioning that elevates heart rate without pounding joints. A Concept2 RowErg or Sunny Health SF-B223018 will last 15+ years with minimal maintenance.
What to Skip (At Least Initially)
- Trap bar for safer deadlift mechanics
- Adjustable dumbbells for natural joint paths
- Resistance bands for warm-ups and joint-friendly loading
- Power rack with safeties for solo training confidence
- Foam roller for daily mobility maintenance
- Heavy specialty barbells (safety squat bar excepted)
- Smith machines that lock into fixed planes
- Fixed heavy dumbbells over 70 lbs
- Leg press machines with extreme knee flexion angles
- Any equipment that requires a spotter you don't have
Training Programming After 40: The Science-Based Approach
The fundamental shift after 40 is from intensity-driven progress to volume-driven progress. Your muscles can still grow at nearly the same rate as younger lifters, but your connective tissue (tendons, ligaments, cartilage) recovers 30-50% slower. Programming must respect this biological reality.
The Extended Warm-Up Protocol
Budget 15-20 minutes. This is not optional — it is injury prevention:
Minutes 0-5: General circulation
- Air bike at conversational pace, jump rope at low intensity, or brisk walking
- Goal: elevate core temperature by 1-2 degrees, increase synovial fluid viscosity in joints
Minutes 5-10: Dynamic mobility
- Leg swings (front/back and lateral): 10 each direction per leg
- Hip circles (controlled): 10 each direction
- Arm circles progressing to band dislocates: 10 each
- Cat-cow spine articulations: 10 reps
- World's greatest stretch: 5 per side
Minutes 10-15: Movement-specific preparation
- Empty bar or very light weight for 2-3 sets of 8-10 reps of your first exercise
- Gradually add weight in 20-25% jumps toward your working weight
- Feel for any unusual tightness or pain before loading up
Minutes 15-20: Activation work
- Band pull-aparts: 15-20 reps (upper body days)
- Glute bridges or banded clamshells: 15 reps (lower body days)
- Dead bugs or bird-dogs: 10 per side (every session)
Volume and Intensity Guidelines
Follow these evidence-based parameters for sustainable progress:
| Parameter | Under 40 Typical | Over 40 Recommended |
|---|---|---|
| Working intensity | 75-90% 1RM | 65-80% 1RM |
| Rep range (hypertrophy) | 6-12 | 8-15 |
| Rep range (strength) | 1-5 | 4-6 |
| Sets per muscle group/week | 15-25 | 10-16 |
| Training frequency | 4-6 days | 3-4 days |
| Deload frequency | Every 6-8 weeks | Every 3-4 weeks |
| Rest between sets | 60-120 seconds | 120-180 seconds |
The Over-40 Movement Selection Hierarchy
Prioritize these movement patterns, ranked by joint-friendliness and carryover to daily function:
Squat patterns:
- Goblet squat (most joint-friendly, self-limiting)
- Front squat with crossed arms (keeps torso upright, reduces spinal compression)
- Safety squat bar squat (neutral grip saves shoulders)
- Barbell back squat (lowest priority unless pain-free)
Hinge patterns:
- Trap bar deadlift from elevated handles (lowest spinal stress)
- Romanian deadlift with dumbbells (controlled eccentric, lighter loads)
- Kettlebell swing (builds explosive hip extension)
- Conventional barbell deadlift (only if mobility and form allow)
Push patterns:
- Dumbbell bench press (natural shoulder rotation)
- Landmine press (shoulder-friendly angle)
- Push-ups with handles (wrist-friendly, scalable)
- Overhead press with dumbbells (only if shoulder clearance is pain-free)
Pull patterns:
- Chest-supported dumbbell row (zero spinal loading)
- Single-arm dumbbell row (allows trunk rotation)
- Band-assisted pull-up (decompresses spine)
- Face pulls and band pull-aparts (rotator cuff maintenance)
Complete 12-Week Training Program
This program uses a 3-day upper/lower split with built-in progression and deload weeks. Rest at least one day between sessions.
Weeks 1-3: Foundation Phase
Day 1: Lower Body
- Goblet Squat: 3x10 @ RPE 6-7
- Trap Bar Deadlift: 3x8 @ RPE 6-7
- Walking Lunges (bodyweight or light dumbbells): 2x10 each leg
- Band-Resisted Leg Curl: 3x15
- Dead Bug: 3x10 per side
- Farmer's Walk: 3x40 yards
Day 2: Upper Push + Accessories
- Dumbbell Bench Press: 3x10 @ RPE 6-7
- Dumbbell Overhead Press (seated): 3x10 @ RPE 6-7
- Incline Dumbbell Fly: 2x12
- Tricep Band Pushdown: 3x15
- Face Pulls: 3x15
- Band Pull-Apart: 2x20
Day 3: Upper Pull + Core
- Chest-Supported Dumbbell Row: 3x10 @ RPE 6-7
- Band-Assisted Pull-Up or Lat Pulldown: 3x8-10
- Single-Arm Dumbbell Row: 2x12 each
- Dumbbell Curl: 2x12
- Plank: 3x30 seconds
- Pallof Press (band): 3x10 per side
Weeks 4 (Deload)
Reduce all working weights by 40-50%. Maintain the same exercises and reps but at RPE 4-5. Focus on mobility work, foam rolling, and movement quality. This is not a week off — it is active recovery that allows tendons and ligaments to adapt to the previous three weeks of loading.
Weeks 5-7: Progressive Phase
Add 5-10% to all working weights from Weeks 1-3. Add one set to compound movements (4 sets instead of 3). Maintain the same rep ranges but target RPE 7-8.
Week 8 (Deload)
Same protocol as Week 4. Reduce loads by 40-50%.
Weeks 9-11: Intensity Phase
Add another 5% to working weights. Reduce reps on compound movements to 6-8 range. Maintain accessory work at higher reps (12-15). Target RPE 7-8, never exceeding RPE 9.
Week 12 (Test and Reset)
Optional: test rep maxes on key lifts (estimate 1RM from a heavy set of 5). Then take 3-4 full rest days before starting the next cycle with updated training maxes.
Recovery Protocols That Actually Work After 40
Recovery is where over-40 lifters either thrive or break down. These are not suggestions — they are requirements:
Sleep: The Master Recovery Tool
- Minimum 7 hours, target 8 — muscle protein synthesis peaks during deep sleep
- Consistent sleep/wake times — even on weekends (within 30 minutes)
- Cool bedroom (65-68 degrees F) — growth hormone release is temperature-dependent
- No screens 60 minutes before bed — blue light suppresses melatonin by up to 50%
Nutrition for the Over-40 Lifter
- Protein: 0.8-1.0g per pound of bodyweight daily — anabolic resistance increases with age, requiring higher protein intake to trigger the same muscle protein synthesis
- Distribute protein across 4 meals — 30-40g per meal maximizes MPS per feeding
- Post-workout protein within 2 hours — the anabolic window matters more with age
- Creatine monohydrate: 5g daily — improves strength output by 5-10% and aids recovery
- Vitamin D: 2000-5000 IU daily — especially critical for garage gym lifters with limited sun exposure
- Omega-3 fatty acids: 2-3g EPA/DHA daily — reduces training-induced inflammation
Read our home gym nutrition basics guide for a complete dietary framework.
Active Recovery Strategies
- Daily foam rolling: 5-10 minutes — focus on thoracic spine, glutes, quads, and calves
- Morning mobility routine: 10 minutes — hip circles, shoulder dislocates, cat-cows, and spinal twists
- Walking: 7,000-10,000 steps daily — promotes blood flow to recovering tissues without adding training stress
- Contrast showers — 30 seconds cold / 2 minutes hot, repeated 3 times after training, enhances circulation
Joint Health and Injury Prevention
Preventing injuries is exponentially more valuable than treating them after 40. A shoulder impingement that heals in 2 weeks at age 25 can sideline you for 3 months at 50.
Daily Joint Maintenance Checklist
Equipment Checklist
6 itemsWarning Signs to Never Ignore
- Sharp, stabbing pain — stop immediately. This indicates tissue damage, not normal training stress.
- Joint pain that worsens during warm-up — healthy training pain improves as you warm up. Pain that increases means inflammation or structural issues.
- Numbness or tingling — nerve involvement requires professional evaluation.
- Swelling that persists 48+ hours — indicates acute inflammation beyond normal training response.
- Grinding or clicking with pain — painless clicking is usually harmless, but clicking accompanied by pain suggests cartilage issues.
Smart Substitutions for Common Pain Points
Shoulder pain during bench press: Switch to floor press (limits range of motion at the vulnerable bottom position) or neutral-grip dumbbell press.
Knee pain during squats: Elevate heels with 1/2-inch plates or squat shoes, reduce depth to parallel (not below), or switch entirely to goblet squats with a slow 3-second descent.
Lower back pain during deadlifts: Use the trap bar with high handles, reduce load by 20%, or switch to Romanian deadlifts with dumbbells where load is self-limiting.
Elbow pain during curls: Switch to hammer curls (neutral grip), use an EZ curl bar, or perform band curls that reduce load at the fully flexed position.
Gym Setup and Safety Considerations
Your training environment matters more after 40 because consequences of equipment failure or environmental issues are more severe.
Flooring Requirements
Install 3/4-inch rubber flooring across the entire training area. This protects joints during standing exercises (the compression absorbs ground reaction force), prevents equipment damage, and provides critical traction. See our garage gym flooring guide for material comparisons and installation tips.
Temperature Management
Cold muscles are brittle muscles. If you train in a garage:
- Install a 240V garage heater (Dr. Heater DR-988, 5600W, heats a 2-car garage to 60+ degrees in 20 minutes)
- In summer, a 20-inch box fan or ceiling fan prevents overheating
- Never train in below-40-degree environments without extended warm-up (add 5 extra minutes)
Our ventilation guide and summer cooling guide cover climate control in detail.
Lighting and Mirrors
Proper lighting prevents accidents and allows form checks. Overhead LED shop lights (5000K daylight, 4500+ lumens per fixture) eliminate shadows that hide bar path deviations. A wall mirror lets you self-coach without a training partner. Consult our lighting guide for fixture recommendations.
Emergency Preparedness
- Always train with your phone within reach
- Set power rack safeties before every barbell set — never skip this step
- Keep a first aid kit in your gym (ice packs, compression bandages, anti-inflammatories)
- Consider telling a family member when you are training heavy
- If training alone, never attempt a true 1RM on any barbell lift
Long-Term Progression: What Realistic Progress Looks Like
Abandon the linear progression mindset. After 40, progress follows a different timeline:
Months 1-3: Rapid neurological gains. Weights increase weekly on most lifts. Enjoy this phase — it does not last.
Months 3-6: Slower but consistent progress. Weight increases shift to biweekly or monthly. Focus on adding reps before adding weight.
Months 6-12: Progress measured in small rep PRs and improved movement quality. A 5-lb increase on your bench press over 8 weeks is excellent.
Year 2+: Progress becomes about maintaining strength while improving body composition, mobility, and work capacity. A 40-year-old who maintains their year-1 strength levels at age 50 is outperforming 95% of the population.
The key metric is not your one-rep max. It is: can you move pain-free, carry groceries without effort, play with kids or grandkids without limitation, and maintain independence as you age? A well-programmed home gym delivers all of this.
Common Mistakes to Avoid
For a deeper dive, read our garage gym mistakes guide, but here are the over-40-specific errors:
- Ego lifting — training at intensities your connective tissue cannot recover from
- Skipping deload weeks — your muscles recover but tendons need programmed rest
- Ignoring warm-up — the number one predictor of injury in over-40 lifters
- Copying younger lifters' programs — volume and intensity must be calibrated for your recovery capacity
- Training through pain — there is no nobility in injury. Modify or substitute.
- Neglecting mobility — strength without mobility creates dysfunction and eventual injury
- All-or-nothing mentality — a 20-minute session beats a skipped session every time
Frequently Asked Questions
Is it too late to start lifting weights after 40?
How much should I spend on a home gym setup after 40?
Should I avoid heavy barbell lifts after 40?
How many days per week should I train after 40?
What supplements actually help for training over 40?
How do I deal with chronic joint pain when lifting?
How long before I see results from training after 40?
Additional Resources
The Bottom Line
Building a home gym after 40 is not about recapturing your twenties. It is about investing in the next 40 years of functional, pain-free living. The equipment you choose should prioritize safety (power rack with safeties, rubber flooring), joint health (adjustable dumbbells, trap bar, bands), and longevity (quality pieces that last decades).
Train three days per week with proper warm-ups, moderate intensity, and programmed deload weeks. Prioritize recovery through sleep, nutrition, and daily mobility work. Progress will come slower than it did at 22, but it will come consistently if you respect your body's changed recovery timelines.
The lifter who trains pain-free three times per week for 20 years will always outperform the one who goes all-out for 6 months and quits with a blown shoulder. Your home gym is a long-term health investment — treat it like one.
Related Content
Lena Park
Former NCAA Division I rower and USA Weightlifting coach. Specializes in conditioning equipment and women's training.
Read full bioMore in Guides
Strength vs Hypertrophy: How to Program for Your Goals (2026)
The definitive guide to programming for strength vs size in your home gym. Rep ranges, volume, intensity, and complete programs for both goals.
The Complete Home Gym Warm-Up Guide (2026)
Stop skipping your warm-up. Complete warm-up protocols for every training style, plus the equipment that makes preparation effortless at home.
Home Gym Deload Guide: When and How to Back Off (2026)
Learn when and how to deload in your home gym. Science-backed protocols, recovery strategies, and signs you need a rest week.