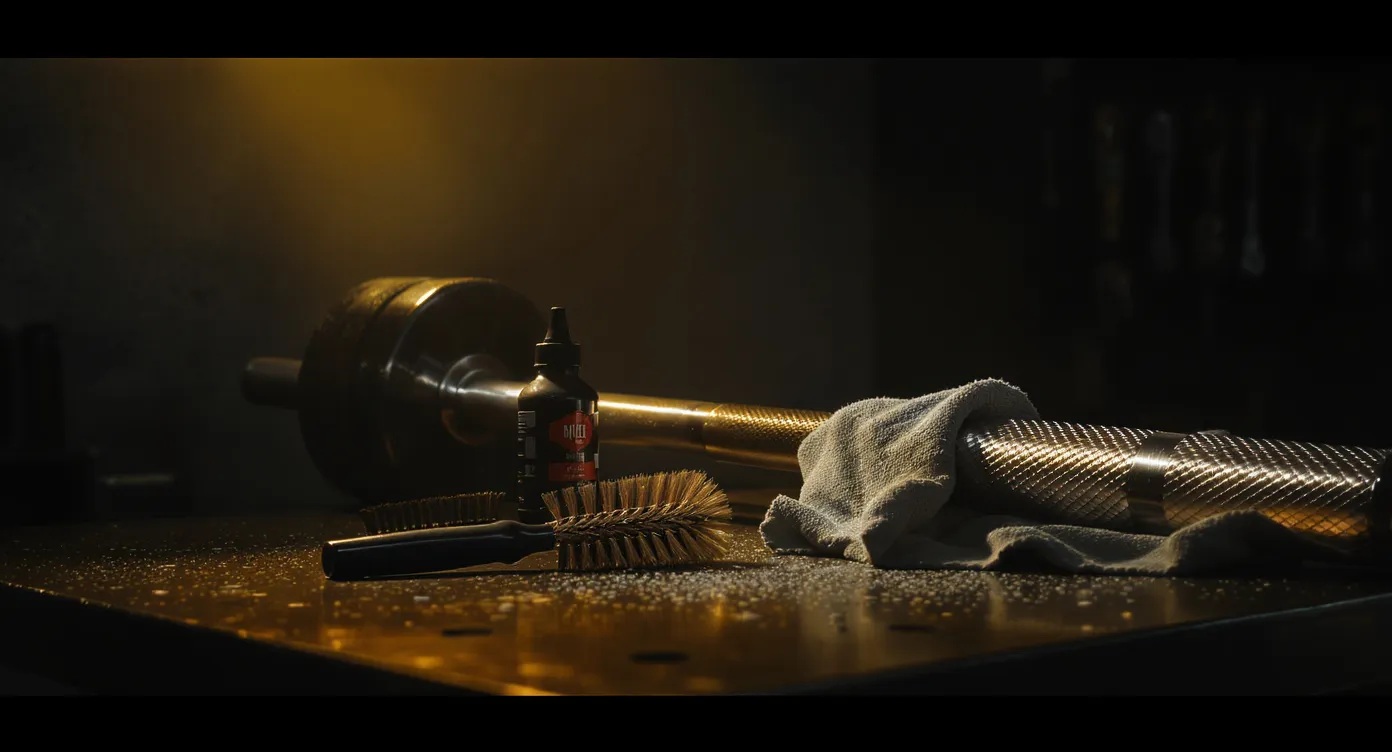
How to Maintain Your Barbell: Cleaning & Care Guide
Keep your barbell in peak condition. How to clean, oil, and prevent rust on your Olympic barbell — plus when to replace it.
A quality Olympic barbell represents one of the single largest investments in any garage gym. A Rogue Ohio Power Bar, a REP Fitness Deep Knurl Power Bar, or even a well-built budget option like the Synergee Games Barbell can last 15 to 25 years under proper care. Neglect that same barbell in an uninsulated garage, and you will be shopping for a replacement inside of 18 months. Rust eats knurling. Seized sleeves kill spin. A bent shaft turns every heavy pull into a gamble.
This guide covers everything: the science behind barbell corrosion, weekly and monthly maintenance protocols, rust remediation for bars that are already suffering, finish-specific care instructions, sleeve and bearing service, proper storage, and a full maintenance schedule you can print and pin to your gym wall. Whether you own a bare steel powerlifting bar or a Cerakote-coated Olympic lifting barbell, the information below will keep it performing at its best.
Why Barbell Maintenance Matters
Steel is an alloy of iron and carbon. Iron reacts with oxygen and water to form iron oxide — rust. Every garage gym accelerates this reaction because temperature swings cause condensation, humidity levels fluctuate with the seasons, and human sweat deposits salt directly into the knurling. A barbell that lives in an air-conditioned commercial gym faces a fraction of the corrosion pressure that yours does.
Beyond aesthetics, rust has real performance and safety consequences. Pitted knurling loses its grip. A rough, oxidized shaft tears calluses and increases the risk of hand injuries. Corroded sleeves bind against the bar, destroying spin and creating dangerous torque on your wrists during cleans and snatches. In extreme cases, deep corrosion weakens the structural integrity of the shaft itself. A barbell that fails under load is a catastrophic event you never want to experience.
The good news: five minutes of weekly maintenance and fifteen minutes once a month eliminate virtually all of these risks. The protocols below are used by competitive powerlifters, Olympic weightlifters, and CrossFit athletes who train in garages, sheds, and basements worldwide.
The Five Enemies of Your Barbell
1. Sweat and Body Oils
Human sweat contains sodium chloride (salt), lactic acid, and urea. This cocktail is actively corrosive to steel. Every rep you perform deposits these compounds deep into the knurling grooves where a simple wipe cannot reach them. Over time, the salt crystals draw ambient moisture from the air and create micro-corrosion cells inside the knurling pattern. This is why the grip area rusts first on almost every neglected barbell.
2. Chalk Buildup
Magnesium carbonate lifting chalk is hygroscopic — it absorbs moisture from the surrounding air. When packed into the knurling, chalk acts like a sponge pressed against bare steel, holding water against the metal surface for hours or days. The irony is that chalk helps your grip in the moment but accelerates corrosion between sessions if left in place.
3. Humidity and Temperature Swings
An uninsulated garage in Houston, Atlanta, or anywhere along the Gulf Coast can see relative humidity above 80% for months at a time. Even in drier climates, a rapid temperature drop overnight causes condensation to form on cold steel surfaces. That thin film of water is all rust needs to get started. If you have ever walked into your garage on a cool morning and found your barbell damp to the touch, your bar is under constant corrosive attack.
4. Plate Contact and Sleeve Wear
Every time you load and unload cast iron or steel plates, the metal-on-metal contact creates micro-scratches in the sleeve finish. These scratches break through protective coatings — chrome, zinc, or black oxide — and expose raw steel to oxygen and moisture. Over months of training, sleeve finishes can wear through entirely in the loading zones, creating visible bare-steel rings that rust quickly.
5. Improper Storage
Leaning a barbell against a wall puts lateral stress on the shaft that can induce a permanent bend over time, especially if plates are left loaded on one end. Storing a bar on the floor exposes it to moisture wicking up from concrete. Tossing a bar in the corner after a session, still wet with sweat, is the fastest way to guarantee rust formation.
Essential Maintenance Supplies
Before diving into the protocols, gather these supplies. You likely already own most of them.
Barbell Maintenance Kit
10 itemsA quick note on oil selection: 3-in-1 oil is the industry standard recommendation from barbell manufacturers including Rogue, REP Fitness, and Eleiko. Camellia oil (also called tsubaki oil) is a premium alternative originally used by Japanese swordsmiths and toolmakers to protect carbon steel. It leaves a thinner, less greasy film that some lifters prefer. WD-40 is a solvent and water displacer — it is outstanding for rust removal but evaporates and leaves steel unprotected, so never use it as your final protective coating.
After-Session Maintenance Protocol (2 Minutes)
This is the single most impactful habit you can build. Performing these steps immediately after every training session prevents the vast majority of corrosion issues.
-
Wipe the entire shaft with a dry microfiber cloth. Run the cloth along the full length of the bar, applying moderate pressure to pull sweat and moisture out of the knurling grooves. Fold the cloth and make two passes minimum.
-
Wipe the sleeves with the same cloth to remove any moisture, chalk dust, or metal shavings from plate contact.
-
Rack the bar properly on a wall-mounted barbell holder, a horizontal rack, or inside your power rack J-cups. Never leave it on the floor, never lean it against the wall.
This two-minute habit after every session does more for your barbell than any amount of monthly deep cleaning. If you do nothing else from this guide, do this.
Weekly Maintenance Protocol (5 Minutes)
Once per week — pick a day and make it routine — perform the following:
-
Brush the knurling with your nylon brush. Work in short strokes along the length of the bar, not across the knurling pattern. Apply moderate downward pressure to dislodge packed chalk and debris from the grooves. You will be surprised how much material comes out of a bar that looks clean to the naked eye.
-
Apply oil to the shaft (bare steel and black oxide bars only). Place 3-4 drops of 3-in-1 oil on a clean cloth and wipe down the entire shaft. This creates a thin protective barrier against moisture. For zinc, chrome, Cerakote, and stainless steel bars, skip this step — those finishes provide their own protection and oil can make them slippery.
-
Oil the sleeves. Apply one drop of 3-in-1 oil to the gap between the sleeve and the shaft on each end. Spin the sleeves several times to work the oil into the bushing or bearing assembly. Wipe off any excess that migrates to the outer surface.
-
Visual inspection. Look over the entire bar for any orange or brown discoloration that indicates early rust formation. Catching rust in the first few days makes it trivially easy to remove. Ignoring it for weeks makes the job much harder.
Monthly Deep Clean Protocol (15 Minutes)
Once a month, set aside fifteen minutes for a thorough cleaning.
-
Remove all plates, collars, and accessories from the bar. Place the bar across your J-cups or rack arms at a comfortable working height.
-
Brush the full shaft with your nylon brush and a light coating of 3-in-1 oil. The oil acts as a solvent to loosen grime while the brush does the mechanical work. Brush along the knurling pattern, covering every inch of the shaft from collar to collar.
-
Wipe clean with a fresh microfiber cloth. Inspect the cloth — if it comes away dark brown or orange, you have surface oxidation forming and should consider increasing your weekly maintenance frequency.
-
Clean the sleeves thoroughly. Wipe down the outer surfaces. Apply oil to the sleeve gaps and spin aggressively — 20 to 30 full rotations per side. This distributes lubricant through the entire bearing or bushing assembly.
-
Check sleeve spin quality. With the bar in J-cups, flick each sleeve with moderate force. A healthy bushing bar should spin freely for 3 to 5 seconds. A needle bearing bar should spin for 8 to 15 seconds. If spin has noticeably degraded, the internal components may need attention (see the quarterly protocol below).
-
Inspect the knurling under good lighting. If packed debris remains after brushing, use your brass brush on those specific areas. Brass is softer than steel and will not damage the knurling pattern.
-
Apply a final light oil coat to the shaft (bare steel and black oxide finishes) and wipe until the bar feels barely oily to the touch. You want protection, not a slick surface.
Quarterly Deep Service (30 Minutes)
Every three months, perform a more invasive service.
-
Remove sleeve end caps if your barbell design permits it. Many bars from Rogue, REP Fitness, Synergee, and other manufacturers use snap rings or threaded end caps that can be carefully removed with snap ring pliers or a flathead screwdriver. Consult your barbell's documentation before attempting this — some bars void their warranty if end caps are removed.
-
Clean inside the sleeves. Use a cloth wrapped around a dowel or pencil to wipe out the interior of each sleeve. You will likely find a mixture of old oil, fine metal particles, and grime. This buildup degrades bushing performance over time.
-
Re-lubricate internal components. Apply fresh 3-in-1 oil to the bushings or needle bearings. For needle bearing bars, a few drops directly onto the bearing cage is sufficient. For bushing bars, apply oil to the bushing surfaces and reassemble.
-
Roll-test the shaft for straightness. Place the bar on a flat, hard surface (a concrete garage floor works perfectly) and slowly roll it back and forth. Watch the ends of the bar — any wobble or oscillation indicates a bend in the shaft. A slight wobble at one end may be a minor cosmetic issue. A visible wave pattern across the full length means the bar has been permanently deformed and should be evaluated for replacement.
-
Inspect the finish across the entire bar. Look for chips, flaking, or worn spots that expose bare steel. Apply a protective coat of oil to any exposed areas.
Barbell Finish Types: Maintenance Requirements Compared
Not all barbells require the same level of care. The finish on your bar is the first line of defense against corrosion, and different finishes offer vastly different levels of protection.
| Finish | Rust Resistance | Maintenance Level | Best For | Typical Lifespan |
|---|---|---|---|---|
| Bare Steel | Low | High (weekly oiling required) | Purists who love raw feel | 10-20 years with diligent care |
| Black Oxide | Low-Medium | Medium-High | Best grip feel, moderate protection | 10-15 years with regular care |
| Black Phosphate | Low-Medium | Medium-High | Similar to oxide, slightly better grip | 10-15 years with regular care |
| Zinc (bright or black) | Medium | Low-Medium | Good all-around protection | 15-20 years |
| Hard Chrome | High | Low | Durability and slickness | 20+ years |
| Cerakote | High | Very Low | Maximum corrosion protection | 15-20 years (coating may wear) |
| Stainless Steel | Very High | Almost None | Humid environments, low maintenance | 25+ years |
Bare Steel and Black Oxide Bars
These finishes offer the best grip feel — the raw knurling is uncoated or minimally coated, giving you direct steel-on-skin contact. Competitive powerlifters and Olympic lifters often prefer these finishes. The tradeoff is that they require the most maintenance. Weekly oiling is non-negotiable in any garage environment. If you live in a humid climate and own a bare steel bar, consider oiling the shaft after every single session.
Zinc and Chrome Bars
Zinc plating (available in bright silver or black varieties) and hard chrome provide a physical barrier between the steel and the environment. These bars need far less maintenance — monthly cleaning and sleeve oiling is typically sufficient. The downside is that the plating slightly fills the knurling, reducing the aggressive bite that bare steel provides.
Cerakote Bars
Cerakote is a ceramic-based polymer coating originally developed for firearms. It provides excellent corrosion resistance and comes in a wide variety of colors. Cerakote bars are popular in garage gyms specifically because they handle humidity well with minimal maintenance. The coating does wear over time in the grip areas, so periodic inspection is still important.
Stainless Steel Bars
Stainless steel alloys (typically 300-series) contain chromium that forms a passive oxide layer, making them inherently rust-resistant. A stainless steel barbell in a garage gym needs almost zero shaft maintenance — occasional wiping is all that is required. The sleeves still need periodic oiling since they typically use standard steel internal components. Stainless bars command a premium price (often $350 to $500+) but the near-zero maintenance requirement makes them the best long-term value for humid-climate garage gyms.
- Bare steel and black oxide provide the best raw knurling grip for heavy pulling and pressing
- Zinc and chrome finishes slash weekly maintenance time by 75% or more
- Cerakote offers outstanding corrosion resistance with minimal upkeep and comes in custom colors
- Stainless steel virtually eliminates shaft maintenance and is the best choice for humid garage gyms
- Higher-end finishes retain resale value significantly better than corroded bare steel bars
- Bare steel and black oxide demand consistent weekly oiling or they will rust in any garage
- Zinc and chrome plating slightly reduces knurling aggressiveness compared to raw steel
- Cerakote can chip or flake under repeated plate loading contact on the sleeves
- Stainless steel bars cost 2-3x more than equivalent bare steel or zinc models
- No finish is maintenance-free — sleeves and bearings still need lubrication regardless of shaft coating
Dealing with Rust: From Light Surface Oxidation to Heavy Corrosion
Light Surface Rust (Orange Discoloration, Smooth to Touch)
Light surface rust is purely cosmetic and easy to handle. Apply a few drops of 3-in-1 oil to the affected area and scrub with your nylon brush. For slightly more stubborn spots, switch to the brass brush. Brass is softer than steel (Mohs hardness of approximately 3.5 versus 6.5 for steel), so it will not scratch or damage the bar surface or knurling. Wipe clean and apply a fresh protective oil coat. This should resolve the issue completely in under five minutes.
Moderate Rust (Visible Brown Spots, Slightly Rough Texture)
Spray or apply WD-40 generously to the rusted areas. Let it penetrate for 10 to 15 minutes — the solvents in WD-40 will break the bond between the iron oxide and the base steel. Scrub aggressively with a brass brush, working the WD-40 into the rust. Wipe clean with shop towels. Repeat the WD-40 soak and scrub cycle if needed. Once the rust is removed, immediately wipe down with a clean cloth and apply 3-in-1 oil. Remember: WD-40 is a solvent, not a protectant. If you stop at the WD-40 step, the bare steel will rust again within days.
Heavy Rust (Deep Pitting, Rough Texture, Flaking)
For bars with significant rust accumulation, you may need a more aggressive approach. Soak the affected areas with WD-40 and wrap them in shop towels saturated with the product. Let this sit for 30 minutes to an hour. Remove the towels and scrub with a brass brush. For deep knurling contamination, use a brass brush attached to a drill at low speed to reach into the grooves. Vinegar soaking (white distilled vinegar for 2 to 4 hours) is another option for severely rusted bars, but you must neutralize the acid afterward with a baking soda solution and immediately oil the bar.
When a Barbell is Beyond Saving
Replace your barbell if any of the following conditions are present:
- Permanent shaft bend — roll it on a flat surface and observe. Any visible wobble means the shaft is compromised. A bent bar creates uneven loading that can cause injury.
- Deep pitting in the knurling — if the knurling grooves are eaten away to the point where the grip pattern is visibly degraded, the bar has lost its primary function.
- Sleeves that no longer spin — seized sleeves create dangerous torque transfer during Olympic lifts and can damage your wrists and elbows.
- Structural flex under moderate loads — if the bar feels soft or whippy with weights well below its rated capacity, internal corrosion may have compromised the steel.
- Visible cracks or stress fractures — extremely rare but possible in low-quality bars subjected to repeated drops. This is an immediate safety concern.
Proper Barbell Storage
How you store your barbell between sessions has as much impact on its longevity as how you clean it.
Vertical storage using a dedicated barbell holder mounted to the wall is the gold standard for garage gyms. It keeps the bar off the floor, prevents bending stress, allows air circulation around the entire shaft, and takes up minimal floor space. Vertical holders from Rogue, Titan Fitness, and generic Amazon options all work well.
Horizontal storage on a wall-mounted rack or inside your power cage J-cups is the next best option. Make sure the bar is supported at two points and that no plates are left loaded.
Never store a barbell leaning diagonally against a wall. The weight of the bar creates a bending moment at the contact point that can induce a permanent set over time. This is especially true for higher-end bars with more flex (whip) built into the shaft design.
Climate control considerations: If your garage is uninsulated and you live in a humid region, a silicone-treated gun sock is an excellent long-term storage solution. These fabric sleeves are impregnated with silicone that creates a vapor barrier around the steel. They cost under $15 and last for years. For serious humidity problems, a small dehumidifier running in your garage space is the most effective single investment you can make for all your steel equipment — barbells, plates, dumbbells, and rack hardware alike. Check our garage gym ventilation guide for more on managing garage climate.
Recommended Barbells by Maintenance Profile
If you are shopping for a barbell and maintenance level is a key decision factor, here are two solid options at different price points.

Synergee Games 15kg and 20kg Colored Ceramic Coated Barbells
Capacity
1,500 lbs rated capacity
Steel
Ceramic Coated Steel / Needle Bearings
Footprint
28.5mm Shaft, 7ft Olympic Bar
Price
$149.95
- 4.7+ star rating on Amazon
- 1,000 lb capacity at mid-range price
- Needle bearings provide smooth spin for Olympic lifts
- 190K PSI tensile strength
- Dual knurling marks for powerlifting and Olympic lifts
- Best Amazon-available upgrade from budget bars
- Black phosphate finish requires regular oiling
- Not made in the USA
- Knurling is slightly less aggressive than premium bars
Price and availability may change
The Synergee Games Barbell features a black phosphate finish and needle bearings, making it a strong choice for lifters who want decent corrosion protection without the premium stainless steel price tag. The phosphate coating requires regular oiling but provides excellent grip. At around $200, it is one of the best value propositions in the mid-range barbell market.

CAP Barbell 300-Pound Olympic Set (Includes 7 Feet Bar)
Capacity
300 lbs total (255 lbs plates + 45 lb bar)
Steel
Cast Iron Plates / Chrome Bar
Footprint
7ft Olympic Bar (28mm shaft)
Price
$499.99
- 4.5+ star rating with 8,000+ reviews
- Complete barbell + plate set in one purchase
- Standard Olympic 2" sleeves fit all racks
- Includes: 2x45, 2x35, 2x25, 2x10, 4x5, 2x2.5 lb plates
- Cast iron plates are durable and accurate
- Best value starter weight set available
- Bar is entry-level (bushing sleeves, mild knurling)
- Plates are not calibrated for competition use
- No bumper plates — not safe to drop on concrete
- Chrome plating on bar chips over time
Price and availability may change
The CAP Barbell 300 lb Olympic Set is the entry point for most garage gym builders. The chrome finish on the bar provides reasonable rust protection with minimal maintenance. While the bar itself is not competition-grade, it is more than adequate for general strength training, and the included 255 lbs of cast iron plates make it an unbeatable value for beginners. For a detailed breakdown, read our CAP Barbell 300 lb set review.
Common Maintenance Mistakes to Avoid
Using WD-40 as a regular lubricant. This is the most common mistake in barbell care. WD-40 is a solvent — it dissolves existing lubrication and then evaporates, leaving the steel worse off than before. Use it for rust removal only, then always follow with a proper oil.
Over-oiling the shaft. A barbell that is dripping with oil is a safety hazard. You want a barely perceptible film that protects the steel without compromising your grip. Apply oil to a cloth first, then wipe the bar — never pour oil directly onto the shaft.
Neglecting the sleeves. Many lifters clean the shaft religiously but forget the sleeves entirely. The bushing or bearing assemblies inside the sleeves need periodic lubrication to maintain spin quality. A seized sleeve on an Olympic lifting bar is not just annoying — it is dangerous.
Using steel wool or abrasive pads. Steel wool and scotch-brite pads are too aggressive for barbell surfaces. They scratch through protective finishes and leave behind fine steel fibers that accelerate rusting. Stick to nylon and brass brushes.
Storing the bar loaded. Leaving 315 lbs on the bar in your rack for weeks at a time puts constant bending stress on the shaft. It also traps moisture between the plates and sleeves, creating a corrosion zone you cannot see until you unload.
Complete Maintenance Schedule Reference
Use this calendar to stay on top of barbell care without overthinking it. Print it and tape it to your gym wall.
After Every Session (2 Minutes)
- Wipe the shaft with a dry microfiber cloth to remove sweat and moisture
- Wipe chalk residue off the sleeves
- Store the bar on a rack or wall mount — never on the floor
Weekly (5 Minutes)
- Brush the knurling with a nylon brush to remove packed chalk
- Oil the shaft (bare steel and black oxide finishes only)
- Apply one drop of 3-in-1 oil to each sleeve gap and spin to distribute
- Visually inspect for any rust spots forming
Monthly (15 Minutes)
- Full deep clean: remove all plates, scrub shaft with nylon brush and light oil
- Oil sleeves thoroughly, spin 20-30 times per side, and wipe excess
- Check sleeve spin quality — if noticeably degraded, note for quarterly service
- Inspect knurling for packed debris and scrub with brass brush if needed
Quarterly (30 Minutes)
- Remove sleeve end caps (if your bar design allows) and clean inside with a cloth
- Re-oil internal bushings or needle bearings
- Roll-test the bar on a flat surface for straightness — watch for wobble
- Check the finish for chips or wear that expose bare steel, oil those spots
Annually
- Complete deep clean and re-oil of all components
- Evaluate whether the bar still meets your training needs and safety standards
- Consider upgrading to a more corrosion-resistant finish if fighting constant rust
- Inspect snap rings, end caps, and all hardware for wear or looseness
Climate-Specific Adjustments
In high-humidity environments (Gulf Coast, Southeast, Pacific Northwest, basements), double your oiling frequency — oil sleeves twice a week and wipe down the shaft with an oiled cloth after every session. Consider a dehumidifier for your garage space if relative humidity regularly exceeds 60%.
In dry climates (Southwest, Mountain West), the standard schedule is more than sufficient. Your biggest concern is chalk buildup rather than moisture.
In cold climates with unheated garages, watch for condensation on cold steel when temperatures swing rapidly — such as when you open the garage door on a warm day after overnight freezing. Wipe condensation off immediately and apply a light oil coat. Steel that is cold to the touch in a warm, humid air mass will accumulate moisture rapidly.
Barbell Maintenance and Your Training Environment
Your barbell does not exist in isolation. The same environmental factors that attack your bar also affect your plates, dumbbells, rack hardware, and bench frames. Building good maintenance habits for your barbell naturally extends to caring for your entire equipment collection. For a comprehensive approach, see our complete gym equipment cleaning guide, which covers everything from rubber flooring to cable machines.
If you are building a new garage gym and maintenance is a concern, factor environmental controls into your budget from day one. Insulated garage doors, a portable dehumidifier, and basic ventilation can dramatically reduce the corrosion load on all your equipment. Our garage gym mistakes guide covers the most common planning errors, including underestimating humidity management.
Frequently Asked Questions
Can I use WD-40 as regular barbell maintenance oil?
How do I know when my barbell needs to be replaced?
Does chalk damage my barbell?
Should I oil a stainless steel barbell?
Is it okay to leave plates on the barbell between sessions?
How often should I oil my barbell sleeves?
What is the best barbell finish for a humid garage gym?
Can I use motor oil or gun oil on my barbell?
Additional Resources
The Bottom Line
Barbell maintenance is not complicated, but it is non-negotiable — especially in a garage gym environment where humidity, temperature swings, and sweat create constant corrosion pressure. The after-session wipe-down is the single most important habit. The weekly brushing and oiling prevent 90% of problems. The monthly deep clean catches anything that slips through. And the quarterly service keeps your sleeves spinning like new.
Five minutes a week is all it takes to protect an investment that should last you decades. Wipe it down, brush the chalk out, oil the sleeves, rack it properly. It is the cheapest insurance policy in your entire gym.
Related Content
- How to Clean & Maintain Home Gym Equipment (2026 Guide)
- 50 Exercises You Can Do With Just a Barbell (Complete List)
- How to Choose a Barbell: Complete Buyer's Guide (2026)
- Common Garage Gym Mistakes to Avoid
- Garage Gym Ventilation Guide
- CAP Barbell 300 lb Olympic Set Review: The Best Starter Weight Set?
- All Maintenance & Care Content
Derek Walsh
Strongman competitor and former commercial gym equipment salesman. Knows what survives heavy daily use.
Read full bioMore in Guides
Strength vs Hypertrophy: How to Program for Your Goals (2026)
The definitive guide to programming for strength vs size in your home gym. Rep ranges, volume, intensity, and complete programs for both goals.
The Complete Home Gym Warm-Up Guide (2026)
Stop skipping your warm-up. Complete warm-up protocols for every training style, plus the equipment that makes preparation effortless at home.
Home Gym Deload Guide: When and How to Back Off (2026)
Learn when and how to deload in your home gym. Science-backed protocols, recovery strategies, and signs you need a rest week.