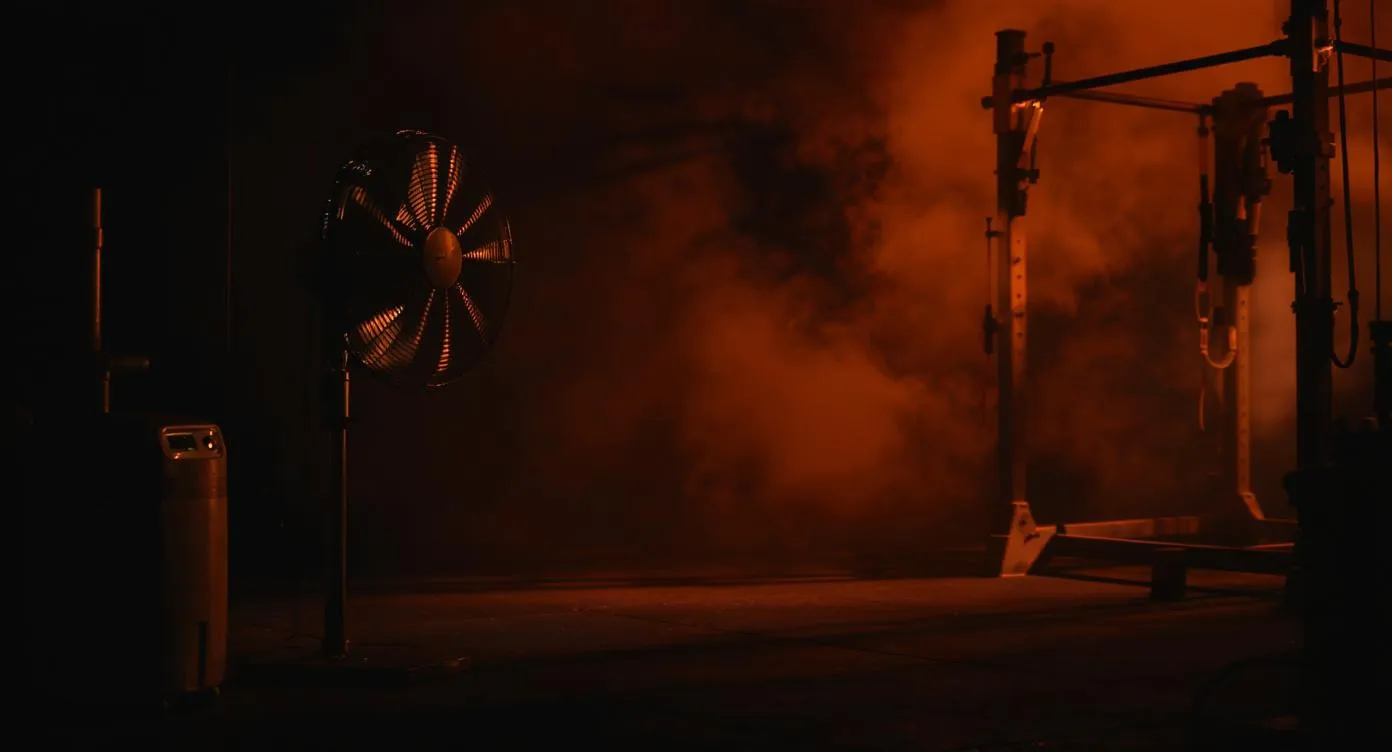
Garage Gym Summer Cooling: Train Through the Heat (2026)
How to keep your garage gym cool in summer. Fans, AC, ventilation, and timing strategies for hot weather training.
An unventilated garage in July is not a gym. It is an oven with a squat rack inside. When the afternoon sun hammers an uninsulated roof, interior temperatures routinely exceed 110 degrees Fahrenheit in Sun Belt states and can reach the mid-90s even in the Midwest. At those temperatures, your central nervous system downregulates force production, grip strength deteriorates, and every set feels like an RPE 9 regardless of the actual load. Worse, you are one skipped water bottle away from genuine heat exhaustion.
The good news: garage gym cooling is a solvable engineering problem. Every dollar and every strategy in this guide follows a single principle — remove heat from the space and remove heat from your body. Do both effectively and you can train year-round in Phoenix, Houston, Miami, or anywhere else the thermometer breaks triple digits.
Why Garage Gyms Overheat: The Physics Behind the Problem
Understanding why your garage cooks helps you target the right fix instead of throwing money at the wrong one.
Radiant Heat From the Roof
A standard asphalt-shingle roof absorbs solar radiation and transfers it to the attic or directly to the garage ceiling. On a 95-degree day, the underside of an uninsulated garage ceiling can reach 140 to 160 degrees Fahrenheit. That radiant heat pours downward onto you and your equipment all day. This is the single largest heat source in most garage gyms.
Concrete Thermal Mass
Concrete garage floors absorb heat throughout the day and release it slowly at night. This is why your garage still feels warm at 9 PM even after the outdoor temperature drops. A four-inch concrete slab stores an enormous amount of thermal energy, and that energy radiates upward into the training space for hours after sunset.
Sealed Air Volume
Garages are designed to store vehicles, not to ventilate human activity. A closed two-car garage holds roughly 4,800 to 5,800 cubic feet of air with no mechanical ventilation and minimal passive airflow. When you add the metabolic heat output of a 200-pound person doing heavy compound lifts — roughly 400 to 600 watts during intense exercise — the temperature inside a sealed garage rises noticeably within 20 minutes.
The Garage Door as Solar Collector
Metal garage doors, especially dark-colored ones, act as massive solar panels. A south- or west-facing steel door in direct sunlight can reach surface temperatures of 130 degrees Fahrenheit or higher, radiating heat into the space even when closed.
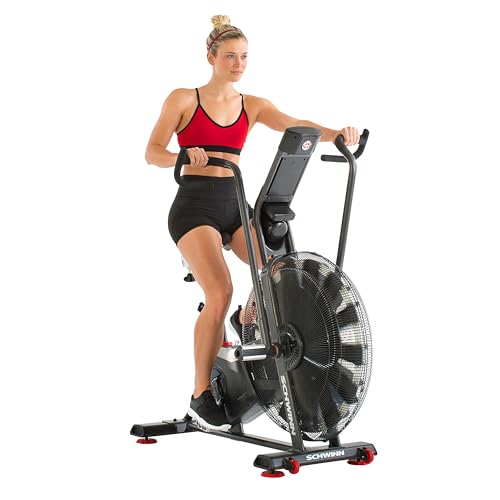
Schwinn Airdyne Bike Series
Capacity
350 lbs user weight
Steel
Steel Frame
Footprint
58.875" L x 29.875" W x 52.75" H
Price
$1,299.00
- Belt-driven fan — quieter and zero chain maintenance
- 127 lbs of steel — the most stable air bike available
- Powder-coated finish resists rust and scratches
- Simple LCD console — no batteries, no Bluetooth, no failures
- Overbuilt for commercial or garage gym abuse
- Lifetime of use with zero maintenance
- No programmable workouts — manual only
- 127 lbs makes it very hard to relocate
- Premium price at $895
- No Bluetooth or app connectivity
Price and availability may change
The Garage Gym Cooling Hierarchy: From Free to Premium
Not every garage gym owner needs a mini-split system. The strategies below are arranged from zero cost to premium investment. Start at the top and work down until your garage is trainable.
Strategy 1: Shift Your Training Schedule ($0)
The simplest and most effective free intervention. Garage temperatures swing 15 to 25 degrees between early morning and mid-afternoon.
- 5:00 to 7:00 AM — The coolest window. Concrete has released overnight heat, ambient air is at its daily low, and the roof has not started absorbing solar energy yet. This is the optimal time for heavy squats, deadlifts, and any session demanding peak CNS output.
- 8:30 to 10:30 PM — The second-best window. Temperatures drop rapidly after sunset, and opening the garage door creates effective natural ventilation. Ideal for hypertrophy work, conditioning, or accessory sessions.
- 11:00 AM to 5:00 PM — The danger zone. Avoid training during these hours unless you have active cooling. In hot climates, this window is when garages reach their peak internal temperature.
Shifting your training schedule alone eliminates roughly half of the heat problem for most lifters. If you currently train at noon, moving to 5:30 AM might be the only change you need.
Strategy 2: Cross-Ventilation With the Garage Door ($0)
Opening the garage door and a rear window or side door simultaneously creates a pressure differential that pulls outdoor air through the space. Even a 5 to 8 mph breeze moving through a garage drops the perceived temperature by 10 to 15 degrees Fahrenheit through convective cooling.
If your garage has only the main door and no secondary opening, consider installing a ventilation screen panel that lets you keep the main door partially open while maintaining some privacy and pest control. A retractable garage door screen costs $80 to $200 and pays for itself by enabling airflow without fully exposing your gym to the street.
Strategy 3: High-Velocity Floor Fans ($25 to $75)
A 20-inch box fan is the baseline recommendation. At $25 to $35, it moves enough air to create meaningful evaporative cooling on your skin during a training session. Position the fan 4 to 6 feet away and point it directly at your primary training area.
For a measurable upgrade, a high-velocity industrial floor fan from brands like Lasko (Model 3300), Maxx Air (DERA24N), or Soleaire (SA-24D) moves two to three times more CFM (cubic feet per minute) than a standard box fan. These units run $50 to $75 and create a wind-tunnel effect that makes 95-degree training feel closer to 80 degrees when the air is moving across your skin.
Positioning tip: Place two fans at opposite corners of the garage pointed toward the center training area. This cross-flow pattern prevents dead air pockets and keeps airflow moving across you regardless of which direction you face during a lift.
Strategy 4: Ceiling-Mounted or Wall-Mounted Fans ($100 to $300)
Permanent fan installations free up floor space and provide consistent overhead airflow. A high-volume ceiling fan rated for damp locations (important in a garage environment) moves air across the entire room without occupying any footprint.
Wall-mounted oscillating fans are another excellent option. Mount them at 7 to 8 feet, angled downward toward the training area. They keep the air circulating without interfering with barbell paths or cable movements. Brands like Air King and TPI produce industrial wall-mount models specifically designed for garage and shop environments, rated for 3,000 to 6,000 CFM.
Strategy 5: Portable Air Conditioning ($300 to $600)
When fans alone are not enough — typically when outdoor temperatures exceed 100 degrees Fahrenheit for extended periods — a portable AC unit becomes a serious quality-of-life upgrade. Look for units rated between 10,000 and 14,000 BTU for a standard two-car garage.
What to look for:
- BTU rating: 12,000 BTU covers approximately 400 to 500 square feet, which matches most two-car garages
- Exhaust hose: Every portable unit requires venting hot exhaust air outside through a window, door, or dedicated vent panel
- Dehumidification: Units that pull moisture from the air provide double benefit in humid climates like the Gulf Coast or Southeast
- Electrical requirements: Most units run on standard 120V/15A circuits, but confirm your garage electrical setup can handle the draw without tripping breakers
Recommended brands: Whynter ARC-14S (dual-hose design for better efficiency), Black+Decker BPACT14WT, LG LP1419IVSM, and Frigidaire FHPC132AB1. Dual-hose models are more efficient because they do not create negative pressure inside the garage.
- Drops garage temperature 10-15 degrees Fahrenheit in under 30 minutes
- Most units run on standard 120V household outlets with no special wiring
- Portable design means you can move it to different locations or store it off-season
- Built-in dehumidification reduces humidity and sweat-drenched feeling in Gulf Coast climates
- No permanent installation required — ideal for renters or temporary setups
- Requires an exhaust hose vented to a window or wall opening
- Single-hose models create negative pressure that pulls more hot air into the garage
- Condensate drain or bucket needs regular emptying in humid climates
- Generates 50-60 decibels of noise which can be noticeable during rest periods
- Ongoing electricity cost of $30-60 per month during heavy summer use
Strategy 6: Window Air Conditioning ($200 to $500)
If your garage has a window — or you are willing to cut a wall opening — a window AC unit delivers significantly better cooling efficiency than a portable unit at the same BTU rating. Window units exhaust heat directly outside without the efficiency loss of a flexible hose. A 12,000 BTU window unit from Frigidaire, GE, or LG cools a two-car garage effectively and costs $250 to $450.
The installation is straightforward for existing windows. For garages without windows, some owners frame a dedicated AC opening in a side wall, which costs $100 to $300 in materials and a weekend of labor.
Strategy 7: Ductless Mini-Split AC System ($1,200 to $3,000 Installed)
The gold standard for garage gym climate control. A ductless mini-split system from Mitsubishi (MSZ-GL series), Fujitsu (Halcyon line), MrCool (DIY series), or Pioneer provides year-round heating and cooling with dramatically better energy efficiency than portable or window units.
Why mini-splits dominate for garage gyms:
- SEER ratings of 18 to 25 make them two to three times more energy efficient than portable AC
- Whisper-quiet operation at 19 to 32 decibels — you will not hear it during training
- Heats in winter too — a single unit solves both your summer cooling and winter heating problems
- No floor space consumed — the indoor head unit mounts high on the wall
- Precise thermostat control lets you pre-cool the garage before your session via a timer or smart controller
The MrCool DIY series is specifically marketed for self-installation with pre-charged line sets, bringing the total cost to $1,200 to $1,800 for a handy owner. Professional installation of other brands typically runs $2,000 to $3,000 including the unit.
Strategy 8: Garage Insulation ($500 to $2,500)
Insulation addresses the root cause rather than the symptom. Every cooling strategy above works dramatically better in an insulated garage because you are no longer fighting continuous radiant heat pouring through the ceiling and walls.
Priority order for maximum impact:
- Ceiling or attic insulation (R-30 to R-38) — The biggest single improvement. Blown-in cellulose or fiberglass batts in the ceiling joists cut radiant roof heat by 60 to 80 percent. Cost: $300 to $1,000 for a two-car garage.
- Garage door insulation kit (R-6 to R-8) — Foam board panels that press-fit into each garage door panel. Kits from Reach Barrier, Owens Corning, or Matador cost $80 to $150 and install in under two hours. This single upgrade can drop peak garage temperature by 10 to 15 degrees.
- Wall insulation (R-13 to R-15) — Fiberglass batts in the wall cavities, covered with drywall or OSB. Cost: $300 to $1,200 depending on whether you DIY or hire out.
An insulated garage with a mini-split system maintains 72 to 76 degrees Fahrenheit year-round regardless of outdoor conditions. That is commercial gym climate control at a fraction of the monthly cost.
Managing Body Temperature During Hot Training Sessions
Even with mechanical cooling, your body generates significant internal heat during intense exercise. Managing core temperature directly is just as important as cooling the air around you.
Aggressive Pre-Hydration Protocol
Dehydration compounds heat stress exponentially. A two-percent drop in body weight from fluid loss reduces aerobic performance by up to 10 percent and impairs strength output measurably.
- Two hours before training: Drink 16 to 20 oz of water with a pinch of sodium (or an electrolyte tablet like LMNT or Liquid IV)
- During training: 6 to 8 oz every 15 minutes, alternating between plain water and an electrolyte drink for sessions longer than 45 minutes
- Post-training: Replace 150 percent of fluid lost — weigh yourself before and after to calculate
Pre-Cooling Strategies
Lowering your core temperature before you start training gives you a larger thermal buffer before reaching the danger zone.
- Cold shower (2 to 3 minutes) before walking to the garage drops skin temperature and delays the onset of excessive sweating
- Ice slurry drink — blend ice with water or a sports drink and consume 500 mL 30 minutes before training. Research shows this extends time to exhaustion by 10 to 19 percent in hot conditions
- Cooling vest worn during warm-up sets provides continuous core cooling through the first 15 to 20 minutes of training
Mid-Session Cooling Techniques
- Cooling towel on the neck — A microfiber cooling towel (brands like Frogg Toggs or Mission) soaked in cold water and draped over the carotid arteries on your neck provides rapid perceived cooling. Re-wet between sets.
- Cold water forearm immersion — Submerge your forearms in a bucket of ice water for 30 seconds between heavy sets. The high density of blood vessels near the surface of the forearms makes this surprisingly effective at reducing core temperature.
- Wrist cooling — Run cold water over your wrists for 20 to 30 seconds between sets. The same principle as forearm immersion but requires only a sink or water bottle.
Training Modifications for Extreme Heat
When the garage is above 90 degrees Fahrenheit despite your cooling efforts, modify your training rather than pushing through unchanged.
- Reduce total volume by 15 to 25 percent — Cut one to two sets per exercise rather than grinding through full volume with degraded performance
- Extend rest periods to 3 to 5 minutes between compound movements — Your body needs more time to dissipate heat between heavy sets
- Prioritize compound lifts early when your core temperature is lowest, and save isolation work and conditioning for the end
- Avoid max-effort singles and doubles — Save PR attempts for cooler days. The risk of a failed rep increases when your CNS is heat-compromised
- Superset strategically — Alternate upper and lower body movements to distribute metabolic heat production rather than concentrating it in one muscle group
Essential Cooling Gear Checklist
Equipment Checklist
10 itemsHeat Safety: Know the Warning Signs
Heat-related illness progresses through three stages, and recognizing the early signs can prevent a medical emergency.
Stage 1: Heat Cramps
Muscle cramps in the legs, arms, or abdomen during or after exercise. This signals electrolyte depletion and early dehydration. Stop training, hydrate with electrolytes, and move to a cooler area. You can resume after cramps resolve and you have rehydrated.
Stage 2: Heat Exhaustion
Symptoms include heavy sweating, cold or clammy skin, nausea, dizziness, headache, rapid weak pulse, and fatigue that feels disproportionate to the work being done. Core temperature reaches 100 to 104 degrees Fahrenheit. Stop training immediately. Move to the coolest area available, remove excess clothing, apply cold towels to the neck and forehead, and drink cold fluids. If symptoms do not improve within 20 minutes, seek medical attention.
Stage 3: Heat Stroke (Medical Emergency)
Core temperature exceeds 104 degrees Fahrenheit. Symptoms include confusion, slurred speech, loss of consciousness, hot and dry skin (sweating stops), seizures, and rapid strong pulse. This is a life-threatening emergency. Call 911 immediately. Move the person to the coolest area possible, immerse in cold water or apply ice packs to the neck, armpits, and groin. Do not wait to see if symptoms improve.
A critical distinction: Heat exhaustion involves profuse sweating. Heat stroke involves the cessation of sweating. If you or a training partner stops sweating in extreme heat, that is a red flag demanding immediate action.
Protecting Your Equipment From Heat and Humidity
Summer heat does not just affect your body. It degrades equipment over time.
- Rubber flooring off-gassing — Heat accelerates the release of volatile organic compounds from rubber gym flooring. Ventilate aggressively during the first summer after installation.
- Barbell oxidation — Humidity combined with sweat accelerates rust formation on bare steel barbells. Wipe bars down with a 3-in-1 oil or barbell maintenance protocol after every session during summer months.
- Leather and synthetic grips — Bench pad vinyl, lifting belt leather, and bar knurling all degrade faster in sustained heat. Store leather goods inside the house when not in use.
- Electronic displays — Cardio machines, smart home gym systems, and digital timers have maximum operating temperature ratings. Most consumer electronics are rated to 95 to 104 degrees Fahrenheit. Sustained heat above these thresholds can damage LCD screens and circuit boards.
- Lubrication breakdown — Cable machine pulleys, spin bike chains, and rowing machine slide rails use lubricants that thin and evaporate faster in heat. Increase your lubrication schedule to every two weeks during summer.
Sample Hot Weather Training Schedule
Option A: Early Bird (Recommended for Hot Climates)
5:15 AM — Wake up, consume 16 oz water with electrolytes, cold shower for 2 minutes
5:45 AM — Open garage door and start fans 15 minutes before training
6:00 to 7:15 AM — Full training session. Prioritize heavy compound lifts in the first 30 minutes when core temperature is lowest. Transition to accessory work and finish with conditioning.
7:15 AM — Immediate post-workout hydration (20 to 24 oz water plus electrolytes). Close garage door.
Option B: Evening Session (Moderate Climates)
8:00 PM — Open garage door and side window or rear door for cross-ventilation. Start fans.
8:30 to 9:45 PM — Training session. Garage has been cooling for 2 to 3 hours since sunset. Moderate intensity hypertrophy or conditioning work.
9:45 PM — Cool down, hydrate, close up the garage.
Option C: Split Sessions (Extreme Heat With AC)
If you have a portable or mini-split AC unit, you can train any time. Pre-cool the garage 30 minutes before your session by setting the thermostat to 72 to 74 degrees. The insulation quality of your garage determines how quickly and effectively the AC reaches target temperature.
Common Questions
How hot is too hot to train in a garage gym without air conditioning?
What size portable AC unit do I need for a two-car garage gym?
Is a mini-split AC system worth the cost for a garage gym?
Should I insulate my garage before or after adding air conditioning?
Can summer heat damage my gym equipment?
How do I cool my garage gym on a $50 budget?
Does training in the heat build mental toughness or just hurt performance?
How long does it take a portable AC to cool a garage gym?
Additional Resources
- CPSC Home Gym Equipment Safety Guide
- NFPA Electrical Code for Home Installations
- EPA Ventilation and Air Quality Guidelines
Related Guides
- Winter Garage Gym Training — The cold-weather counterpart to this guide
- Garage Gym Ventilation Guide — Deep dive on airflow design and HVAC systems
- Garage Gym Electrical Setup — Make sure your circuits can handle AC units
- How to Build a Garage Gym — Complete build guide including climate planning
- Barbell Maintenance Guide — Protect your bars from summer humidity and sweat
The Bottom Line
Summer garage gym training is a logistics problem, not a willpower problem. The lifters who train consistently through July and August are not tougher than you — they are better prepared. Train early or late to dodge peak heat. Use fans aggressively for evaporative cooling. Hydrate before, during, and after every session. Insulate the ceiling first because that is where 60 percent of the heat enters. Add air conditioning if your climate demands it, and choose a ductless mini-split if you want the most efficient long-term solution.
Do not train through heat stroke warning signs to prove a point. A single heat-related medical event can sideline you for weeks. The barbell will be there tomorrow morning at 5:30 AM when the garage is 20 degrees cooler.
Marcus Reid
Powerlifter and mechanical engineer who has been building and breaking home gym equipment for 15 years.
Read full bioMore in Guides
Strength vs Hypertrophy: How to Program for Your Goals (2026)
The definitive guide to programming for strength vs size in your home gym. Rep ranges, volume, intensity, and complete programs for both goals.
The Complete Home Gym Warm-Up Guide (2026)
Stop skipping your warm-up. Complete warm-up protocols for every training style, plus the equipment that makes preparation effortless at home.
Home Gym Deload Guide: When and How to Back Off (2026)
Learn when and how to deload in your home gym. Science-backed protocols, recovery strategies, and signs you need a rest week.