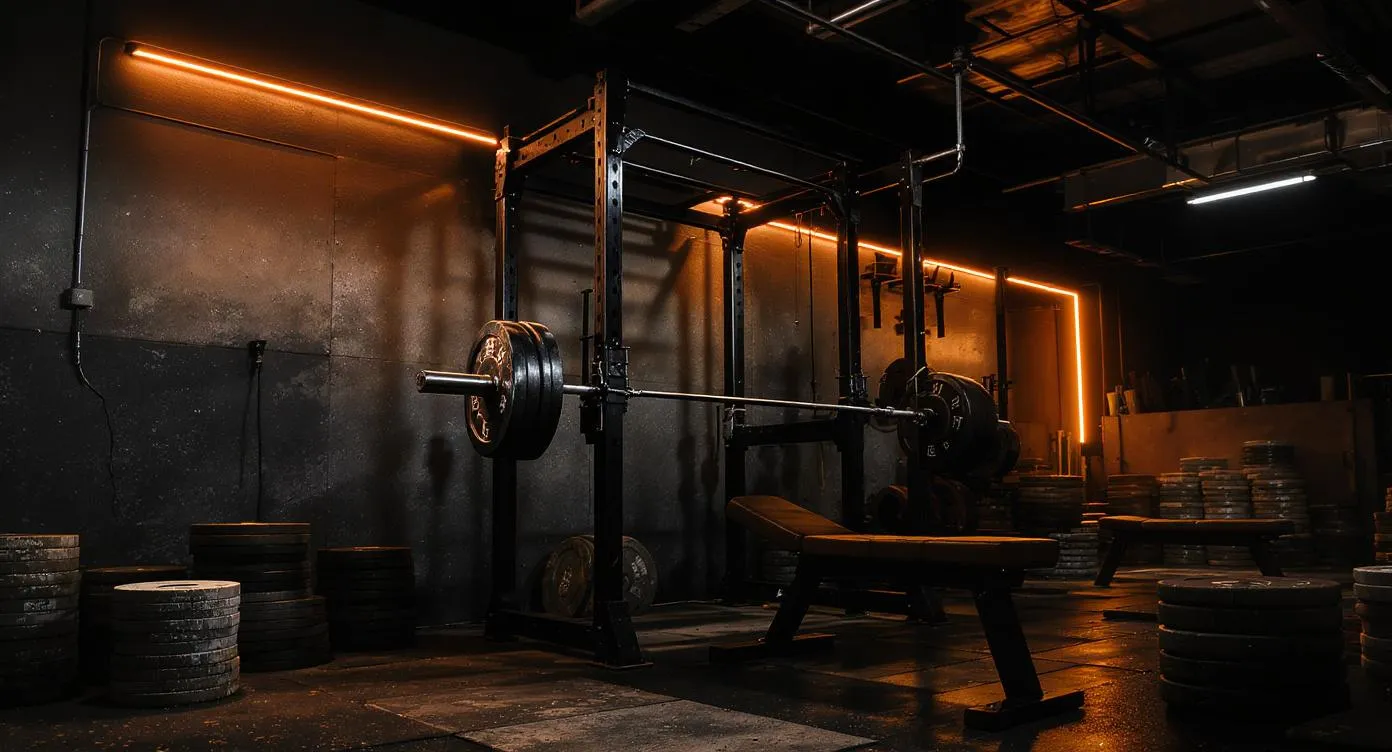
Powerlifting Home Gym Setup: Equipment & Building Guide (2026)
How to build the perfect powerlifting home gym. Equipment priorities, budget tiers, and the setup that will take you to 1,000+ lbs total.
You need a power rack with solid safeties, a stiff 29mm barbell, 500+ lbs of iron plates, a flat bench, and 3/4-inch rubber flooring. Budget $1,200-$2,000 for a competition-ready home setup.
Powerlifting is the most equipment-focused barbell sport, but it is also the simplest to build a home gym around. You need a power rack, a stiff barbell, hundreds of pounds of plates, a flat bench, and proper flooring. That is it. No cables, no machines, no cardio equipment. The simplicity is what makes a powerlifting home gym one of the best investments a strength athlete can make — and why so many competitive lifters train out of garages, basements, and spare bedrooms rather than commercial gyms.
This guide covers every detail: what to buy first, how to evaluate equipment for powerlifting-specific demands, budget tiers from $1,200 to $4,000+, programming templates you can run with minimal equipment, safety considerations for solo training, maintenance protocols, and the mistakes that cost lifters money and progress. Whether you are pulling 225 or chasing an 1,800 lb total, the principles here apply.
Why a Home Gym Is Superior for Powerlifting
Before getting into equipment, it is worth understanding why home gyms and powerlifting are such a natural fit. Unlike bodybuilding (which benefits from cable stations and machines) or CrossFit (which rotates through dozens of modalities), powerlifting revolves around three lifts performed on the same equipment every session. That means you need fewer pieces of equipment — but those pieces need to be solid.
Consistency of setup. In a commercial gym, rack heights change, barbells vary, and benches differ between locations. At home, your J-hook height is always exactly where you left it. Your barbell has the same knurl pattern every session. This consistency compounds over months and years into measurably better technique.
No restrictions on chalk, noise, or time. Most commercial gyms ban chalk, frown on heavy deadlifts, and operate on schedules that may not match your training windows. Your garage has no closing time, no noise complaints from the front desk, and no one asking you to use the trap bar instead of a straight bar for deadlifts.
Zero wait time. A powerlifting session on squat day might require the rack for 45-90 minutes straight. Good luck holding a power rack at a busy gym for that long during peak hours. At home, every session starts exactly when you arrive.
For a broader look at the home gym versus commercial gym debate, read our home gym vs. commercial gym comparison.
Powerlifting Equipment Priority List
Equipment order matters. Buy these in sequence — each item builds on the last and the first four are non-negotiable for safe, productive powerlifting training.
- Power rack with safety bars — the foundation for solo squatting and benching
- Powerlifting barbell (29mm, stiff shaft) — what you grip every rep of every session
- Iron plates (500+ lbs minimum) — you cannot progress without enough weight
- Flat or adjustable bench — for bench press, the second competition lift
- Gym flooring (3/4" rubber minimum) — protects concrete, absorbs deadlift impact
- Deadlift jack or mini jack — quality-of-life upgrade for loading/unloading heavy pulls
- Personal equipment — belt, wrist wraps, knee sleeves, chalk
Everything else — dumbbells, resistance bands, specialty bars, cardio equipment — is optional and should come only after the core seven items are dialed in.
The Powerlifting Rack: Your Most Important Purchase

ULTRA FUEGO Power Cage, Multi-Functional Power Rack
Capacity
800 lbs
Steel
2x2" 14-Gauge Steel
Footprint
50.5" L x 46.5" W x 83.5" H
Price
$389.98
- 4.5+ star rating on Amazon with 5,000+ reviews
- Excellent value under $350
- 800 lb weight capacity
- Includes multi-grip pull-up bar
- Standard 2x2 hole spacing for attachments
- Optional lat pulldown attachment available
- 14-gauge steel is thinner than premium racks
- Plastic J-cup liners can wear over time
- Not ideal for lifters squatting 600+ lbs
Price and availability may change
The power rack is where you squat, bench, and perform the majority of your accessory work. For powerlifting specifically, you need three things a rack designed for general fitness may lack: adequate weight capacity, properly spaced safety bars, and enough depth for a wide squat stance.
Weight capacity. A competitive intermediate powerlifter squatting 405 lbs generates forces well above the static bar weight during the eccentric phase and especially during a failed rep caught by the safeties. Aim for a rack rated at 800 lbs minimum. The ULTRA FUEGO Power Cage meets this threshold at $389.99, making it the go-to budget option for lifters working up to a 500 lb squat. Read our full ULTRA FUEGO Power Cage review for specifications and load testing results.
Safety bar design. Pin-and-pipe safeties or full-length steel safety bars are both acceptable. Avoid strap safeties for powerlifting — they allow too much bar deflection on a failed heavy squat and can dump you forward. Westside hole spacing (1-inch spacing in the bench zone) is a nice feature but not essential for home training.
Rack depth. Standard powerlifting squat stance is wider than hip width. Make sure the rack interior is at least 24 inches deep so you can walk out a squat without your hips contacting the uprights.
Upgrade to Mikolo F4 if you are squatting above 500 lbs or want additional attachment options:

Mikolo F4 2.0 Power Cage with Dual-Track Smooth Pulley System
Capacity
1,200 lbs
Steel
2x2" 12-Gauge Steel
Footprint
49" L x 49" W x 86" H
Price
$399.99
- 4.6+ star rating on Amazon with 3,000+ reviews
- 1,200 lb weight capacity — rare at this price
- Includes LAT pulldown and low row cable system
- 27 height adjustments with 2" hole spacing
- Dual-track pulley system
- Comes with multiple attachments included
- Assembly takes 3-4 hours
- Heavier than budget racks — needs two people to move
- Plate storage pegs sold separately
Price and availability may change
The Mikolo F4 doubles the weight capacity to 1,200 lbs and includes a LAT pulldown attachment that serves as a useful accessory tool for upper back work. The 14-gauge steel uprights handle aggressive re-racking without flexing. Read our Mikolo F4 review for the complete breakdown, or see our three-way rack comparison to see how it stacks up against the ULTRA FUEGO and the Sportsroyals.
- Racks pay for themselves in under a year compared to gym membership costs
- Safety bars let you train heavy squats and bench press alone without a spotter
- Fixed setup means J-hook heights and safety positions never need re-adjusting
- No wait times — the rack is always open when you are ready to train
- Budget racks under $200 often lack adequate weight capacity for advanced lifters
- Ceiling height can be a problem in garages under 8 feet
- Heavy-duty racks weigh 150-300 lbs and are difficult to move once assembled
- Bolt-together racks require periodic tightening of hardware every 3-6 months
The Powerlifting Barbell: Choosing the Right Shaft
The barbell is the single piece of equipment you touch on every rep of every working set for the rest of your lifting career. A bad barbell degrades every session. A good barbell disappears into the background and lets you focus on the lift.
What Makes a Bar a "Power Bar"
Powerlifting barbells differ from Olympic weightlifting bars and general-purpose bars in several important ways:
- 29mm shaft diameter — thicker than the standard 28.5mm, which reduces whip and provides a stiffer feel under heavy loads. Less whip means less energy lost during the squat walkout and bench press unrack.
- Aggressive knurling — deep, sharp knurl patterns that bite into your hands. Essential for heavy deadlift singles where grip is the limiting factor.
- Center knurling — a knurled section in the middle of the shaft that prevents the bar from sliding down your back during heavy squats. Most Olympic bars omit center knurling.
- Bronze bushings (not needle bearings) — powerlifting bars do not need fast sleeve rotation. Bushings provide a slow, controlled spin and are more durable long-term.
- 190,000+ PSI tensile strength — stiff bars resist bending permanently. A bar rated below 180,000 PSI will eventually take a set (permanent bend) under heavy deadlifts.

Synergee Games 15kg and 20kg Colored Ceramic Coated Barbells
Capacity
1,500 lbs rated capacity
Steel
Ceramic Coated Steel / Needle Bearings
Footprint
28.5mm Shaft, 7ft Olympic Bar
Price
$149.95
- 4.7+ star rating on Amazon
- 1,000 lb capacity at mid-range price
- Needle bearings provide smooth spin for Olympic lifts
- 190K PSI tensile strength
- Dual knurling marks for powerlifting and Olympic lifts
- Best Amazon-available upgrade from budget bars
- Black phosphate finish requires regular oiling
- Not made in the USA
- Knurling is slightly less aggressive than premium bars
Price and availability may change
The Synergee Games Barbell offers aggressive knurling, a stiff shaft, and 1,500 lb static rating at a mid-range price point. It handles heavy squats, bench, and deadlifts without the premium price of a Rogue Ohio Power Bar or Texas Power Bar. Read our Synergee barbell review and our CAP vs. Synergee barbell comparison for side-by-side analysis.
Budget alternative: The CAP barbell included in the 300 lb set works for beginners and intermediates pulling under 405 lbs. The knurling is moderate, the whip is minimal, and the 28mm shaft is slightly thinner than a true power bar — but for the first 1-2 years of training, the difference is academic. Read our CAP Barbell 300 lb set review.
For a deeper dive into barbell selection across all disciplines, see our complete how to choose a barbell guide.
Plates: You Need 500 Lbs Minimum
Powerlifting demands more total plate weight than any other home gym discipline. A 405 lb deadlift requires 360 lbs of plates on the bar. A 500 lb squat requires 455 lbs of plates. You need enough weight to handle your current maxes plus 50-100 lbs of headroom for progression, warm-up plates, and occasional rack pulls or partial-range work.
How Much Weight to Buy at Each Level
| Strength Level | Squat | Deadlift | Total Plates Needed |
|---|---|---|---|
| Beginner (0-12 months) | Under 275 lbs | Under 315 lbs | 300 lbs |
| Intermediate (1-3 years) | 275-405 lbs | 315-500 lbs | 500 lbs |
| Advanced (3-7 years) | 405-550 lbs | 500-650 lbs | 700 lbs |
| Elite (7+ years) | 550+ lbs | 650+ lbs | 900+ lbs |
Building Your Plate Collection Cost-Effectively
The most economical path is to start with a 300 lb barbell set (like the CAP 300 lb Olympic set, which includes a barbell and 255 lbs of plates) and then add individual 45 lb plate pairs as your strength increases.

Yes4All 2" Bumper Plate, Olympic Rubber Weight Plate with Steel Hub
Capacity
10-190 lbs options
Steel
Olympic Rubber / Steel Hub
Footprint
17" diameter
Price
$86.00
- 4.6+ star rating on Amazon with 10,000+ reviews
- Cast iron durability
- Standard Olympic 2" hole fits all bars
- Available in individual pairs to build up your set
- Great for expanding an existing set
- Best value for adding weight
- Not competition-calibrated (weight tolerance ±2%)
- Painted finish can chip
- Not safe to drop on concrete (no rubber coating)
- Thicker than premium plates
Price and availability may change
Yes4All 45 lb Olympic plates run approximately $90 per pair and are a reliable way to expand your collection. The cast iron construction holds up well, the hub design allows easy plate tree storage, and the Olympic-sized center hole fits standard 2-inch sleeves without excessive slop. Read our Yes4All Olympic Plates review.
Do you need bumper plates for powerlifting? Generally, no. Powerlifting does not involve dropping the bar from overhead. You control the descent on squat, bench, and deadlift. Cast iron plates are cheaper per pound, more compact (thinner profile means more plates fit on the sleeve), and perfectly adequate for the three competition lifts. The only exception is if you plan to do occasional Olympic lifting variations for athletic development — in that case, a basic pair of 45 lb bumper plates provides a safety margin for bailed overhead lifts.
For a full breakdown of plate types, coatings, and what to look for, check out our how to choose weight plates guide.
The Bench: Powerlifting-Specific Requirements
The bench press is the second competition lift and the most equipment-sensitive. A wobbly bench, a narrow pad, or a gap between the seat and back pad can cost you pounds on your max. Powerlifting bench requirements differ from general fitness bench requirements in several critical ways.
Pad width. IPF competition benches are 12 inches (30 cm) wide. Your home bench should match or exceed this width to allow proper shoulder retraction and arch without your shoulders rolling off the edge.
Pad height. Competition bench height is 16.5-17.5 inches (42-45 cm). Too low and your leg drive is compromised. Too high and shorter lifters cannot plant their feet.
Zero-gap design. The junction between the seat pad and the back pad should be flush with no gap or step. A gap catches your lower back during heavy bench press and disrupts your arch.
Weight capacity. For bench press, the combined weight of the lifter plus the bar must fall within the bench's rated capacity. A 220 lb lifter benching 315 lbs is putting 535 lbs on the bench. Aim for 800 lb capacity minimum.

FLYBIRD WB2 Weight Bench, Utility Adjustable Weight Bench
Capacity
800 lbs (ASTM Certified)
Steel
Commercial-Grade Steel Frame
Footprint
48.4" L x 16.5" W x 17" H (folded)
Price
$109.99
- 4.6+ star rating on Amazon with 25,000+ reviews
- Unbeatable value under $120
- ASTM-certified 800 lb weight capacity
- 8 backrest angles (90° to -30° FID)
- Folds flat for easy storage in small spaces
- Quick 10-minute assembly
- Gap between seat and backrest at steep inclines
- No decline position on some variants
- Pad is narrower (10.2") than premium benches (12")
- Feet can slide on smooth concrete without rubber mats
Price and availability may change
The FLYBIRD adjustable bench handles up to 800 lbs, offers a relatively flat surface when set to 0 degrees, and costs around $110. It is adequate for lifters benching under 315 lbs. Read our FLYBIRD bench review. For a more comprehensive look at what separates good benches from great ones, see our how to choose a weight bench guide.
Flooring: Protecting Your Foundation
Dropping a loaded barbell on bare concrete — even from deadlift height (roughly 8 inches with standard plates) — will crack the concrete, damage your plates, and transmit noise through the entire structure. Proper flooring is not optional for powerlifting.
Minimum standard: 3/4-inch thick rubber horse stall mats from a farm supply store (Tractor Supply Company is the standard source). These run approximately $50 per 4x6 ft mat and provide adequate shock absorption for conventional and sumo deadlifts up to 600+ lbs.
Upgraded option: Build a dedicated lifting platform. A standard powerlifting platform is 8x8 feet, built from two layers of 3/4-inch plywood topped with stall mats on the sides and a bare wood center section for deadlifting. The wood surface gives better foot grip than rubber and the double plywood layer distributes impact forces across a wider area.
Read our detailed how to build a lifting platform guide for step-by-step construction instructions, and our garage gym flooring guide for a complete comparison of flooring materials.
Temperature considerations. Rubber stall mats become stiffer in cold weather and more pliable in heat. If you train in an unheated garage through winter, expect the mats to feel harder underfoot and provide slightly less shock absorption. This is normal and not a safety concern — the mats still protect your concrete.
The Deadlift Jack: A Quality-of-Life Essential

Titan Fitness Mini Deadlift Barbell Jack Stand, 600 LB Capacity, Elevated Lift for Easy Loading and Unloading Barbell Weight Plates, Weight Training, Deadlift Exercises, Powerlifting, Home Gym
Capacity
600 lbs lift capacity
Steel
Powder-Coated Steel
Footprint
Compact mini jack
Price
$89.99
- 4.6+ star rating on Amazon
- Lifts entire loaded barbell with one handle
- 2,000 lb lift capacity handles anything
- Saves your back when loading deadlift plates
- Fits standard Olympic bars
- Sturdy powder-coated construction
- Bulky to store (38" x 26" footprint)
- Premium price for a simple accessory
- Only useful for deadlifts and loading plates
Price and availability may change
Once you are pulling 315+ lbs regularly, loading and unloading plates becomes genuinely tedious. A deadlift jack levers the loaded bar off the ground so you can slide plates on and off without bending over and muscling one end of the barbell up by hand. This sounds like a luxury until you realize that a heavy deadlift session might require 8-12 plate changes across warm-up sets and working sets.
The Titan Deadlift Jack is the standard recommendation at approximately $90. It handles bars loaded to 800+ lbs, folds flat for storage, and weighs about 30 lbs. Read our Titan Deadlift Jack review for details.
Budget alternative: A mini deadlift jack (also called a deadlift wedge) costs $20-30, weighs under 5 lbs, and accomplishes the same plate-change function by rolling the innermost plate up a ramp. Less dramatic than a full jack but perfectly functional.
Personal Powerlifting Equipment
These items are worn, not installed. They travel with you to meets, training sessions, and anywhere you lift. Budget $150-300 for the essentials.
Powerlifting Belt
A quality 10mm or 13mm leather belt with a single-prong or lever buckle is the single most impactful personal equipment purchase for powerlifting. A belt does not protect your back — it gives your core something to brace against, increasing intra-abdominal pressure and allowing you to move more weight safely.
- 10mm leather — slightly more flexible, easier to break in, preferred for deadlifts by many lifters
- 13mm leather — maximum rigidity, preferred for heavy squats and bench
- Lever buckle — fastest to tighten/release, more expensive, requires a screwdriver to adjust size
- Single-prong buckle — quick to adjust, reliable, less expensive
When to start using a belt. Spend your first 6-12 months learning to brace properly without a belt. Once you can maintain a neutral spine under moderate load (roughly 1.5x bodyweight squat), add the belt for working sets above 80% of your one-rep max. Keep warm-up sets beltless to maintain core strength.
Wrist Wraps
Wrist wraps stabilize the wrist joint during bench press and overhead pressing. They are especially useful if you have a history of wrist pain or if your bench press exceeds 225 lbs. A basic pair of 18-inch wraps costs $15-25 and lasts years.
Knee Sleeves
Neoprene knee sleeves (5mm or 7mm) provide compression, warmth, and mild rebound out of the hole on squats. They do not add significant pounds to your squat — expect 5-15 lbs of carryover — but they keep the knee joint warm and can reduce discomfort during high-volume squat sessions. SBD, Rehband, and Stoic are reputable brands ranging from $40-90 per pair.
Chalk
Loose chalk or liquid chalk costs under $15 and dramatically improves grip for deadlifts. If you train in a shared space or want to minimize mess, liquid chalk (such as Liquid Grip) leaves less residue than loose chalk blocks.
Budget Tiers for a Powerlifting Home Gym
Tier 1: Starter Setup ($1,200-1,500)
- ULTRA FUEGO Power Cage — ~$389.99
- CAP Barbell 300 lb Olympic set (bar + plates) — ~$300
- Additional Yes4All 45 lb plates (2 pairs) — ~$180
- FLYBIRD adjustable bench — ~$110
- Horse stall mats (3 mats) — ~$150
- Deadlift jack (mini wedge) — ~$25
- Belt, chalk, basic wrist wraps — ~$100
Total: ~$1,095-1,200. This setup supports training up to roughly a 1,000 lb total (350 squat / 250 bench / 400 deadlift).
Tier 2: Intermediate Setup ($2,000-2,500)
- Mikolo F4 power cage — ~$500
- Synergee Games Barbell — ~$200
- 500 lbs total plates (mix of set + individual pairs) — ~$400
- Quality flat bench (Rep Fitness FB-3000 or similar) — ~$200
- Lifting platform (DIY, 8x8 ft) — ~$200
- Titan Deadlift Jack — ~$90
- Belt (lever), knee sleeves, wraps, chalk — ~$200
Total: ~$1,790-2,000. Supports training to a 1,200-1,400 lb total.
Tier 3: Advanced Setup ($3,000-4,000+)
Everything from Tier 2, plus:
- Rogue Ohio Power Bar or Texas Power Bar — ~$350-400
- Additional plates to 700+ lbs total — ~$300
- Competition flat bench — ~$350-500
- Resistance bands (5 bands, multiple strengths) — ~$80
- Safety squat bar — ~$250-350
- Calibrated competition plates (optional) — $$$
Total: $3,200-4,500+. Supports elite-level training and home meet simulation.
For complete builds at specific price points, see our home gym under $1,000 guide, home gym under $2,000 guide, and home gym under $3,000 guide.
Sample Powerlifting Programs for Home Gyms
All three programs below require only a rack, barbell, bench, and plates — the core home gym setup.
Starting Strength (Beginner, 0-12 Months)
3 days per week, alternating A/B sessions
Workout A:
- Squat: 3 sets of 5 reps
- Bench Press: 3 sets of 5 reps
- Deadlift: 1 set of 5 reps
Workout B:
- Squat: 3 sets of 5 reps
- Overhead Press: 3 sets of 5 reps
- Deadlift: 1 set of 5 reps
Progression: Add 5 lbs per session to squat and bench, 10 lbs per session to deadlift. When you can no longer add weight every session (typically 4-8 months in), move to an intermediate program.
Home gym advantage: This program takes 45-60 minutes and uses only the rack and bench. No waiting, no sharing, no compromises.
5/3/1 by Jim Wendler (Intermediate, 1-3+ Years)
4 days per week, wave periodization over 3-week cycles plus deload
Each training day centers on one main lift:
- Day 1: Squat
- Day 2: Bench Press
- Day 3: Deadlift
- Day 4: Overhead Press
Three-week wave:
- Week 1: 3 x 5 reps at 65%, 75%, 85% (last set AMRAP)
- Week 2: 3 x 3 reps at 70%, 80%, 90% (last set AMRAP)
- Week 3: 5 reps at 75%, 3 reps at 85%, 1 rep at 95% (last set AMRAP)
- Week 4: Deload at 40-60%
After each main lift, add 2-3 accessory exercises targeting weak points. Common accessories that require only a barbell and rack: front squats, Romanian deadlifts, close-grip bench press, barbell rows, and overhead pin press.
Progression: Add 5 lbs to your squat and deadlift training max after each cycle, 2.5 lbs to bench and overhead press. This creates slow, sustainable progress over years.
Conjugate Method (Advanced, 3+ Years)
4 days per week, max effort and dynamic effort rotation
- Monday — Max Effort Lower: Work up to a 1-3 rep max on a squat or deadlift variation (e.g., box squat, deficit deadlift, front squat, SSB squat). Rotate the variation every 1-3 weeks.
- Wednesday — Max Effort Upper: Work up to a 1-3 rep max on a bench press variation (e.g., floor press, close-grip bench, 2-board press, incline bench).
- Friday — Dynamic Effort Lower: Speed squats at 50-60% of 1RM for 10-12 sets of 2 reps with 45-60 second rest. Add bands or chains if available.
- Saturday — Dynamic Effort Upper: Speed bench at 50-60% for 8-9 sets of 3 reps with short rest.
Home gym note: The conjugate method benefits from specialty bars (safety squat bar, cambered bar, football bar) and accommodating resistance (bands and chains). You can run a basic version with just a straight bar, but this method reaches its full potential with a Tier 3 equipment setup.
For more programming options and periodization strategies, read our home gym programming guide.
Safety: Training Heavy Alone
Solo powerlifting demands respect for safety protocols. You do not have a spotter. Every heavy set is on you and your equipment.
Squat Safety
Always squat inside the rack with safety bars set 1-2 inches below your lowest squat depth. Practice bailing: descend to the bottom, lean forward slightly, and let the bar catch on the safeties. You should rehearse this with an empty bar before you ever need it with a loaded one.
Bench Press Safety
The bench press is the most dangerous lift to perform alone. A failed rep pins the bar on your chest or throat with no escape route. Never bench outside the rack. Set the safety bars to a height that clears your chest arch by approximately half an inch — low enough to touch-and-go off your chest but high enough to catch a failed rep before it crushes you.
If your rack's safety bars cannot be set precisely enough for bench press, consider purchasing a set of bench press safety arms or using the roll of shame technique as a backup (rolling the bar down your torso to your hips, then sitting up). The roll of shame works but is painful above 225 lbs and should be a last resort.
Deadlift Safety
Deadlifts are self-spotting — if you cannot complete the lift, you simply lower or drop the bar. The danger with heavy deadlifts is lower back rounding under maximal loads. Film your sets periodically and review for form breakdown. If your lower back rounds significantly on singles above 90%, reduce the weight and strengthen your posterior chain with Romanian deadlifts and good mornings.
For a comprehensive safety guide covering all aspects of solo training, read our garage gym safety guide.
Maintenance and Longevity
A well-maintained powerlifting home gym lasts decades. Iron plates from the 1980s are still being used in garages worldwide. Here is what to keep an eye on.
Barbell Care
- Wipe the knurling after every session with a nylon brush to remove chalk, skin oils, and moisture. A 3-in-1 oil application once per month keeps the shaft from developing surface rust.
- Check the sleeves quarterly for smooth rotation. If the sleeves feel gritty, clean with a dry cloth and apply a light machine oil to the bearing or bushing area.
- Store the bar horizontally on J-hooks or a wall-mounted bar holder. Standing bars vertically allows oil to drain out of the sleeves and accelerates bushing wear.
Read our complete barbell maintenance guide for detailed cleaning, oiling, and rust removal procedures.
Rack Maintenance
- Tighten all bolts every 3-6 months. Bolt-together racks loosen over time from vibration, especially if you rack heavy squats aggressively.
- Inspect J-hooks and safety bars for cracks, deformation, or excessive wear in the UHMW plastic liners. Replace liners if the metal-on-metal contact points are exposed.
- Check for rust on unpainted steel surfaces, especially in humid garages. A coat of spray paint or clear enamel stops surface rust from spreading.
Plate and Floor Care
- Cast iron plates require minimal maintenance. Wipe with a damp cloth if they accumulate chalk residue. If rust develops, use a wire brush and apply a thin coat of truck bed liner spray for permanent protection.
- Rubber flooring can be cleaned with a mild soap and water solution. Avoid harsh solvents. Sweep regularly to prevent grit from embedding in the rubber surface.
Common Powerlifting Home Gym Mistakes
- Training without safety bars. A failed 400 lb squat without safeties is a medical emergency. Always set your safeties before every heavy set.
- Buying a rack rated below your needs. An 600 lb rated rack is fine today but not in two years when you are squatting 450 lbs. Buy more capacity than you currently need.
- Skimping on the barbell to buy more plates. You touch the bar every rep. Cheap barbells develop bent shafts, lose their knurl, and spin unevenly. Invest in the bar first, add plates later.
- Not buying enough plates upfront. If you are deadlifting 315 today, you will be pulling 405 within a year on a good program. Buy plates for where you are going, not where you are.
- Using spring collars on heavy lifts. Spring clips slip under heavy loads. Use clamp-style collars rated for Olympic bars — they cost $15-25 and grip securely at any weight.
- Ignoring temperature management. Powerlifting sessions last 60-90+ minutes. A garage at 40 degrees in January or 105 degrees in August degrades performance and increases injury risk. A space heater for winter and a fan system for summer are practical investments. See our winter garage gym training guide and summer cooling guide for solutions.
Common Questions
Can I powerlift seriously in a home gym?
What is the minimum equipment needed for powerlifting?
Do I need a dedicated power bar or will a general-purpose barbell work?
How much plate weight do I need for powerlifting?
Are bumper plates necessary for powerlifting?
When should I start using a powerlifting belt?
Can I compete in powerlifting meets while training at home?
How do I safely bench press without a spotter?
Additional Resources
Related Content
- Home Gym Under $1,000 (Basic Powerlifting Setup)
- Home Gym Under $2,000 (Intermediate)
- Home Gym Under $3,000 (Advanced)
- How to Choose a Power Rack
- How to Choose a Barbell
- How to Choose Weight Plates
- How to Build a Lifting Platform
- Home Gym Programming Guide
- Garage Gym Safety: Training Alone
- Barbell Maintenance Guide
- All Powerlifting Content
The Bottom Line
A powerlifting home gym is one of the best investments you can make as a strength athlete. For $1,200-3,000, you build a training environment that eliminates gym fees, wait times, and equipment compromises — permanently. Focus your budget on the rack, barbell, plates, and bench first. Skip everything else until those four items are competition-grade for your strength level. With consistent training on proven programming, a garage gym will take you from your first 135 lb squat to a 1,000+ lb total and beyond. The iron does not care where it lives — only that you show up and move it.
Marcus Reid
Powerlifter and mechanical engineer who has been building and breaking home gym equipment for 15 years.
Read full bioMore in Guides
Strength vs Hypertrophy: How to Program for Your Goals (2026)
The definitive guide to programming for strength vs size in your home gym. Rep ranges, volume, intensity, and complete programs for both goals.
The Complete Home Gym Warm-Up Guide (2026)
Stop skipping your warm-up. Complete warm-up protocols for every training style, plus the equipment that makes preparation effortless at home.
Home Gym Deload Guide: When and How to Back Off (2026)
Learn when and how to deload in your home gym. Science-backed protocols, recovery strategies, and signs you need a rest week.