Home Gym for Injury Rehab & Recovery: Equipment Guide
Build a home gym focused on rehab and recovery. Low-impact equipment, joint-friendly exercises, and training through injuries.
Recovering from an injury does not mean sitting on the couch waiting for something to heal. Modern sports medicine overwhelmingly supports active rehabilitation — controlled loading, progressive movement, and strategic exercise selection that accelerates tissue repair while preserving the fitness you built before the injury. The problem is that commercial gyms are terrible environments for rehab. You cannot find the specialized equipment you need, you cannot control the variables that matter, and the psychological pressure of training at half capacity around healthy lifters slows your progress.
A dedicated home gym built around rehab and recovery eliminates every one of those obstacles. You train on your schedule, at your intensity, with equipment selected specifically for your injury. This guide covers the complete blueprint: what to buy, how to set it up, which exercises to prioritize for the most common injuries, and how to structure your return to full-strength training.
Why a Home Gym Is the Best Rehab Environment
Rehabilitation demands precision. You need exact weight increments, specific angles, controlled ranges of motion, and the freedom to stop mid-set without embarrassment. A home gym delivers all of this in ways a commercial facility never can.
Micro-loading capability. Rehab progression happens in small jumps — 2.5 lbs, sometimes even 1.25 lbs. Commercial gyms rarely stock fractional plates. At home, you buy a set once and use them for years of precise progression.
Angle control. A shoulder impingement might require pressing at exactly 60 degrees of incline. A hip injury might demand a specific squat depth marked by a box or bench. You set it once and leave it. No one moves your setup between sessions.
Zero time pressure. Rest intervals during rehab are often longer — 2 to 3 minutes between sets of corrective exercise. At home, no one is waiting for your bench or giving you looks for "just sitting there."
Consistency without barriers. The number-one factor in successful rehab is consistency. When the gym is 15 steps away in your garage, you eliminate the friction that causes missed sessions. Even on bad days, you can do a 15-minute mobility session instead of skipping entirely.
Privacy for vulnerable moments. Rehab involves movements that look strange to outsiders — banded clamshells, eccentric wrist curls, single-leg balance work on a foam pad. Training alone removes self-consciousness and lets you focus entirely on the quality of each rep.
Pros and Cons of a Home Rehab Gym
- Complete control over equipment selection tailored to your specific injury and recovery protocol
- Micro-loading with fractional plates enables precise 1.25 to 2.5 lb weekly progression
- No commute means higher session consistency — the single biggest factor in successful rehab
- Privacy eliminates psychological pressure and self-consciousness during modified training
- 24/7 access allows you to train whenever your body feels best including early morning or late night
- Long-term cost savings versus physical therapy copays and commercial gym memberships combined
- Equipment retains 60-70% resale value if your needs change after full recovery
- Upfront investment of $300 to $1,500 depending on injury complexity and equipment tier
- No in-person coaching feedback — critical for complex injuries requiring form corrections
- Requires self-discipline without the external accountability of a class or trainer
- Space requirement of at least 60 to 80 square feet for a functional rehab setup
- Risk of doing too much too soon without a professional monitoring your progression
- Some advanced rehab modalities like aquatic therapy or isokinetic machines cannot be replicated at home
- You are responsible for all equipment maintenance and safety checks
Essential Rehab and Recovery Equipment
The equipment below is organized by priority. Start with the first two categories and add the rest as your recovery progresses and your budget allows.
Tier 1: Resistance Bands (The Foundation of Every Rehab Program)

Bodylastics PRO Series Resistance Band Set (6 Bands, 280 lbs)
Capacity
6 bands stackable to 280 lbs
Steel
Anti-Snap Natural Latex Tubing
Footprint
Handles, ankle straps, door anchor + carry bag
Price
$61.97
- 4.6 star rating on Amazon with 2,600+ reviews
- Patented anti-snap inner cord for safety
- 6 bands stackable up to 280 lbs total resistance
- Includes handles, ankle straps, and door anchor
- Lifetime replacement on bands
- Travel-friendly storage bag
- Resistance feels different than free weights
- Door anchor requires an inward-opening door
- Handles wear faster than the bands
Price and availability may change
Resistance bands are the single most important piece of rehab equipment you can own. Physical therapists use them in virtually every rehabilitation protocol because they provide accommodating resistance — the load increases through the range of motion, which is gentler on joints at the weakest points and more demanding where you are strongest.
A quality set of loop bands covering 5 to 100 lbs of resistance costs $30 to $60 and replaces hundreds of dollars worth of fixed-weight equipment for early-stage rehab. Bodylastics and WOD Nation both make durable, layered-latex bands that hold up to daily use without snapping.
What to look for: Bands with a fabric sleeve or layered construction last significantly longer than single-layer latex. Get at least 5 resistance levels. Light bands (5-15 lbs) handle rotator cuff work and ankle rehab. Medium bands (20-40 lbs) cover hip activation and upper body pulling. Heavy bands (50-100 lbs) support assisted pull-ups and heavy hip work as you progress.
Tier 2: Adjustable Dumbbells with Small Increments

BowFlex Results Series SelectTech Dumbbells
Capacity
5-52.5 lbs each
Steel
Steel Plates / Nylon Dial Mechanism
Footprint
16.9" L x 8.3" W x 9" H each
Price
$429.00
- 4.7+ star rating on Amazon with 15,000+ reviews
- Replaces 15 sets of dumbbells (5-52.5 lbs)
- Fastest weight change system on the market (2 seconds)
- 2.5 lb increments up to 25 lbs
- Compact cradle storage footprint
- Sold as a pair
- Cannot be dropped — internal mechanism is fragile
- Length at 52.5 lbs feels awkward on some exercises
- Price has increased from original $349 MSRP
- 5 lb increments above 25 lbs
Price and availability may change
Rehab demands weight precision that fixed dumbbells cannot provide. Jumping from 15 lbs to 20 lbs is a 33% increase — far too aggressive for healing tissue. The Bowflex SelectTech 552 adjusts in 2.5 lb increments from 5 to 52.5 lbs, giving you 30 weight settings in a single pair. That granularity is what separates successful rehab progression from re-injury. Check our detailed Bowflex 552 review for the full breakdown.
For even smaller jumps, add magnetic micro-plates (PlateMate or similar) that attach to dumbbell heads and provide 1.25 lb increments. These are especially valuable during the first 4 to 6 weeks when tissue tolerance is lowest.
Tier 3: Adjustable Bench with Multiple Angles

FLYBIRD WB2 Weight Bench, Utility Adjustable Weight Bench
Capacity
800 lbs (ASTM Certified)
Steel
Commercial-Grade Steel Frame
Footprint
48.4" L x 16.5" W x 17" H (folded)
Price
$109.99
- 4.6+ star rating on Amazon with 25,000+ reviews
- Unbeatable value under $120
- ASTM-certified 800 lb weight capacity
- 8 backrest angles (90° to -30° FID)
- Folds flat for easy storage in small spaces
- Quick 10-minute assembly
- Gap between seat and backrest at steep inclines
- No decline position on some variants
- Pad is narrower (10.2") than premium benches (12")
- Feet can slide on smooth concrete without rubber mats
Price and availability may change
Different injuries require different pressing and pulling angles. A shoulder impingement may only tolerate pressing above 45 degrees. A lower back injury benefits from supported incline positions that reduce spinal loading. The FLYBIRD adjustable bench offers 7 back positions and 3 seat positions, covering everything from decline to near-vertical. It folds flat for storage, which matters in tight garage gym setups. Read our FLYBIRD bench review for specifics.
Rehab-specific bench tip: When returning from a shoulder injury, start pressing at the highest incline (70-80 degrees) and progressively work downward toward flat over several weeks. The higher the incline, the less stress on the anterior shoulder capsule.
Tier 4: Foam Roller and Percussion Therapy

TriggerPoint Grid 1.0 Foam Roller - 13" Multi-Density Massage Roller for Deep Tissue & Muscle Recovery - Relieves Tight, Sore Muscles & Kinks, Improves Mobility & Circulation - Targets Key Body Parts
Capacity
500 lbs
Steel
EVA Foam / Rigid Hollow Core
Footprint
13" x 5.5" diameter
Price
$32.92
- 4.7+ star rating on Amazon with 20,000+ reviews
- Multi-density GRID surface targets muscles differently
- Rigid hollow core won't flatten over time
- 500 lb weight capacity — built to last
- Compact 13" size for travel
- The gold standard in foam rollers
- Pricier than basic smooth rollers
- 13 inches too short for full-back rolling
- Firm surface may be intense for beginners
Price and availability may change
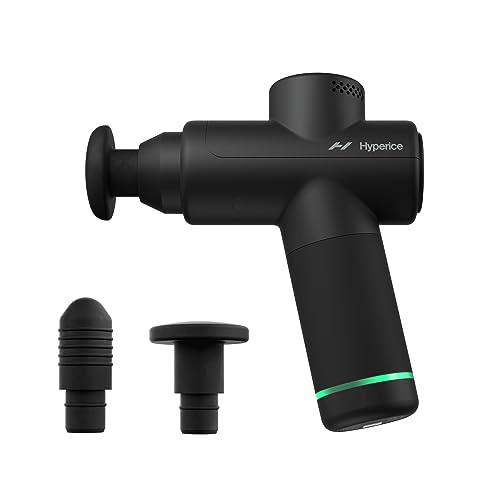
Hyperice Hypervolt Go 2 - Black - Featuring Quiet Glide Technology - Handheld Percussion Massage Gun - 3 Speeds, 2 Interchangeable Heads - Helps Relieve Sore Muscles and Stiffness
Capacity
N/A — recovery tool
Steel
QuietGlide Motor / 3 Speeds
Footprint
6.8" x 4" — portable
Price
$139.00
- 4.5+ star rating on Amazon with 2,000+ reviews
- Ultra-lightweight at 1.5 lbs
- QuietGlide technology — barely audible
- 3 speed settings up to 3200 RPM
- 2.5-hour battery life
- TSA-approved for travel
- Less powerful than full-size Hypervolt
- Only 2 attachment heads included
- Charge port cover can be stiff
Price and availability may change
Soft tissue quality directly impacts rehab outcomes. Scar tissue adhesions, trigger points, and fascial restrictions all limit range of motion and create compensation patterns that delay recovery. A daily 10 to 15 minute self-myofascial release routine using a foam roller and percussion device addresses these issues between physical therapy appointments.
The TriggerPoint GRID foam roller provides a firm, textured surface ideal for thoracic spine mobility, IT band work, and quad release. For deeper, more targeted work, a percussion therapy device like the Hypervolt GO 2 reaches tissues that foam rolling cannot. Use it on the muscles surrounding an injury — never directly on an acute injury site.
Budget alternative: A lacrosse ball ($5) handles trigger point work on the glutes, shoulders, and feet. Combined with a basic foam roller ($20), you have a complete soft tissue toolkit for under $30.
Tier 5: Power Rack with Safety Bars (For Return to Strength)

ULTRA FUEGO Power Cage, Multi-Functional Power Rack
Capacity
800 lbs
Steel
2x2" 14-Gauge Steel
Footprint
50.5" L x 46.5" W x 83.5" H
Price
$389.98
- 4.5+ star rating on Amazon with 5,000+ reviews
- Excellent value under $350
- 800 lb weight capacity
- Includes multi-grip pull-up bar
- Standard 2x2 hole spacing for attachments
- Optional lat pulldown attachment available
- 14-gauge steel is thinner than premium racks
- Plastic J-cup liners can wear over time
- Not ideal for lifters squatting 600+ lbs
Price and availability may change
Once your physical therapist clears you for loaded barbell work, a power rack with adjustable safety bars is non-negotiable. The ULTRA FUEGO Power Cage supports 800 lbs, includes adjustable safety bars and J-hooks, and provides the controlled environment you need to rebuild confidence under the bar. Read our ULTRA FUEGO Power Cage review for the complete specs.
Set the safety bars 2 to 3 inches higher than your normal fail point during the first month back. This shortened range of motion protects healing tissue while still allowing meaningful loading. Lower them by one hole every 2 to 3 weeks as tolerance improves.
Tier 6: Supplementary Recovery Tools
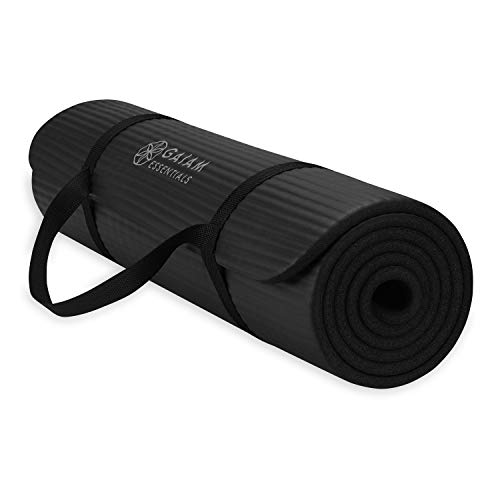
Gaiam Yoga Mat, Pilates & Exercise Mat, Thick 2/5" (10mm) Workout Mat with Easy-Cinch Carrying Strap for Home & Gym Workouts
Capacity
N/A — exercise mat
Steel
NBR Foam / Non-Slip Surface
Footprint
72" x 24" x 10mm thick
Price
$23.07
- 4.5+ star rating on Amazon with 50,000+ reviews
- Extra thick 10mm cushioning for joint protection
- Non-slip textured surface
- Includes carry strap for portability
- Great for stretching, ab work, and yoga
- Best budget exercise mat on Amazon
- Not firm enough for standing balance poses
- Absorbs sweat — needs regular cleaning
- 10mm thickness makes balance poses harder
Price and availability may change

TRX GO Suspension Trainer, Portable Gym for Full Body Exercise
Capacity
350 lbs user weight
Steel
Mil-Spec Nylon Webbing / Reinforced Hardware
Footprint
Fits in a small bag
Price
$139.95
- 4.6+ star rating on Amazon with 5,000+ reviews
- Original TRX brand quality
- Fits in a backpack (best for travel)
- 300+ exercises possible
- Includes door anchor and carry bag
- Lifetime warranty on hardware
- Pricier than knockoff suspension trainers
- Requires a sturdy anchor point overhead
- Door anchor only works on inward-opening doors
- Not ideal for explosive movements
Price and availability may change
Additional equipment that accelerates recovery:
- Yoga mat. Every rehab program includes floor-based mobility work. A thick (6mm+) mat protects knees and spine during exercises like dead bugs, bird dogs, and hip stretches. The Gaiam Premium mat handles daily use well.
- TRX GO Suspension Trainer. Bodyweight training with adjustable assistance is ideal for rehab. A suspension trainer lets you scale exercises from assisted (leaning back slightly) to advanced (feet elevated) without changing equipment. Particularly effective for shoulder, hip, and knee rehab.
- Yoga blocks and straps. Inexpensive props that modify range of motion for tight or injured joints.
- Balance pad or BOSU ball. Proprioceptive training is essential for ankle, knee, and hip rehab. A simple foam balance pad costs $20 and challenges joint stability without impact.
Rehab Equipment Checklist
Equipment Checklist
12 itemsRehab Setup and Safety Configuration
Building a rehab gym is not just about equipment — how you arrange the space matters for both safety and effectiveness.
Flooring
Install rubber stall mats (3/4 inch thick, 4x6 ft) over your garage floor. They protect dropped equipment, provide cushioning for floor exercises, and create a non-slip surface. Two mats ($50 each from a farm supply store) cover a functional 8x6 ft training area. For the complete flooring breakdown, see our garage gym flooring guide.
Mirrors for Form Monitoring
A wall mirror is not vanity — during rehab, it is a clinical tool. Compensation patterns are the number-one reason injuries recur. When your right knee hurts, your body shifts load to the left leg without conscious awareness. A full-length mirror (minimum 4x6 ft) lets you monitor symmetry in real time during squats, lunges, and single-leg work.
Lighting and Climate
Bright, even lighting (5000K color temperature, minimum 300 lumens per square foot) reduces fall risk and helps you see form details in the mirror. If you are training in a garage, address temperature control as well — cold muscles are more injury-prone, and extreme heat causes premature fatigue. A space heater in winter and a fan in summer are minimum requirements. Our ventilation guide covers climate solutions in detail.
Clear Pathways and Organization
During rehab, your balance and proprioception may be compromised. Keep all equipment in designated spots. Hang bands on hooks. Store dumbbells on a rack, not the floor. Ensure a clear 3-foot pathway from the entrance to every training station. Tripping over a barbell plate during ACL rehab creates a catastrophic setback.
Common Injuries: Equipment and Exercise Protocols
Below are evidence-based approaches for the most common injuries that drive people to build home rehab gyms. These protocols supplement — never replace — professional medical guidance.
Lower Back Injuries (Disc Herniation, Strain, Sciatica)
Priority equipment: Resistance bands, adjustable bench (incline support), foam roller, yoga mat
Phase 1 (Weeks 1-3): Pain management and gentle movement
- McGill Big Three: curl-up, side plank, bird dog — 3 sets of 8-10 second holds
- Glute bridges with bodyweight — 3x15
- Cat-cow stretches — 2 minutes
- Walking — 20-30 minutes daily
Phase 2 (Weeks 4-8): Rebuild core stability
- Dead bugs with band resistance — 3x10 per side
- Pallof press with band — 3x12 per side
- Goblet squat (light dumbbell) — 3x12
- Romanian deadlift (light dumbbells) — 3x10
- Band pull-throughs — 3x15
Phase 3 (Weeks 9+): Return to loading
- Trap bar deadlift (preferred over conventional for reduced spinal shear)
- Front squat (keeps torso upright, less back stress than back squat)
- Single-leg work: Bulgarian split squats, step-ups
- Progress by 5 lbs per week maximum
Movements to avoid until fully cleared: Conventional deadlifts, loaded back squats, standing overhead press, sit-ups and crunches
Shoulder Injuries (Rotator Cuff, Impingement, Labral Tear)
Priority equipment: Light resistance bands, adjustable dumbbells (start at 2.5-5 lbs), adjustable bench
Phase 1 (Weeks 1-4): Restore range of motion
- Band external rotations at side — 3x15 (light band)
- Band pull-aparts — 3x20
- Wall slides — 3x10
- Pendulum swings (Codman exercises) — 2 minutes per direction
- Sleeper stretches — 3x30 seconds
Phase 2 (Weeks 5-10): Strengthen stabilizers
- Face pulls with band — 3x15
- Prone Y-T-W raises on incline bench (2.5 lb dumbbells) — 3x10 each
- Side-lying external rotation — 3x12
- High incline dumbbell press (70+ degrees) — 3x10
- Scapular push-ups — 3x12
Phase 3 (Weeks 11+): Return to pressing
- Landmine press (neutral grip, shoulder-friendly arc) — 3x10
- Incline dumbbell press, progressively lowering angle every 2 weeks
- Single-arm cable or band rows — 3x12
- Overhead press only when pain-free at full range
Movements to avoid until fully cleared: Behind-the-neck press, upright rows, flat bench press with a barbell (dumbbells are safer — they allow natural rotation), dips below 90 degrees
Knee Injuries (ACL, Meniscus, Patellofemoral Pain)
Priority equipment: Resistance bands, adjustable bench (for step-ups), foam balance pad, heel wedges or squat shoes
Phase 1 (Weeks 1-4): Control inflammation, restore extension
- Quad sets (isometric contraction) — 5x10 second holds
- Straight leg raises — 3x15
- Terminal knee extension with band — 3x15
- Heel slides — 3x15
- Ankle pumps — throughout the day
Phase 2 (Weeks 5-10): Rebuild strength through safe ranges
- Wall sits — 3x30-60 seconds
- Step-ups to low box (6-8 inches) — 3x10 per leg
- Partial range goblet squat (above 90 degrees) — 3x12
- Leg curls with band — 3x15
- Calf raises — 3x20
Phase 3 (Weeks 11+): Full range loading
- Goblet squat to full depth — 3x10
- Bulgarian split squat — 3x10 per leg
- Romanian deadlift — 3x10
- Single-leg balance work on foam pad — 3x30 seconds per leg
Movements to avoid until fully cleared: Deep barbell back squat, heavy leg extension (high patellofemoral compression), plyometrics, dynamic lunges
Elbow Injuries (Tennis Elbow, Golfer's Elbow)
Priority equipment: Light resistance bands, adjustable dumbbells (2.5-10 lbs), grip strengthener (IronMind or similar)
The Tyler Twist protocol (gold standard for lateral epicondylitis):
- Hold a FlexBar or rolled towel in the affected hand with wrist extended
- Twist with the opposite hand
- Slowly release the twist with the affected hand (eccentric loading)
- 3x15, twice daily for 6-8 weeks
Additional exercises:
- Eccentric wrist extension with light dumbbell (2.5 lbs) — 3x15
- Eccentric wrist flexion with light dumbbell — 3x15
- Hammer curls (neutral grip reduces forearm strain) — 3x12
- Band finger extensions — 3x20
- Grip work with a hand gripper — progressive holds
Movements to avoid: Heavy curls, pull-ups (until pain-free), any exercise requiring a tight grip on a straight bar
Hip Injuries (Labral Tear, FAI, Bursitis)
Priority equipment: Resistance bands (especially mini bands), foam roller, yoga mat, adjustable bench
Key exercises:
- Banded clamshells — 3x20 per side
- Side-lying hip abduction — 3x15
- Glute bridges with band around knees — 3x15
- Fire hydrants — 3x15 per side
- Hip flexor stretches (half-kneeling, 60 seconds per side)
- Pigeon pose — 3x30 seconds per side
Progression path: Clamshells to lateral band walks to single-leg hip hinge to Bulgarian split squat to full depth squat over 8 to 12 weeks.
Sample Rehab Training Week
This template assumes a moderate upper body injury (such as a recovering shoulder impingement at week 6 of rehab). Adjust the specific exercises based on your injury and clearance level.
Day 1: Upper Body Rehab Focus
- Band external rotations: 3x15 (light band)
- Band pull-aparts: 3x20
- High incline dumbbell press: 3x10 (start at 50% of pre-injury weight)
- Single-arm dumbbell row: 3x10 per side
- Prone Y-T-W on incline bench: 3x8 each position (2.5 lb dumbbells)
- Face pulls with band: 3x15
Day 2: Lower Body Maintenance
- Goblet squat: 3x12
- Romanian deadlift with dumbbells: 3x10
- Walking lunges: 3x10 per leg
- Band leg curls: 3x15
- Calf raises: 3x20
- Dead bug: 3x10 per side
Day 3: Active Recovery
- 20-30 minutes walking or stationary cycling
- Foam rolling: 10 minutes (focus on thoracic spine, lats, hip flexors)
- Percussion therapy: 5 minutes per target area
- Stretching routine: 15 minutes (hold each stretch 45-60 seconds)
Day 4: Upper Body Rehab Focus (Varied)
- Band pull-aparts: 3x20
- Landmine press: 3x10 (if cleared)
- Suspension trainer rows (TRX): 3x12
- Lateral raises: 3x15 (very light — 5 lbs maximum)
- Scapular push-ups: 3x12
- Pallof press: 3x12 per side
Day 5: Lower Body + Core
- Step-ups to bench: 3x10 per leg
- Hip thrust: 3x12
- Single-leg Romanian deadlift: 3x10 per side
- Banded clamshells: 3x20 per side
- Plank variations: 3x30-45 second holds
- Bird dog: 3x10 per side
Day 6: Mobility and Recovery
- 30 minutes dedicated mobility work
- Foam rolling: 15 minutes (full body)
- Yoga flow or guided stretching: 20 minutes
- Balance training on foam pad: 3x60 seconds per leg
Day 7: Complete Rest
Progressive Return to Full Training
The transition from rehab to full training is where most people make mistakes. They feel good after 8 weeks of careful rehab and immediately return to pre-injury weights. This almost always leads to re-injury. Follow these five principles:
1. The 50% Rule. Your first week back at "normal" training should use 50% of your pre-injury working weights. If you squatted 225 lbs before the injury, start at 115 lbs.
2. Weekly progression of 5-10%. Add no more than 5-10% of the load per week. At that rate, you reach pre-injury numbers in 8-12 weeks — which is roughly the timeline for tissue to fully remodel under load.
3. RPE ceiling of 7. Rate of perceived exertion should not exceed 7 out of 10 during the return phase. If it feels like an 8, reduce the weight. There is zero benefit to grinding reps during this phase.
4. Maintain rehab exercises as warm-ups. The corrective exercises that healed your injury should become permanent warm-up fixtures. Band pull-aparts, external rotations, glute activation work — these take 5 minutes and prevent recurrence.
5. Deload every third week. Standard training uses a deload every 4th week. During the return-to-training phase, deload every 3rd week to allow extra recovery time for remodeling tissue.
For detailed programming structures once you are past the rehab phase, see our home gym programming guide.
Equipment Maintenance for Rehab Tools
Rehab equipment requires more frequent inspection than standard gym gear because failure mid-exercise can directly aggravate a healing injury.
Resistance bands: Inspect before every session. Look for nicks, tears, discoloration, or thinning. Replace any band showing wear immediately — a snapped band under tension causes injury. Store bands away from direct sunlight and heat, which degrade latex.
Foam rollers: Clean weekly with a mild soap and water solution. EVA foam rollers last 6 to 12 months with daily use before they lose density. When the roller no longer feels firm, replace it.
Adjustable dumbbells: Test the locking mechanism monthly. Bowflex SelectTech models should click cleanly into each weight setting. If you feel any play or looseness, contact the manufacturer.
Percussion devices: Charge after every 3 to 4 sessions. Clean the attachment heads weekly with isopropyl alcohol. Replace heads when they show cracks or permanent deformation.
When to Seek Professional Help
A home rehab gym supplements professional care — it does not replace it. See a physical therapist or sports medicine doctor if:
- Pain increases despite 2 weeks of modified training
- You experience sharp, sudden pain during any exercise
- Swelling returns after being resolved
- You cannot achieve pain-free range of motion after 4 weeks
- Numbness or tingling develops in extremities
- You hear clicking, popping, or locking in a joint that was not present before
Common Questions
Can I train with an injury?
What is the single best piece of rehab equipment?
How much should a home rehab gym cost?
Should I train with a back injury?
How long after surgery can I start training?
Are resistance bands enough for a complete rehab program?
How do I know when I'm ready to lift heavy again?
Can I do rehab at home without a physical therapist?
Additional Resources
Related Content
- Home Gym for Beginners Over 40
- Home Gym for Seniors
- Best Recovery Tools for Home Gyms
- Best Resistance Bands
- Home Gym Safety: Training Alone
- Home Gym Programming Guide
- Home Gym for Postpartum Recovery: Safe Return to Training
- All Recovery & Mobility Content
The Bottom Line
A home gym is the ideal environment for injury rehabilitation and recovery. The combination of privacy, precision loading, 24/7 access, and customized equipment selection creates conditions that commercial gyms and even many physical therapy clinics cannot match. Start with resistance bands and a foam roller for immediate rehab needs. Add adjustable dumbbells with micro-loading capability as you progress past the acute phase. When cleared for barbell work, a power rack with conservatively set safety bars lets you rebuild strength with confidence. Train consistently, progress conservatively, maintain your corrective exercises as permanent warm-up routines, and respect the timelines your body sets. The goal is not to rush back — it is to come back stronger and more resilient than before the injury.
Lena Park
Former NCAA Division I rower and USA Weightlifting coach. Specializes in conditioning equipment and women's training.
Read full bioMore in Guides
Strength vs Hypertrophy: How to Program for Your Goals (2026)
The definitive guide to programming for strength vs size in your home gym. Rep ranges, volume, intensity, and complete programs for both goals.
The Complete Home Gym Warm-Up Guide (2026)
Stop skipping your warm-up. Complete warm-up protocols for every training style, plus the equipment that makes preparation effortless at home.
Home Gym Deload Guide: When and How to Back Off (2026)
Learn when and how to deload in your home gym. Science-backed protocols, recovery strategies, and signs you need a rest week.