The Complete Guide to Garage Gym Flooring (2026)
Everything you need to know about garage gym flooring. Compare rubber tiles, horse stall mats, and rolled rubber to protect your floor and equipment.
Horse stall mats (3/4-inch thick, 4x6 ft, ~$50 each from Tractor Supply) are the best garage gym flooring — six mats cover a full training area for under $300, protect your concrete, and outlast every alternative at this price.
Your garage gym floor endures more punishment than almost any other surface in your home. Every dropped deadlift sends shockwaves through bare concrete. Every loaded squat session grinds equipment feet against the slab. Sweat, chalk dust, and rubber debris accumulate in cracks and expansion joints. Without proper flooring, you are looking at cracked concrete, damaged equipment, angry neighbors, and joint pain that compounds over months of training on an unforgiving surface.
The right flooring system solves all of these problems simultaneously. It absorbs impact energy to protect your concrete slab and your barbell. It dampens noise transmission so your 6 AM deadlift session does not wake the entire household. It provides a stable, non-slip training surface that keeps your feet planted during heavy lifts. And it reduces fatigue on your ankles, knees, and lower back during long training sessions.
This guide covers every flooring option worth considering in 2026, from budget-friendly horse stall mats to premium rolled rubber installations. We break down exact costs, installation methods, thickness requirements for different training styles, and the maintenance routines that keep your flooring performing for a decade or longer.
Why Garage Gym Flooring Is Non-Negotiable
Before you spend a single dollar on a power rack or barbell, your floor needs protection. Here is why flooring should be the very first purchase in any garage gym build.
Concrete Protection
A standard 4-inch residential garage slab is not designed to absorb repeated point-load impacts. A 315 lb deadlift dropped from lockout height generates roughly 5,000-7,000 lbs of instantaneous force on impact. Without rubber flooring to distribute and absorb that energy, the concrete will crack. Hairline fractures spread into spider-web patterns over weeks of training, and once a slab cracks, repair costs start at $500 and climb quickly. A $50 horse stall mat prevents thousands in concrete repair bills.
Equipment Longevity
Bare concrete destroys equipment. Barbell sleeves get scratched and dented on every ground contact. Bumper plates develop flat spots and cracks from repeated concrete impacts. Power rack feet grind against the slab, wearing down both the rack's powder coat and the concrete beneath it. Cast iron plates chip and crack on hard surfaces. Proper rubber flooring extends the useful life of every piece of equipment that touches the floor.
Noise and Vibration Reduction
This is the factor most beginners underestimate. Impact noise from dropped weights travels through the concrete slab, into the foundation, and up through the framing of your house. A decibel meter placed in the living room directly above an unprotected garage gym will register 80-90 dB during barbell drops, roughly equivalent to a food blender running at full speed. A 3/4-inch rubber mat reduces that transmission by 15-25 dB, bringing it closer to normal conversation levels.
Joint Health and Comfort
Training on bare concrete takes a toll on your body over time. The zero-give surface transmits impact forces directly into your joints during every standing exercise, jump, and landing. Your ankles, knees, hips, and lower back absorb micro-trauma that accumulates across hundreds of training sessions. Rubber flooring with 3/4-inch thickness provides enough cushion to meaningfully reduce these forces without creating instability during heavy lifts.
Rack Stability and Safety
A power rack sitting on bare concrete can slide during aggressive reracking or failed lifts. Rubber flooring increases the coefficient of friction between the rack feet and the floor surface, keeping your rack planted. If you bolt your rack to a DIY lifting platform, the rubber layer beneath provides additional vibration dampening and protects the concrete from anchor bolt stress fractures.

BalanceFrom Puzzle Exercise Mat 1/2' Thick, EVA Interlocking Foam Floor Tiles for Home Gym, Mat for Home Workout Equipment, Floor Padding for Kids, Black, 24 in x 24 in x 1/2 in, 24 Sq Ft - 6 Tiles
Capacity
N/A — flooring
Steel
High-Density EVA Foam (1/2" thick)
Footprint
24 sq ft (6 tiles)
Price
$25.99
- 4.5+ star rating on Amazon with 40,000+ reviews
- 24 sq ft covers a full lifting platform area
- 1/2 inch thick EVA foam absorbs impact and noise
- Interlocking design — no adhesive needed
- Easy to cut for custom fit around racks
- Best budget gym flooring on Amazon
- Puzzle seams can separate under heavy racks
- Not as durable as horse stall mats for deadlifts
- Slight chemical smell for first few days
Price and availability may change
The Four Main Flooring Options Compared
Horse Stall Mats: The Gold Standard for Value
The 4x6-foot, 3/4-inch thick vulcanized rubber horse stall mats sold at Tractor Supply Co. (TSC) remain the single best value in garage gym flooring in 2026. At $49.99 per mat (approximately $2.08 per square foot), they deliver commercial-grade durability at a fraction of the cost of products marketed specifically to gym owners.
Each mat weighs approximately 100 lbs, measures 48 x 72 inches, and is made from 100% recycled vulcanized crumb rubber bonded with a polyurethane binder. The material is the same compound used in commercial gym installations, weight room flooring at Division I universities, and CrossFit boxes worldwide. The only difference between a TSC horse stall mat and a "premium gym tile" costing $4-6 per square foot is branding, packaging, and marketing.
- Lowest cost per square foot of any durable option ($2.08/sq ft)
- Extreme durability — 10+ year lifespan under heavy use
- 3/4-inch thickness handles deadlift drops up to 500+ lbs
- Heavy weight means no shifting or sliding during training
- No adhesive or interlocking mechanism needed
- Available at any Tractor Supply Co. location for immediate pickup
- Extremely heavy (100 lbs each) — difficult to transport and position alone
- Strong rubber odor for the first 2-4 weeks
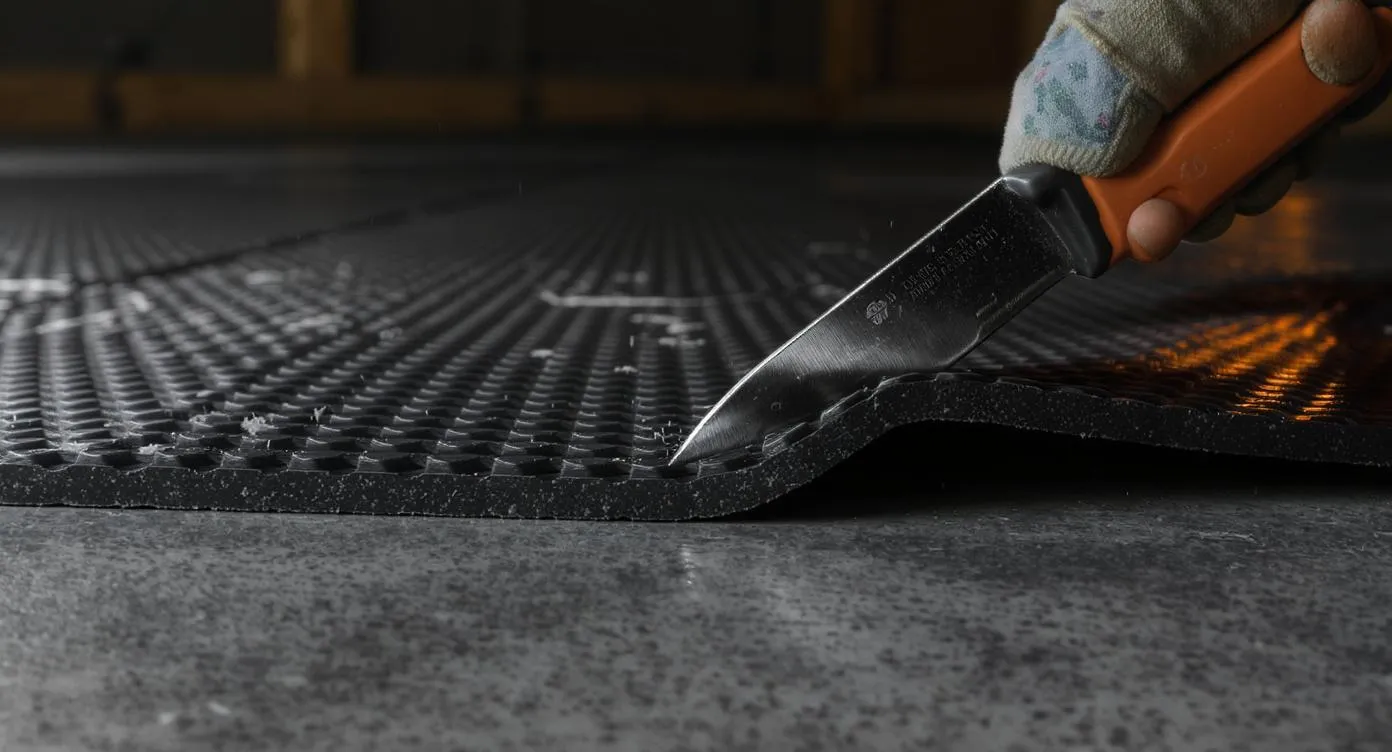
- Difficult to cut — requires multiple passes with a sharp utility knife
- Seams between mats are visible and can collect debris
- Only available in black with a pebble or diamond-tread surface texture
- Slight size variations between mats can create uneven seams
Best for: Deadlift zones, full-garage coverage on a budget, under power racks, and any area where barbell drops are expected.
Interlocking Rubber Tiles: Cleaner Aesthetics
Interlocking rubber tiles range from 3/8-inch to 3/4-inch thick and connect via puzzle-piece or pin-and-loop edges. Brands like Xspec, ProSource, and IncStores sell 24x24-inch tiles in packs of 6-12, typically running $2.50-4.50 per square foot depending on thickness and quality.
The interlocking mechanism eliminates visible seams and prevents gaps from forming over time. Tiles are lighter than stall mats (typically 3-8 lbs each), making them much easier to transport, position, and cut. Many brands offer color options including red, blue, green, and gray speckled patterns that give your gym a more polished, commercial appearance.
However, the thinner options (3/8-inch) do not provide adequate protection for dropped barbells. If you choose tiles, stick with 3/4-inch thickness for any area where weights will hit the floor. Thinner tiles work fine under cardio equipment, for bodyweight training zones, and in walkways.
- Interlocking edges create a cleaner, gap-free appearance
- Lighter and easier to handle than horse stall mats
- Available in multiple colors and patterns
- Easy to cut with a utility knife
- Can be removed and reinstalled if you relocate
- No adhesive required for most installations
- Higher cost per square foot than horse stall mats ($2.50-4.50)
- Thinner options do not protect against barbell drops
- Interlocking edges can separate under lateral stress
- Lower-quality tiles curl at edges over time
- Color options fade with UV exposure in garages with windows
- Must buy specific brand replacement tiles — not interchangeable
Best for: Dedicated workout rooms, multi-use spaces, gyms where appearance matters, and cardio or bodyweight training areas.
Rolled Rubber: Seamless Professional Coverage
Rolled rubber flooring comes in continuous rolls, typically 4 feet wide and sold by the linear foot. Thickness ranges from 3/8-inch to 1/2-inch for standard commercial applications. Brands like Rubber-Cal, Regupol, and IncStores offer rolls in 25-foot and 50-foot lengths. Cost runs $3.00-5.00 per square foot before adhesive.
The primary advantage of rolled rubber is seamless coverage. No gaps, no seams shifting apart, no debris collecting between mats. Once installed with adhesive, rolled rubber creates a permanent, professional surface that looks and performs like a commercial gym floor. It is the flooring you see in CrossFit affiliates, university weight rooms, and high-end personal training studios.
The downsides are significant for garage gym builders. Rolled rubber requires adhesive for proper installation, which means it is essentially permanent. Removal destroys both the flooring and the adhesive bond. Standard roll thicknesses of 3/8-inch to 1/2-inch are thinner than the 3/4-inch horse stall mat standard, meaning rolled rubber alone may not provide enough protection for heavy deadlift drops. Many garage gym owners who install rolled rubber still add a stall mat or lifting platform in the deadlift zone for extra impact absorption.
- Seamless wall-to-wall coverage with no gaps
- Professional commercial gym appearance
- No shifting or separation over time
- Easy to clean — mop or sweep the continuous surface
- Available in various colors and speckle patterns
- Excellent for large dedicated gym spaces
- Highest cost per square foot ($3.00-5.00 plus adhesive)
- Requires adhesive for proper installation — essentially permanent
- Standard thickness (3/8 to 1/2 inch) thinner than stall mats
- Difficult to remove without damaging the concrete
- Heavy rolls are awkward to transport and position
- Not practical for renters or temporary gym setups
Best for: Large dedicated gym spaces, permanent installations, commercial-grade home gyms, and owners who prioritize a seamless professional appearance.
Foam Tiles: Budget Cardio-Only Option
EVA foam interlocking tiles are the cheapest flooring option at $1.00-2.00 per square foot. Brands like BalanceFrom, ProSource, and ProsourceFit sell them in packs of 6-24 tiles. They are lightweight, easy to install, and available in dozens of colors.
Foam tiles are not appropriate for any training that involves dropped weights, heavy equipment, or loaded barbells. They compress permanently under heavy rack loads, tear when equipment is dragged across them, and provide zero concrete protection during barbell drops. Their only legitimate use in a garage gym is under cardio equipment, in a dedicated stretching or yoga area, or as a temporary solution for bodyweight-only training.
Best for: Yoga and stretching zones, under cardio machines, kids' play areas, and temporary or bodyweight-only setups.
How to Calculate Your Flooring Needs
Measuring Your Space
A standard single-car garage is approximately 12 x 20 feet (240 sq ft). A standard two-car garage is approximately 20 x 20 feet (400 sq ft). Measure your actual dimensions, as garages vary significantly. Account for any built-in shelving, water heaters, or HVAC units that reduce usable floor space.
Full Coverage vs. Zone Coverage
You do not necessarily need to floor the entire garage. Many experienced garage gym owners use a zone approach.
Priority Zone 1 — Lifting Platform Area (64-96 sq ft): The area under and immediately around your power rack, including the deadlift zone. This area needs 3/4-inch rubber minimum. Two to four horse stall mats cover this zone for $100-200.
Priority Zone 2 — Accessory and Free Weight Area (48-96 sq ft): The area where you use dumbbells, kettlebells, and do accessory work. Three-quarter-inch rubber is ideal, but 3/8-inch tiles work if you are not dropping weights here.
Priority Zone 3 — Cardio and Bodyweight Area (48-96 sq ft): The area for your rowing machine, bike, jump rope, and bodyweight movements. Thinner rubber tiles or even foam tiles work fine here.
Priority Zone 4 — Storage and Walkways: Bare concrete is perfectly fine for plate storage trees, wall-mounted storage, and walking paths between equipment.
Cost Breakdown by Garage Size
For a standard two-car garage (400 sq ft):
Equipment Checklist
6 itemsThe hybrid approach delivers the best value for most home gym builders. Put your budget where the impact is highest and use cheaper options (or bare concrete) everywhere else.
Step-by-Step Installation Guide
Tools and Supplies You Will Need
- Sharp utility knife with extra blades (you will go through 5-10 blades per mat)
- 4-foot aluminum straight edge or steel ruler
- Measuring tape (25-foot minimum)
- Chalk or painter's tape for marking cuts
- Rubber mallet (for seating interlocking tiles)
- Double-sided carpet tape (for seam stabilization)
- Broom and shop vacuum
- Work gloves (rubber edges are sharp when cut)
Step 1: Prepare the Concrete Surface
Sweep the entire garage floor thoroughly. Use a shop vacuum to clean expansion joints and cracks. Remove any oil stains with a concrete degreaser — rubber flooring will not adhere properly to oily surfaces, and mats placed over oil will slide. Fill any cracks wider than 1/4-inch with concrete crack filler and allow 24 hours to cure. For significantly uneven surfaces (more than 1/4-inch variation over 4 feet), apply a self-leveling concrete compound before installing flooring.
Step 2: Plan Your Layout
Dry-fit your first row of mats or tiles before committing to any cuts. Start from one wall and work toward the garage door. Position mats tight against the starting wall with the long edge running parallel to the wall. Leave a 1/4-inch expansion gap at all walls — rubber expands slightly with temperature changes, and mats forced tight against walls will buckle in summer heat.
For horse stall mats, a standard two-car garage layout uses rows of mats running the 20-foot width (three and a half 6-foot mats per row) with rows stacked along the 20-foot depth. Stagger seams between rows like bricks for maximum stability.
Step 3: Cutting Horse Stall Mats
Cutting 3/4-inch rubber is the most physically demanding part of installation. Here is the method that works.
- Measure and mark your cut line on both sides of the mat using chalk
- Place the straight edge along the cut line and clamp or weight it in place
- Score the surface with a fresh utility blade using moderate pressure — do not try to cut through in one pass
- Make 4-6 additional passes, deepening the cut each time
- Flip the mat and repeat the scoring process from the other side
- The mat should separate cleanly once cuts meet in the middle
- Replace your blade every 2-3 cuts — dull blades cause ragged edges and waste enormous effort
For curves around posts or pipes, make relief cuts (straight cuts from the edge to the curve) to remove waste material in sections rather than trying to cut a smooth curve in one piece.
Step 4: Secure Seams and Prevent Shifting
Heavy stall mats generally stay put through gravity alone, but seams can open over months of training. Prevent this with one of three approaches.
Double-sided carpet tape (recommended): Run a strip of heavy-duty carpet tape along every seam on the concrete side. This keeps mats from drifting apart while still allowing removal if needed. Reapply every 6-12 months as adhesive weakens.
Construction adhesive (permanent): Apply Liquid Nails or Gorilla Glue construction adhesive in a zigzag pattern on the concrete before placing each mat. This creates a permanent bond. Only choose this option if you are certain you will never remove or reposition the flooring.
Wall-pressure method (free): Push all mats tight against two perpendicular walls (typically the back wall and one side wall). Mats can only shift toward the open walls, and the weight of the mats creates enough friction to prevent meaningful movement. This works well for smaller installations but may not hold in large full-coverage setups.
Step 5: Address the Rubber Smell
New rubber mats off-gas volatile organic compounds (VOCs) that produce a strong chemical rubber odor. The smell is unpleasant but not harmful at the concentrations present in a ventilated garage. Here is how to minimize it.
Before installation: Lay mats flat outdoors in direct sunlight for 2-3 days. UV light and heat accelerate VOC release. Flip mats halfway through. This step alone eliminates 50-70% of the initial odor.
During the first week: Keep the garage door open at least 4-6 inches and run a box fan to maintain constant airflow across the mat surface. If your garage has windows, open them for cross-ventilation.
Weeks 2-4: The odor fades significantly but may persist in enclosed garages with poor ventilation. Continue running a fan during training sessions. By week 4-6, the smell should be undetectable for most people. For more on managing garage air quality, see our ventilation and climate control guide.
Flooring Recommendations by Training Style
Powerlifting
Powerlifters need maximum stability and impact protection. A 3/4-inch horse stall mat under the rack and the deadlift zone is non-negotiable. The surface should be flat and firm — avoid foam or soft rubber that compresses under heavy loads, as this creates instability during squats and reduces force transfer during pulls. Many serious powerlifters build a DIY lifting platform that combines plywood layers with rubber surfaces to create the firmest possible training surface. For the full powerlifting setup, see our powerlifting home gym guide.
Olympic Weightlifting
Olympic lifters drop loaded barbells from overhead regularly, generating the highest impact forces of any training style. Minimum flooring requirements are 3/4-inch rubber plus crash pads or a dedicated lifting platform with doubled-up rubber in the drop zones. The platform surface where you stand should be bare plywood or a thin rubber layer for maximum grip during the pull — thick rubber under your feet reduces force transfer and creates instability during the catch.
CrossFit and Functional Fitness
CrossFit programming combines barbell work, gymnastics, monostructural cardio, and odd-object training. Your flooring needs to handle everything from barbell drops to burpees to jump rope doubles. Full-garage coverage with 3/4-inch horse stall mats is the most practical solution. The continuous rubber surface gives you freedom to set up workouts anywhere in the garage without worrying about hitting bare concrete during a dropped barbell in a timed workout.
Bodybuilding and Hypertrophy Training
Bodybuilders rarely drop weights from height, which means concrete protection is less critical. The primary concerns are joint comfort during long sessions, equipment stability, and a surface that is easy to clean. Interlocking rubber tiles in 3/8-inch to 3/4-inch thickness work well for bodybuilding-focused gyms. If you use adjustable dumbbells, lay at least a 3/4-inch mat in the dumbbell area as insurance against accidental drops.
Cardio and Bodyweight Only
If your gym focuses exclusively on cardio equipment, bodyweight training, yoga, and mobility work, foam tiles or thin rubber tiles are adequate. The primary concern is comfort and non-slip performance rather than impact protection. Budget accordingly — there is no reason to spend $800 on horse stall mats if your heaviest piece of equipment is a rowing machine.
Long-Term Maintenance and Care
Weekly Cleaning Routine
Sweep or vacuum the flooring surface weekly to remove chalk dust, rubber crumbs, and debris. For a deeper clean, mop with warm water and a small amount of dish soap or Simple Green diluted per label directions. Avoid bleach, ammonia-based cleaners, and petroleum-based solvents — these degrade rubber over time. Allow the floor to air dry completely before training, as wet rubber becomes dangerously slippery.
Seasonal Maintenance
Spring/Fall: Check all seams for gaps and reapply carpet tape as needed. Inspect mats for lifting or buckling caused by temperature-driven expansion and contraction. Readjust expansion gaps at walls.
Summer: In hot climates where garage temperatures exceed 100 degrees F, rubber mats expand noticeably. If mats buckle or lift in the center, the expansion gap at the walls is too small. Pull mats back to create a 3/8-inch to 1/2-inch gap on all sides.
Winter: Cold temperatures make rubber stiffer and slightly more brittle. This is normal and does not affect performance. Mats may contract slightly, opening small gaps at seams. Close gaps by pushing mats together after the garage warms up during a training session.
When to Replace Your Flooring
Quality 3/4-inch rubber mats last 10-15 years under heavy residential use. Replace flooring when you see permanent compression marks deeper than 1/8-inch under rack feet, surface cracking or crumbling, or when mats have thinned noticeably in high-traffic areas. Interlocking tiles have a shorter lifespan of 5-8 years, as the interlocking edges wear down and connections loosen over time. Foam tiles should be considered disposable and replaced every 1-3 years as they compress permanently.
Common Mistakes to Avoid
Skipping the off-gassing period. Installing brand-new rubber mats in a sealed garage and training immediately will give you headaches and nausea from VOC concentration. Always pre-air mats outdoors first.
Using foam tiles under heavy equipment. Foam compresses permanently under concentrated loads. A 500 lb loaded power rack will sink into foam tiles within weeks, creating instability and a tripping hazard.
Ignoring expansion gaps. Rubber expands with heat. Mats forced tight against walls in winter will buckle and lift off the floor when summer temperatures hit. Always leave 1/4-inch to 1/2-inch at all walls.
Buying thin mats for barbell training. Three-eighths-inch rubber is not thick enough to protect concrete from barbell drops. If you pull heavy deadlifts or do any Olympic lifting, you need 3/4-inch minimum in those zones.
Over-spending on full coverage. You do not need premium flooring under your plate storage tree or in the corner where you keep your gym bag. Prioritize your budget on the lifting zones and use cheaper options or bare concrete everywhere else.
Frequently Asked Questions
How thick should garage gym flooring be?
Do I need to glue gym flooring to the concrete?
Can I put gym flooring over an uneven or cracked garage floor?
How long does the rubber smell from new gym mats last?
Are horse stall mats really the same as gym flooring?
How many horse stall mats do I need for a two-car garage?
Can I install gym flooring over epoxy-coated concrete?
What is the best gym flooring for a garage that also parks cars?
Additional Resources
The Bottom Line
For the vast majority of garage gym builders, horse stall mats from Tractor Supply Co. remain the best flooring investment in 2026. At $50 per 4x6 mat, they deliver commercial-grade impact protection, noise reduction, and durability that lasts a decade or longer. Start with 3-4 mats covering your lifting zone for under $200. Add more later as your gym grows and your budget allows.
If aesthetics matter to you and you have the budget, interlocking rubber tiles in 3/4-inch thickness offer a cleaner look with easier installation. For permanent, professional-grade installations in large dedicated spaces, rolled rubber with adhesive provides the seamless coverage found in commercial gyms.
Whichever option you choose, invest in your floor before you invest in equipment. Your concrete, your gear, your joints, and your household will thank you.
Related Content
- Best Garage Gym Flooring Options (2026 Tested & Compared)
- How to Build a DIY Lifting Platform (Step-by-Step)
- Garage Gym Ventilation & Climate Control Guide (2026)
- Garage Gym Electrical & Power Setup Guide (2026)
- Garage Gym Lighting Guide: Best Lights for Training (2026)
- The Best Power Racks Under $500 (2026)
Derek Walsh
Strongman competitor and former commercial gym equipment salesman. Knows what survives heavy daily use.
Read full bioMore in Guides
Strength vs Hypertrophy: How to Program for Your Goals (2026)
The definitive guide to programming for strength vs size in your home gym. Rep ranges, volume, intensity, and complete programs for both goals.
The Complete Home Gym Warm-Up Guide (2026)
Stop skipping your warm-up. Complete warm-up protocols for every training style, plus the equipment that makes preparation effortless at home.
Home Gym Deload Guide: When and How to Back Off (2026)
Learn when and how to deload in your home gym. Science-backed protocols, recovery strategies, and signs you need a rest week.