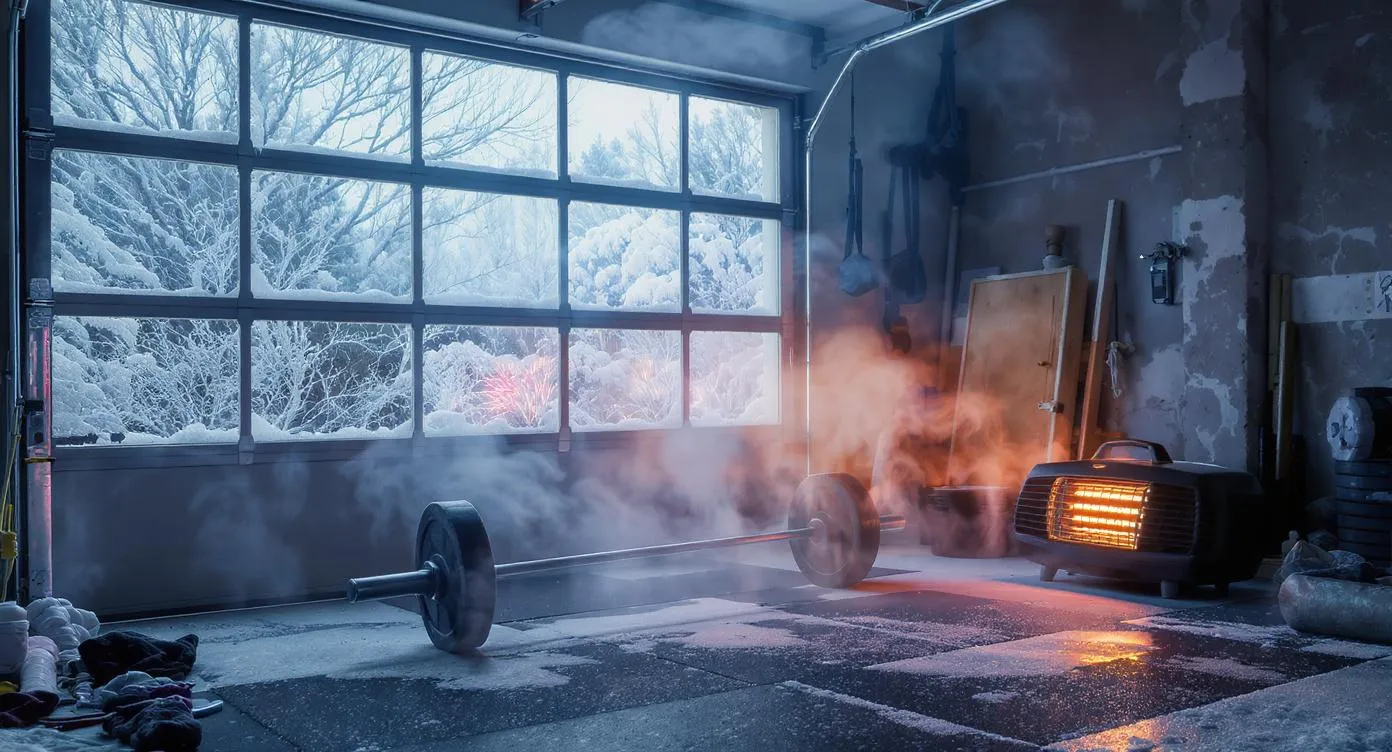
Training in a Cold Garage Gym: Winter Survival Guide
How to train in your garage gym during winter. Heating strategies, cold barbell solutions, warm-up protocols, and gear to survive sub-freezing workouts.
A 28-degree garage at 5:30 AM is not a comfortable place to train. The barbell stings your palms like dry ice, condensation beads on the plates, and the concrete floor radiates cold straight through your shoes into your heels. Every warm-up rep feels like a battle with inertia — both physical and mental.
But here is the thing: winter garage gym training is where serious lifters are forged. While commercial gym members skip sessions because the parking lot is icy, you walk fifteen feet from your kitchen to a squat rack that is always available. No commute, no excuses. The only variable is temperature, and that is entirely solvable.
This guide covers everything you need to train safely and effectively in a cold garage gym — from heating systems and insulation strategies to cold-weather warm-up protocols, barbell care, and the mental tactics that keep you showing up when the thermometer drops below freezing.
Why Cold Garage Training Is Different (And Dangerous If You Ignore It)
Training in a cold environment changes your physiology in ways that directly impact performance and injury risk. Understanding these mechanisms is the first step to training around them.
Reduced blood flow to extremities. Below 50 degrees Fahrenheit, your body redirects blood toward your core to maintain organ temperature. Your hands, feet, and superficial muscles receive less oxygen-rich blood, which means slower warm-ups and reduced grip strength.
Increased joint viscosity. Synovial fluid — the lubricant inside your joints — thickens in cold temperatures. This makes joints stiffer, reduces range of motion, and increases the shear forces on cartilage during heavy compound movements like squats and deadlifts.
Slower nerve conduction. Cold peripheral nerves transmit signals more slowly, reducing proprioception (your sense of where your body is in space). This is why a heavy clean or snatch feels "off" in a cold garage — your timing and coordination are genuinely impaired.
Higher injury risk. Cold muscles and tendons have less elasticity. A muscle strain that would not happen at 70 degrees can absolutely happen at 35 degrees if you skip a proper warm-up. Tendon injuries — which heal slowly and plague lifters for months — are particularly common in cold-weather training.
The takeaway: you cannot just walk into a freezing garage, load the bar, and start working sets. Cold-weather training requires deliberate preparation, starting with your environment.
Heating Your Garage Gym: A Tiered Strategy
Not every heating solution works for every garage. Your choice depends on your garage size, insulation level, local climate, electrical capacity, and budget. Here is the hierarchy from most effective to most affordable.
Tier 1: Dr. Infrared Heater DR-968 or Similar Infrared Panel ($100-200)
Infrared heaters are the gold standard for garage gyms because they heat objects and people directly rather than heating the air. This distinction matters enormously in an uninsulated garage where warm air escapes through every gap.
A 1,500-watt infrared heater like the Dr. Infrared Heater DR-968 pointed at your training area warms your body, the barbell, and the bench within 10-15 minutes. The air temperature might still read 45 degrees, but you feel 15-20 degrees warmer in the direct path of the heater.
Placement tip: Mount or position the heater 5-8 feet from your rack, aimed at the barbell and your standing position. If you train in multiple spots (rack, bench, platform), a portable unit on a stand that you can reposition between exercises works best.
- Heats you and equipment directly — works even in uninsulated garages
- Energy-efficient compared to forced-air heaters
- No blowing air means no dust circulation or noise interference
- Safe around rubber flooring and gym equipment
- Reaches effective temperature in 10-15 minutes
- Only heats what it's pointed at — limited coverage area
- Won't raise overall garage temperature significantly
- Requires 15-amp dedicated circuit for 1,500-watt models
- Some models have exposed heating elements — keep away from bands and towels
Tier 2: Ceramic Space Heater ($40-80)
A ceramic heater like the Lasko 755320 or Vornado VH200 heats a 10x10-foot area to a tolerable temperature within 20-30 minutes. These heaters use a ceramic element and fan to blow warm air, which means they work best in smaller or partially insulated garages.
Run the heater on a timer or smart plug so it kicks on 20-30 minutes before your scheduled session. Walking into a garage that is 50 degrees instead of 30 degrees is a dramatically different experience.
Tier 3: Layer Up and Train (Free)
If heating is not in the budget, strategic layering is your fallback. This is not just "wear a hoodie." It is a deliberate system:
- Base layer: Moisture-wicking synthetic or merino wool (not cotton — cotton traps sweat and makes you colder). Brands like Under Armour ColdGear or Smartwool are purpose-built for this.
- Mid layer: A fleece pullover or training hoodie that allows full range of motion. Avoid bulky jackets that restrict overhead pressing or pull-ups.
- Hands: Lightweight touchscreen-compatible gloves for warm-up sets. Remove for working sets once your hands are warm.
- Feet: Merino wool socks (Darn Tough or Smartwool) in flat-soled training shoes. Wool insulates even when damp and prevents the cold-concrete-through-the-shoe problem.
- Head: A thin beanie retains significant body heat. Remove it once you start sweating.
Layering protocol: Start fully layered. Remove the mid layer after your dynamic warm-up. Remove the beanie once you are sweating. By your second or third working set, you should be down to your base layer.
The Cold Barbell Problem (And How to Solve It)
A bare steel barbell at 25 degrees Fahrenheit is genuinely painful to grip. Your hands lose heat through conduction faster than your body can replace it, and the knurling — designed to bite into your skin for grip — amplifies the cold contact. Here is how experienced cold-weather lifters handle it.
Method 1: Pre-Heat the Bar
Point your infrared or ceramic heater directly at the barbell for 15-20 minutes before your session. The steel absorbs heat and becomes tolerable to grip. If you use a timer for your heater, the bar warms alongside the room.
Method 2: Warm-Up Set Friction
Every rep generates friction between your hands and the knurling. By the end of 2-3 warm-up sets with an empty bar, the contact area is noticeably warmer. This is another reason to never skip warm-up sets in cold weather — the bar literally needs warming up too.
Method 3: Chalk as Insulation
Magnesium carbonate chalk creates a thin barrier between your skin and the cold steel. It will not make the bar feel warm, but it reduces the rate of heat loss from your palms and dramatically improves grip on a bar that might have invisible condensation.
Method 4: Strategic Glove Use
Wear lightweight lifting gloves (Mechanix Wear or similar) for warm-up sets only. Once the bar is warm and your hands have adapted, switch to bare hands with chalk for working sets. Gloves reduce tactile feedback and grip strength under heavy loads — you do not want them for a max deadlift attempt.
What About Bar Coatings?
If you are buying a barbell specifically for a cold garage, consider a cerakote or e-coat finish over bare steel or zinc. Coated bars feel slightly less cold to the touch because the ceramic or epoxy coating conducts heat more slowly than bare metal. It is a minor advantage, but noticeable at extreme temperatures. Check out our barbell maintenance guide for more on protecting your bar in harsh conditions.
Garage Insulation: The Biggest Return on Investment
Heating an uninsulated garage is like running the AC with every window open. Before you invest in heaters, address the insulation — especially the garage door, which accounts for 60-70% of heat loss in a typical garage.
Garage Door Insulation Kits ($80-150)
Pre-cut foam board insulation kits (such as the Reach Barrier or Owens Corning kits) press-fit into each panel of a standard garage door. Installation takes 1-2 hours with no tools beyond a utility knife. A quality kit adds R-8 to R-10 insulation value, which can raise your garage temperature by 10-20 degrees on a cold day — before you even turn on a heater.
Weatherstripping ($15-30)
Cold air infiltrates through gaps around the garage door edges, the bottom seal, and any side doors or windows. Replacing worn weatherstripping and adding a new bottom seal stops drafts that make a heated garage feel cold. This is a 30-minute project with adhesive-backed weatherstrip from any hardware store.
Wall and Ceiling Insulation ($200-800 for DIY)
If you are committed to year-round garage training, insulating the walls (fiberglass batts or rigid foam) and ceiling (blown-in or batts) transforms your garage into a space that a single heater can maintain at 55-60 degrees even in sub-zero conditions. This is a bigger project, but the payoff is enormous for anyone in USDA zones 5-7 where winters are prolonged.
Rubber Flooring as Thermal Insulation
Here is a detail most guides miss: your gym flooring acts as insulation between your feet and the cold concrete slab. A 3/4-inch rubber horse stall mat (R-value ~1.2 per inch) is measurably warmer underfoot than bare concrete. If you are training in a cold garage without rubber mats, you are losing heat through the floor constantly.
The Complete Cold-Weather Warm-Up Protocol
This is the most critical section of this guide. A proper warm-up in a cold garage is not optional — it is the difference between a productive session and a pulled hamstring that sidelines you for six weeks. Budget 15-20 minutes minimum when the garage is below 50 degrees.
Phase 1: Raise Core Temperature Indoors (3-5 Minutes)
Before you step into the garage, get your heart rate up inside your heated house. This is the single most effective cold-weather warm-up tactic because you start with warm muscles instead of trying to warm cold muscles in cold air.
- Jumping jacks: 2 minutes
- Bodyweight squats: 20 reps
- Push-ups: 10-15 reps
- High knees: 1 minute
You should have a light sweat by the time you walk into the garage.
Phase 2: Dynamic Full-Body Movement in the Garage (5-7 Minutes)
Move continuously through these exercises without rest. The goal is to increase blood flow to every joint and muscle group before you touch the barbell.
- High knees: 30 seconds
- Butt kicks: 30 seconds
- Arm circles (small to large, forward and backward): 20 each direction
- Hip circles: 10 each direction
- Leg swings (front-to-back): 10 each leg
- Leg swings (side-to-side): 10 each leg
- Inchworms: 5 reps
- Band pull-aparts (light resistance band): 20 reps
- Band dislocates: 10 reps
- Banded squats: 10 reps

Bodylastics PRO Series Resistance Band Set (6 Bands, 280 lbs)
Capacity
6 bands stackable to 280 lbs
Steel
Anti-Snap Natural Latex Tubing
Footprint
Handles, ankle straps, door anchor + carry bag
Price
$61.97
- 4.6 star rating on Amazon with 2,600+ reviews
- Patented anti-snap inner cord for safety
- 6 bands stackable up to 280 lbs total resistance
- Includes handles, ankle straps, and door anchor
- Lifetime replacement on bands
- Travel-friendly storage bag
- Resistance feels different than free weights
- Door anchor requires an inward-opening door
- Handles wear faster than the bands
Price and availability may change
Resistance bands are arguably the most important warm-up tool in a cold garage gym. They allow you to load joints progressively without gripping a freezing barbell, and they increase blood flow to shoulders, elbows, and hips faster than bodyweight movements alone.
Phase 3: Barbell-Specific Warm-Up (5-10 Minutes)
By now your body temperature is elevated and the bar has been near the heater for 15+ minutes. Work through these with the empty bar, focusing on full range of motion and controlled tempo:
- Empty bar Romanian deadlifts: 10 reps
- Empty bar overhead press: 10 reps
- Empty bar back squats: 10 reps (pause at the bottom for 2 seconds each)
- Empty bar bent-over rows: 10 reps
Then ramp to your working weight gradually:
- 25% of working weight: 2 sets of 5
- 50% of working weight: 1 set of 5
- 75% of working weight: 1 set of 3
- 90% of working weight: 1 set of 1-2 (for heavy days)
Cold-Weather Warm-Up Rules
- Never skip warm-up sets. Jumping to working weight with cold joints and stiff tendons is the fastest path to injury. This is non-negotiable.
- Keep layers on through warm-ups. Strip the mid-layer only once you are sweating. The hoodie traps heat and accelerates the warming process.
- Stay warm between sets. In cold air, your muscles cool down faster during rest periods. Keep moving — band pull-aparts, light stretching, or pacing. Keep hand warmers in your hoodie pocket.
- Extend rest periods slightly. Add 30-60 seconds to your normal rest periods. Your muscles need more time to recover when ambient temperature is pulling heat out of them.
Programming Adjustments for Cold-Weather Training
Smart lifters adjust their programming in winter — not because they are weaker, but because cold-weather physiology demands it.
Reduce Max-Effort Frequency
Save true one-rep max attempts for days when you can adequately heat the garage (or for warmer months). Working in the 3-5 rep range at 80-90% gives you 90% of the strength stimulus with a fraction of the injury risk. Cold tendons and ligaments are the weakest link, and they fail without warning.
Increase Volume on Warm-Up Sets
Instead of 2-3 warm-up sets, do 4-5. The extra sets cost 5 minutes but dramatically reduce injury risk. Think of them as insurance — cheap relative to the cost of a strained pec or pulled hamstring.
Prioritize Compound Movements Early
Start with the heaviest, most demanding lift while your body temperature is highest from the warm-up. If you are doing squats and accessory work, squat first. By the time you reach isolation movements, the reduced injury risk of lighter weights compensates for any cooling.
Consider a Conditioning Finisher
End your session with 5-10 minutes of higher-rep metabolic work — kettlebell swings, jump rope, or bodyweight circuits. This maintains body temperature through the end of the session and provides cardiovascular benefits. Read our home gym programming guide for more on structuring effective sessions.
Equipment Protection: Preventing Rust and Condensation Damage
Cold weather does not damage steel by itself. The enemy is condensation — when cold equipment meets warm, moist air (from your body heat and breath), water droplets form on metal surfaces. Over a winter season, unchecked condensation destroys knurling, corrodes plates, and seizes cable pulleys.
Daily Maintenance Protocol
- Wipe down the barbell with a dry rag after every session. Focus on the knurling where moisture hides.
- Apply 3-in-1 oil or Barbell Savior to the shaft weekly. A thin coat prevents oxidation between sessions.
- Brush the knurling with a nylon brush monthly to remove chalk buildup that traps moisture.
- Oil sleeve bearings monthly if you have a needle-bearing Olympic bar.
Environmental Controls
- Run a dehumidifier on days when temperature swings are large (cold night to warm day). This is when condensation is worst.
- Keep the garage door closed after training. Opening the door lets warm, humid outside air rush in and condense on cold equipment.
- Store barbells vertically in a bar holder. Horizontal storage on J-cups lets moisture pool on the bottom of the shaft.
For a comprehensive approach, check our full barbell maintenance guide — it covers seasonal protection in detail.
Gear Checklist for Cold-Weather Garage Gym Training
Equipment Checklist
15 itemsThe Mental Game: Showing Up When It Is Freezing
Physical preparation gets you through the session. Mental preparation gets you to the garage in the first place. Here are the psychological strategies that experienced cold-weather lifters use:
The 10-Minute Rule
Tell yourself you only have to train for 10 minutes. If you still want to quit after 10 minutes, you can. This lowers the activation energy of starting. In practice, once you are warm and moving, you almost never quit. The hardest part of a cold garage session is the first 3 minutes.
Pre-Session Ritual
Build a ritual that makes the transition automatic. Example: alarm goes off, coffee starts brewing, you put on your base layer and training shoes while the coffee drips, pour the thermos, walk to the garage, turn on the heater (which has already been running on a timer), press play on your playlist. By the time you are thinking about whether you want to train, you are already warming up.
Streak Tracking
Mark every winter session on a visible calendar — a physical one on the garage wall, not an app. Visual streaks create a psychological commitment that is disproportionately powerful. Missing one day is easy. Breaking a 23-day streak is hard.
Reframe the Cold
Commercial gym lifters train in climate-controlled comfort. You train in conditions that test your resolve. This is not a disadvantage — it is a selection filter. The cold-weather sessions are where you build the mental calluses that carry over to competition day, hard sets, and life in general. Embrace the suck.
Hot Drinks Between Sets
Keep a thermos of black coffee, green tea, or hot water with lemon on the rack shelf. A sip between sets warms your core, keeps your hands occupied, and turns a punishing session into something almost ritualistic. It sounds trivial. It is not.
Safety Considerations for Sub-Freezing Training
Cold-weather training introduces risks that do not exist in a climate-controlled gym. Take these seriously, especially if you train alone. Review our full garage gym safety guide for solo training protocols.
Know Your Limits
Below 20 degrees Fahrenheit, even with a heater running, injury risk rises substantially. At these extreme temperatures:
- Extend your warm-up to 25+ minutes
- Do not attempt any lift above 85% of your max
- Monitor your grip — if you cannot feel the knurling, you cannot control the bar
- Consider an indoor bodyweight or band session instead
Watch for Condensation on the Floor
Temperature swings cause moisture to form on concrete and rubber flooring. A wet garage floor under a loaded barbell is a slip hazard. Check the floor before every session and mop up any condensation.
Carbon Monoxide Awareness
Never use propane heaters, kerosene heaters, or any combustion-based heat source in a closed garage. Carbon monoxide is odorless and lethal. Electric infrared and ceramic heaters are the only safe options for an enclosed garage gym. If you must use a propane heater, the garage door must be partially open — which defeats the purpose of heating.
Keep a Phone Accessible
Training alone in a cold garage introduces unique risks. Keep your phone within arm's reach (not across the garage) in case you need to call for help. A phone mount on the rack upright works perfectly and doubles as a timer/music stand.
Frequently Asked Questions
At what temperature is it unsafe to train in a garage gym?
Will cold weather damage my gym equipment?
Should I use lifting gloves in a cold garage gym?
How long should I run a space heater before training in a cold garage?
Is it better to train in the morning or evening during winter?
What is the best type of heater for a garage gym?
How do I prevent my barbell from rusting in a cold garage?
Can I do cardio in a cold garage gym to warm up?
Additional Resources
The Bottom Line
Winter garage gym training is not about suffering through miserable conditions. It is about engineering your environment and your approach so that cold weather becomes a minor inconvenience instead of a training-ending obstacle.
The essentials are straightforward: insulate the garage door ($100), add an infrared heater ($130), pre-heat the space on a timer, extend your warm-up to 15-20 minutes, protect your equipment from condensation, and dress in moisture-wicking layers. Total investment is under $300, and the return is twelve months of uninterrupted training instead of three or four months of excuses.
The lifters who train through winter are always ahead by spring. Not just physically — though they are — but mentally. They have proven to themselves, session after session, that comfort is optional and consistency is not. That is the real benefit of a cold garage gym.
Related Content
Marcus Reid
Powerlifter and mechanical engineer who has been building and breaking home gym equipment for 15 years.
Read full bioMore in Guides
Strength vs Hypertrophy: How to Program for Your Goals (2026)
The definitive guide to programming for strength vs size in your home gym. Rep ranges, volume, intensity, and complete programs for both goals.
The Complete Home Gym Warm-Up Guide (2026)
Stop skipping your warm-up. Complete warm-up protocols for every training style, plus the equipment that makes preparation effortless at home.
Home Gym Deload Guide: When and How to Back Off (2026)
Learn when and how to deload in your home gym. Science-backed protocols, recovery strategies, and signs you need a rest week.