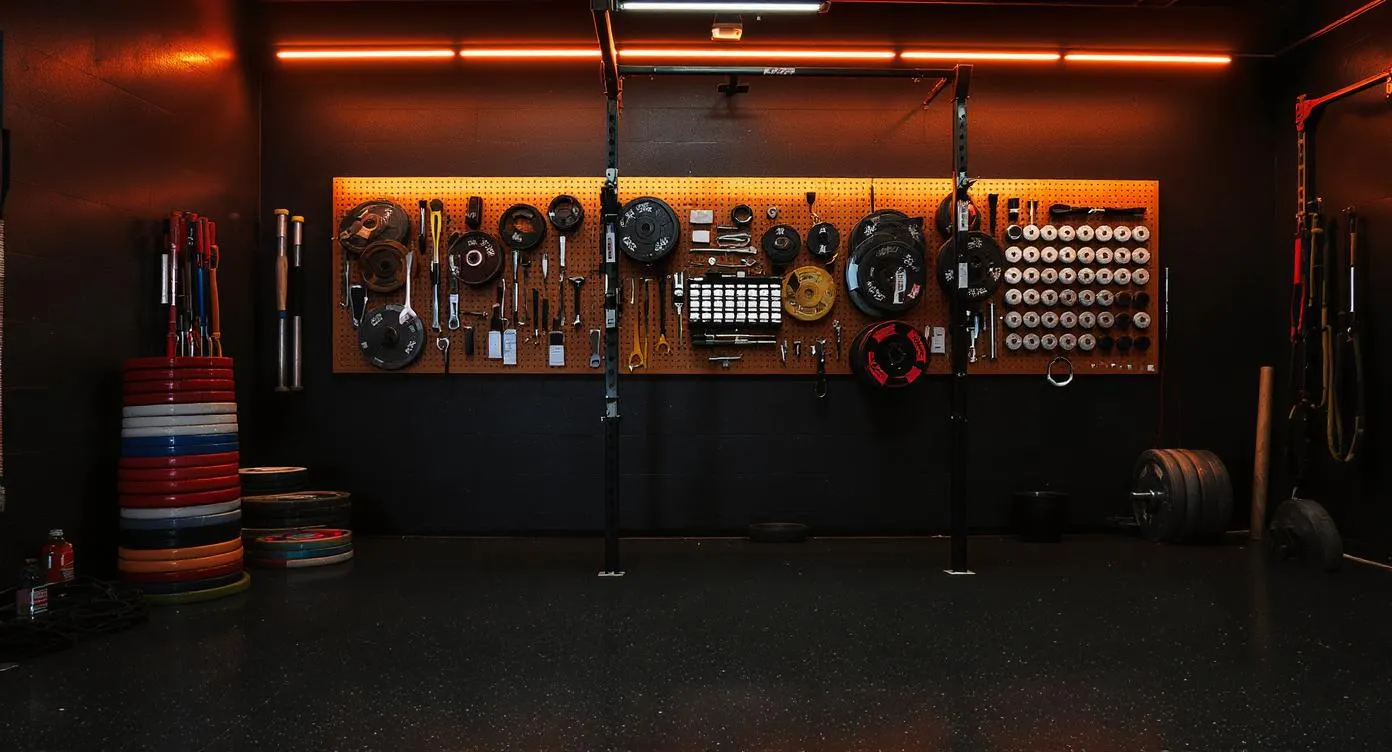
How to Organize Your Garage Gym (Layout & Storage Guide)
How to lay out, organize, and store equipment in your garage gym. Space planning, wall storage, plate organization, and keeping your gym clean.
A disorganized garage gym does not just look bad — it actively sabotages your training. Plates scattered across the floor become trip hazards during heavy carries. Barbells leaning against walls roll into shins at the worst moment. Bands, collars, and chalk buried under piles of gear turn a quick warm-up into a five-minute scavenger hunt. Over time, that friction compounds. You skip sessions. You lose momentum. The garage becomes a storage unit with a squat rack in it.
The fix is not complicated. It requires a weekend afternoon, a measuring tape, a handful of inexpensive wall-mounted storage solutions, and a disciplined system for putting things back where they belong. This guide walks through every step: planning your floor layout, choosing the right storage products, building daily habits that keep the gym clean, and avoiding the mistakes that turn organized spaces back into chaos.
If you are building a garage gym from scratch, start with our complete guide to building a garage gym first — then come back here once your equipment arrives.
Step 1: Measure Everything Before You Move Anything
Organization starts with measurements, not motivation. Before you push a single piece of equipment, grab a tape measure and document these numbers:
- Total garage dimensions (length x width x height). Most single-car garages measure roughly 12 x 20 feet (240 sq ft). Two-car garages run about 20 x 20 feet (400 sq ft).
- Ceiling height. Standard garages have 8-foot (96-inch) ceilings. Measure at the lowest point — garage door tracks, light fixtures, and support beams all reduce usable overhead clearance.
- Garage door track clearance. Overhead doors need 4 to 6 inches of clearance on each side of the track. Equipment placed too close prevents the door from opening fully.
- Electrical outlet locations. Fans, lights, air bikes with consoles, and phone chargers all need power. Map every outlet before you commit to a layout.
- Windows and vents. Never block airflow. Your ventilation strategy depends on knowing where air enters and exits. See our garage gym ventilation guide for the full breakdown.
Write these numbers down or sketch them on graph paper (1 square = 1 foot works well). This sketch becomes your layout blueprint.
Step 2: Floor Layout Rules for Maximum Training Space
The way you arrange equipment determines whether your gym feels like a professional training facility or a cluttered storage closet. Follow these rules in order of priority.
Rule 1: Power Rack Goes Against a Wall
Your power rack is the largest, heaviest, and most-used piece in the gym. Place it with the back uprights 2 to 3 inches from the wall. This maximizes open floor space in front for deadlifts, barbell rows, lunges, and conditioning work.
Critical detail: Leave at least 4 feet of clearance on each side of the rack for plate loading. A loaded Olympic barbell spans roughly 7 feet 2 inches. If your rack is in a corner, you need 4 feet of open space on the exposed side to slide plates on and off. Many lifters discover this problem only after bolting the rack down.
Rule 2: Create Three Distinct Zones
The most functional garage gyms divide floor space into three zones:
- Strength zone — Power rack, barbell, bench, plate storage. This is the core of the gym and gets the most square footage (roughly 8 x 10 feet minimum).
- Conditioning zone — Air bike, rower, jump rope area. Tuck this into a corner since cardio equipment needs less surrounding clearance.
- Mobility zone — A clear 6 x 6 foot area for foam rolling, stretching, and bodyweight warm-ups. If every inch of floor is covered with equipment, you will skip warm-ups — and that leads to injuries.
Rule 3: Keep a Clear Path to the Garage Door
Never block the garage door with equipment. You need to open it for ventilation on hot days, receiving deliveries, and emergency access. Maintain a minimum 3-foot-wide walking path from the house entry door to the garage door at all times.
Rule 4: Face a Mirror, Not a Blank Wall
Positioning your rack so you stare at a blank garage door during squats is a motivation killer. Mount a mirror on the wall you face during primary lifts. A 48 x 24 inch gym mirror costs under $90, and two or three of them create enough coverage for full-body form checks on squats, deadlifts, and overhead presses.

Fab Glass and Mirror Large Gym Mirror for Home Gym 48x32 - Full Length HD Tempered Glass Wall Panel - Professional Workout Display with Safety Backing - 1/4 Inch Commercial Grade
Capacity
N/A — wall-mounted mirror
Steel
1/4" Tempered Glass / Safety Backing
Footprint
48" x 32" (mount 2-3 for full wall)
Price
$119.94
- 4.4+ star rating on Amazon
- 6mm tempered glass — shatter-resistant
- Polished edges for safe handling
- 48x24 size — mount 2-3 for full wall coverage
- Form check on squats, deadlifts, and presses
- Best budget gym mirror on Amazon
- Mounting hardware not included
- Heavy — need two people to install
- Not truly shatterproof (tempered, not acrylic)
Price and availability may change
Mount mirrors at a height where the bottom edge sits 16 to 20 inches above the floor. Use heavy-duty mirror clips rated for the weight — never adhesive alone. Check our best gym mirrors guide for tested options.
Rule 5: Cardio Equipment Goes in the Corner
Bikes, rowers, and treadmills need less surrounding clearance than barbell movements. A Concept2 RowErg occupies a 9 x 2 foot footprint during use, and most air bikes fit in a 4 x 2 foot area. Corners are perfect for these machines because you do not need access from all sides.
Step 3: Wall Storage Solutions (The Vertical Advantage)
The number one mistake in garage gym organization is ignoring vertical space. Your walls can hold hundreds of pounds of equipment that would otherwise clutter the floor. Here are the four wall storage categories every organized gym needs.
Pegboard System ($30-60)
A 4 x 8 foot sheet of pegboard with assorted hooks is the cheapest and most versatile wall storage solution available. Mount it to wall studs (not drywall alone) using 1-inch standoff spacers so hooks can insert from behind.
What to hang on pegboard:
- Resistance bands (sorted by tension)
- Jump ropes
- Barbell collars
- Wrist wraps and lifting straps
- Chalk bags
- Ab wheel
- Gymnastic rings (when not in use)
- Timer or stopwatch
Pro tip: Use a label maker or permanent marker on the pegboard behind each hook location. When every item has a labeled silhouette, you will notice immediately when something is missing.
Wall-Mounted Barbell Holders ($25-50)
Olympic barbells should never lean against walls. They roll, fall, and damage both themselves and whatever they hit. Wall-mounted barbell holders come in two styles:
- Horizontal holders — Gun rack style. The barbell rests in two J-hooks mounted 36 to 42 inches apart. Best for garages with long, uninterrupted wall space.
- Vertical holders — The barbell stands upright in a sleeve-down cradle. Takes up less wall width but requires full ceiling height clearance (a 7-foot bar needs at least 86 inches of vertical space).
Mount holders into wall studs with lag bolts — never drywall anchors. A loaded barbell sleeve weighs 10 to 20 pounds even without plates, and the leverage on a horizontal holder is significant.
Shelf Unit for Accessories ($40-100)
A basic 5-tier metal shelf unit (such as the Amazon Basics 5-Shelf or a Muscle Rack from Home Depot) stores everything that does not hang well:
- Foam rollers and massage tools
- Lifting belts
- Knee sleeves
- Chalk buckets
- Water bottles and towels
- First aid kit
- Bluetooth speaker
Anchor the shelf to the wall with an anti-tip bracket. Loaded shelves in a garage (where vibration from deadlifts travels through the floor) can walk forward over time without anchoring.
Plate Storage: Tree vs. Rack-Mounted Pegs
Weight plates are the heaviest items in your gym, and how you store them defines whether your floor stays clear or becomes an obstacle course.
Option A: Freestanding Plate Tree

Titan Fitness Portable Weight Tree for Olympic Plate and Barbell Storage, Weight Plate Storage with 1,000 LB Capacity, Weight Tree Rack with Locking Wheels, Weight Plate Tree with Barbell Storage
Capacity
1,000 lbs plate storage
Steel
Powder-Coated Steel / 6 Pegs
Footprint
22" L x 22" W x 36" H
Price
$239.99
- 4.5+ star rating on Amazon
- Holds 850 lbs of Olympic plates
- 6 weight pegs + 2 barbell holders
- Compact footprint keeps gym organized
- Powder-coated steel resists rust
- Best value plate storage on Amazon
- Assembly required (30 minutes)
- Pegs are slightly short for large plate stacks
- Wheels not included — stationary unit
Price and availability may change
The Titan Fitness Olympic Plate Tree holds 850 lbs across 6 pegs and includes 2 barbell holders — all in a 22 x 22 inch footprint. At under $90, it is the best value plate storage solution on the market. Place it within arm's reach of your power rack so you never have to carry plates across the gym.
Option B: Rack-Mounted Weight Horns
If your power rack has standard 2 x 2 inch or 3 x 3 inch uprights with accessory holes, bolt-on weight horn pegs ($15 to $30 per pair) let you store plates directly on the rack. This eliminates the need for a separate plate tree entirely and keeps plates exactly where you load them.
Plate organization rule: Always store plates by weight, with the most-used sizes (45s and 25s) at the most accessible height. Never stack plates flat on the floor — they become trip hazards, they are difficult to grab mid-workout, and they trap moisture underneath that can corrode both plates and flooring.
Step 4: Dumbbell and Kettlebell Storage
Dumbbells left on the floor are ankle-breakers waiting to happen. Even a single hex dumbbell sitting in a walkway can cause a serious injury when you are carrying a loaded barbell to the rack.

YES4ALL Dumbbell Rack Stand Only, 5 Tier A Frame Weight Rack for Dumbbells
Capacity
500 lbs total
Steel
Powder-Coated Steel
Footprint
25" L x 13" W x 30" H
Price
$38.45
- 4.6+ star rating on Amazon
- Holds up to 5 pairs of dumbbells
- Compact A-frame design saves floor space
- 500 lb total weight capacity
- Powder-coated steel resists rust
- Easy 20-minute assembly
- Only fits hex dumbbells (not adjustable)
- Wobbles slightly when fully loaded
- Rubber feet can mark garage floors
Price and availability may change
The Yes4All 5-Tier A-Frame Dumbbell Rack holds 5 pairs of hex dumbbells in a compact 25 x 13 inch footprint. At $40, it pays for itself the first time you do not trip over a stray 35-pound dumbbell.
For kettlebells, a simple tiered shelf or a dedicated kettlebell rack keeps them organized. If you only own two or three kettlebells, storing them directly on the floor against a wall (in a line, not a pile) is acceptable — just ensure they are out of any walking path.
- Plate tree + dumbbell rack together cost under $130 and free up 15+ sq ft of floor space
- Wall-mounted barbell holders eliminate the most common garage gym trip hazard
- Pegboard systems cost $30-60 and organize dozens of small accessories in one place
- Labeled storage positions make it obvious when something is out of place
- Vertical storage uses otherwise wasted wall space above head height
- Wall-mounted storage requires drilling into studs — renters may need landlord permission
- Plate trees and dumbbell racks add to the total gym budget (budget $130-200 for full storage)
- Heavy wall-mounted items (barbells, plate pegs) need lag bolts and proper stud mounting — drywall anchors alone will fail
- Organizing requires discipline — a perfect system only works if you use it every session
Step 5: The Daily Reset Habit (5 Minutes That Change Everything)
The best storage products in the world mean nothing if you do not use them consistently. The single most important organization practice is the 5-minute post-workout reset:
- Re-rack all plates onto the plate tree or weight horns, sorted by size.
- Return the barbell to wall holders or rack hooks.
- Put dumbbells and kettlebells back on their rack.
- Hang bands, ropes, and accessories on the pegboard.
- Wipe down the bench and any equipment that contacted skin.
- Sweep the floor with a quick pass (chalk dust and rubber debris accumulate fast).
This takes 5 minutes at most. The lifters who maintain organized gyms for years are not more disciplined than everyone else — they have simply automated this habit until it feels wrong to leave without doing it.
Step 6: Seasonal Maintenance and Deep Cleaning
Beyond daily resets, schedule a quarterly deep maintenance session (30 to 60 minutes) to keep your garage gym in peak condition:
Quarterly Tasks
- Inspect all wall mounts — check lag bolts for loosening. Vibration from dropped weights gradually backs out fasteners.
- Clean rubber flooring — mop stall mats with warm water and a mild detergent. Avoid harsh chemicals that degrade rubber. For more detail, read our equipment cleaning and maintenance guide.
- Oil barbells — wipe the shaft with 3-in-1 oil and scrub the knurling with a nylon brush to remove chalk buildup and prevent rust.
- Check for rust — Garage environments with temperature swings create condensation. Inspect plate edges, barbell sleeves, and rack bolts for oxidation. Treat early spots with a wire brush and rust-inhibiting spray.
- Reorganize accessories — Items migrate from their assigned spots over time. Reset everything to its designated position.
- Test safety equipment — Confirm that J-cups, safety arms, and spotter pins are secure and functioning. Replace any cracked UHMW liners.
Humidity and Temperature Control
Garages are not climate-controlled spaces, and that creates unique challenges for gym equipment. In humid climates (Gulf Coast, Southeast, Pacific Northwest), a small dehumidifier ($40 to $80) running during the wettest months prevents rust on barbells, plates, and rack hardware. In hot climates, a box fan or wall-mounted fan keeps air circulating and prevents that stale, musty smell that builds up when a garage stays closed.
In winter, metal equipment in an unheated garage drops to ambient temperature. Cold steel barbells are uncomfortable and can cause grip issues. A small space heater running 15 minutes before your session takes the edge off. See our winter garage gym training guide for cold-weather strategies.
Step 7: Common Organization Mistakes (And How to Fix Them)
Mistake 1: Placing the Rack in the Center of the Garage
A centered rack wastes space on all four sides. Unless you have a dedicated gym building with 500+ square feet, push the rack against a wall. You gain usable floor space on three sides instead of losing it to dead zones you will never use.
Mistake 2: Forgetting About Barbell Loading Space
A loaded Olympic barbell is over 7 feet long. If your rack is against a side wall, you need at least 4 feet of clearance on the open side to slide plates on and off. Many lifters position their rack and then realize they can only load one side of the bar. Measure before you bolt anything down.
Mistake 3: Placing the Bench Too Far From the Rack
Your flat or adjustable bench should slide into the rack without carrying it across the room. If the bench lives more than two steps from the rack uprights, you will subconsciously dread bench day. Keep it within arm's reach — or better yet, store it inside the rack footprint between sessions.
Mistake 4: Ignoring Lighting When Choosing Layout
Positioning your squat rack directly under the only light fixture means you cast your own shadow during lifts. Map your lighting zones before committing to a layout. Add LED shop lights ($20 to $40 each) directly above your primary lifting positions. Our garage gym lighting guide covers placement, lumens, and color temperature in detail.
Mistake 5: No Dedicated Warm-Up Area
Every functional gym needs a clear 6 x 6 foot area for foam rolling, stretching, and bodyweight warm-ups. If every square inch of floor is covered with equipment, you will skip warm-ups — and skipped warm-ups lead to pulled muscles and tweaked joints. Even a corner with a rolled-up yoga mat works, as long as the floor space stays clear.
Mistake 6: Stacking Equipment Against the Car Wall
If you still park a vehicle in half the garage, keep all equipment on the opposite side with a minimum 2-foot buffer zone. One misplaced dumbbell roll can dent a car door. One barbell leaning against a wall can slide and crack a tail light. The $0 cost of maintaining a buffer zone saves hundreds in auto body repairs.
Mistake 7: Buying Storage After the Gym is Already Cluttered
This is backwards. Order your plate tree, dumbbell rack, pegboard, and barbell holders at the same time you order your equipment — not three months later when frustration peaks. Storage is not optional. It is foundational.
The Organization Checklist
Use this checklist to audit your current setup or plan a new one from scratch:
Equipment Checklist
14 itemsTotal organization budget: $200 to $500 depending on how many storage solutions you need. That is less than the cost of a single specialty barbell — and it makes your entire gym more functional.
Frequently Asked Questions
How much floor space do I actually need for a functional garage gym?
Should I use wall-mounted or freestanding storage for plates?
How do I keep my garage gym from smelling bad?
Can I still park my car in the garage with a gym setup?
What is the best way to organize weight plates?
How often should I deep-clean and maintain my garage gym?
What is the cheapest way to organize a garage gym?
How do I prevent rust on equipment in a humid garage?
Additional Resources
The Bottom Line
Garage gym organization is not a luxury — it is a force multiplier. Two hours of setup and $200 to $500 in wall storage products transform a cluttered garage into a space that feels professional, stays safe, and makes you want to train. The plate tree, pegboard, barbell holders, and dumbbell rack pay for themselves in saved time, reduced injury risk, and preserved motivation.
But the products are only half the equation. The daily 5-minute reset habit is what separates gyms that stay organized for years from gyms that fall apart in weeks. Build the system, buy the storage, and commit to the habit. Your garage gym will reward you with decades of consistent, frustration-free training.
Related Content
- How to Buy Used Gym Equipment (Without Getting Ripped Off)
- Garage Gym Electrical & Power Setup Guide (2026)
- The Complete Guide to Garage Gym Flooring (2026)
- Garage Gym Lighting Guide: Best Lights for Training (2026)
- 12 Garage Gym Mistakes That Waste Your Money (And How to Avoid Them)
- How to Clean & Maintain Home Gym Equipment
Derek Walsh
Strongman competitor and former commercial gym equipment salesman. Knows what survives heavy daily use.
Read full bioMore in Guides
Strength vs Hypertrophy: How to Program for Your Goals (2026)
The definitive guide to programming for strength vs size in your home gym. Rep ranges, volume, intensity, and complete programs for both goals.
The Complete Home Gym Warm-Up Guide (2026)
Stop skipping your warm-up. Complete warm-up protocols for every training style, plus the equipment that makes preparation effortless at home.
Home Gym Deload Guide: When and How to Back Off (2026)
Learn when and how to deload in your home gym. Science-backed protocols, recovery strategies, and signs you need a rest week.