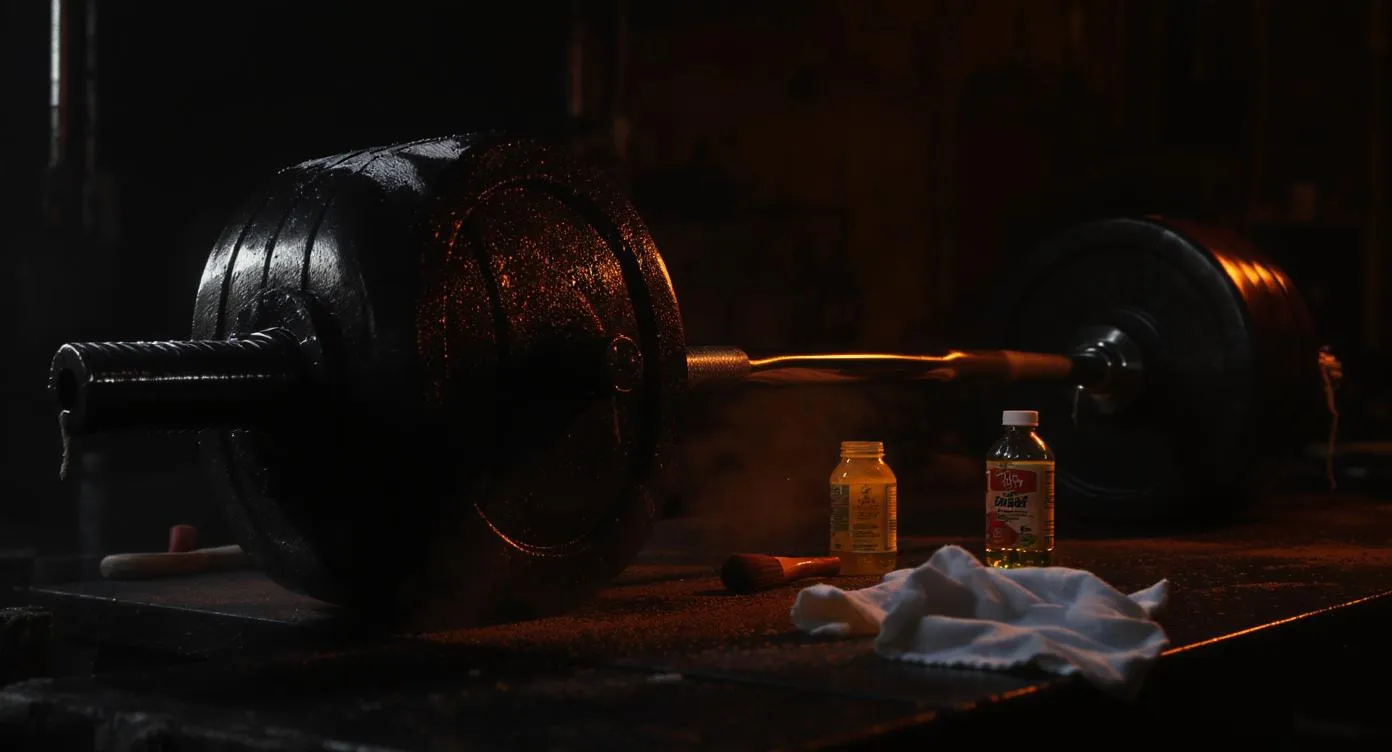
How to Clean & Maintain Home Gym Equipment (2026 Guide)
Step-by-step cleaning and maintenance guide for barbells, plates, racks, benches, and cardio equipment. Make your gear last decades.
A home gym is one of the best investments a lifter can make, but that investment only pays off if the equipment lasts. A Rogue Ohio Bar left uncared-for in a humid Texas garage will develop deep pitting inside of six months. A Concept2 RowErg with a neglected chain will seize up after a year. A vinyl bench pad wiped with alcohol-based cleaners will crack within two seasons. The difference between equipment that performs flawlessly for 20 years and equipment that falls apart in 2 is not build quality alone — it is maintenance.
This guide covers a complete cleaning and maintenance protocol for every major category of home gym equipment: barbells, power racks, weight plates, benches, cardio machines, cables, accessories, and flooring. You will learn the exact products to use, the products to avoid, weekly and monthly schedules, rust remediation techniques, and climate control strategies that protect your entire gym year-round.
If you are still building out your space, check our complete guide to building a garage gym before diving in.
Why Cleaning and Maintenance Matter More Than You Think
Most lifters understand that equipment maintenance is "a good idea." Few understand just how consequential neglect actually is.
Corrosion accelerates exponentially. Rust is not linear. A small spot of surface oxidation traps moisture against the surrounding steel, which causes the rust to spread outward and downward. What starts as a cosmetic blemish on a barbell shaft becomes a structural problem inside the knurling within weeks if left untreated in a humid environment.
Sweat is actively corrosive. Human perspiration contains sodium chloride, lactic acid, urea, and ammonia. This cocktail attacks bare steel, chrome plating, powder coat finishes, vinyl pads, and rubber surfaces. Every training session deposits these compounds onto your equipment. Without regular cleaning, they go to work destroying your gear 24 hours a day.
Hygiene concerns are real. A bench pad that never gets wiped down becomes a colony of Staphylococcus, Streptococcus, and fungal organisms. This is not hypothetical. Studies on commercial gym equipment have found bacterial loads exceeding those on public toilet seats. Your home gym is no exception if you skip cleaning.
Safety is at stake. Corroded bolts on a power rack lose tensile strength. A seized barbell sleeve creates dangerous torque on your wrists during cleans and snatches. A frayed treadmill belt can catch your foot and cause a fall. Maintenance is not vanity — it is injury prevention. For a deeper dive into training safely, see our garage gym safety guide.
Resale value drops fast. Well-maintained gym equipment sells for 65 to 80 percent of its new price on the secondary market. Rusty, neglected equipment sells for 20 to 30 percent — if it sells at all. The 15 minutes you spend per week on maintenance protects hundreds or thousands of dollars in resale value.

TriggerPoint Grid 1.0 Foam Roller - 13" Multi-Density Massage Roller for Deep Tissue & Muscle Recovery - Relieves Tight, Sore Muscles & Kinks, Improves Mobility & Circulation - Targets Key Body Parts
Capacity
500 lbs
Steel
EVA Foam / Rigid Hollow Core
Footprint
13" x 5.5" diameter
Price
$32.92
- 4.7+ star rating on Amazon with 20,000+ reviews
- Multi-density GRID surface targets muscles differently
- Rigid hollow core won't flatten over time
- 500 lb weight capacity — built to last
- Compact 13" size for travel
- The gold standard in foam rollers
- Pricier than basic smooth rollers
- 13 inches too short for full-back rolling
- Firm surface may be intense for beginners
Price and availability may change
Essential Cleaning Supplies for Your Home Gym
Before establishing a routine, stock these supplies. Total cost is under $40 and everything lasts months.
Gym Cleaning Supply Kit
8 itemsWhat NOT to buy: Avoid bleach, ammonia-based cleaners, Lysol wipes, alcohol-based disinfectant wipes, WD-40 (for barbells — it is a solvent, not a lubricant), and any abrasive cleaning pads. These products damage finishes, degrade rubber, crack vinyl, and strip protective coatings.
The 15-Minute Weekly Maintenance Routine
Consistency beats intensity when it comes to equipment care. A short weekly routine prevents 90 percent of all equipment problems. Perform these steps once per week, ideally after your last training session of the week.
Step 1 — Wipe all high-touch surfaces (3 minutes). Use a damp microfiber cloth (water only) to wipe down every surface your hands, back, or body contacts during training. This includes barbell shafts, dumbbell handles, bench pads, J-cup contact points, pull-up bar grips, and cable attachment handles. You are removing sweat, chalk residue, and skin oils before they can cause damage.
Step 2 — Brush the barbell knurling (3 minutes). Use a nylon bristle brush and scrub the full length of the knurling on every barbell you used that week. Brush in the direction of the knurling pattern. Chalk and sweat pack into the grooves and hold moisture against the steel. This single habit prevents more rust than any other maintenance task.
Step 3 — Quick bolt inspection (2 minutes). Walk around your power rack, bench, and any other bolted equipment. Visually check for any bolts that look loose or have backed out. Give any suspect bolts a quick snug with the appropriate wrench. Do not overtighten — snug plus a quarter turn is sufficient for most rack hardware.
Step 4 — Sweep the gym floor (4 minutes). Grit, dust, chalk powder, and small debris accumulate on rubber flooring throughout the week. This grit gets ground into rubber mats (damaging them), sticks to the bottom of plates (scratching paint), and works its way into moving parts on cardio equipment. A quick sweep eliminates all of this.
Step 5 — Spot check for rust (3 minutes). Visually inspect your barbell shaft, plate edges, rack uprights, and any exposed steel surfaces for the first signs of oxidation. Early rust appears as faint orange or brown discoloration. If caught at this stage, a nylon brush and a few drops of 3-in-1 oil will remove it completely. Wait a month, and you may need mineral spirits and a brass brush.
Barbell Cleaning and Maintenance Protocol
Your barbell is likely the single most important piece of equipment in your gym, and it is also the most vulnerable to damage from neglect. A Rogue Ohio Power Bar, REP Deep Knurl Power Bar, or Synergee Games Barbell will last decades with proper care. For the full deep dive, read our barbell maintenance guide.
After Every Session
- Wipe down the shaft with a dry microfiber cloth to remove sweat
- Brush the knurling with a nylon brush — 10 to 15 passes per section
- Rack the bar horizontally on J-cups or a barbell holder (never store vertically long-term)
Monthly Deep Clean
- Remove the bar from storage and lay it across J-cups or sawhorses
- Brush the entire shaft thoroughly with a nylon brush
- Apply 6 to 8 drops of 3-in-1 oil along the shaft
- Spread the oil with a clean microfiber cloth, working it into the knurling
- Wipe away all excess — the bar should feel dry to the touch, not slippery
- Apply 2 to 3 drops of oil into each sleeve seam (where the sleeve meets the shaft)
- Spin the sleeves several times to distribute oil into the bushings or bearings
- Wipe down the sleeves with a clean cloth
Quarterly Rust Remediation (If Needed)
If you discover rust beyond what a nylon brush can handle:
- Apply mineral spirits to a shop towel and rub the affected area
- For stubborn rust, use a brass wire brush with mineral spirits (never steel wool on a coated bar)
- Wipe clean with a dry shop towel
- Apply a thin coat of 3-in-1 oil and spread evenly
- For severely pitted bars, consider Evapo-Rust soak for the affected section
Finish-Specific Considerations
Bare steel bars (e.g., Rogue Bare Steel Ohio): Most vulnerable to rust. Oil monthly without exception. Consider bi-weekly oiling in humid climates.
Black oxide bars: Moderate rust resistance. The finish wears away over time, especially in the knurling. Oil monthly.
Zinc-coated bars: Good corrosion resistance. Oil monthly. The zinc layer is sacrificial — it corrodes instead of the steel underneath.
Cerakote bars: Excellent corrosion resistance on the shaft, but the coating can chip with impact. Clean with a damp cloth. Oil the sleeves but the shaft generally does not need oiling unless the coating is damaged.
Stainless steel bars: Best corrosion resistance. Requires minimal maintenance — occasional wiping and sleeve oiling is sufficient. Premium price but nearly maintenance-free.
- 3-in-1 oil is cheap ($5) and available everywhere — hardware stores, Amazon
- A single bottle lasts 6+ months of regular barbell maintenance
- Nylon brushes remove chalk and light rust without damaging any bar finish
- Monthly oiling takes under 5 minutes per barbell
- Proper maintenance extends barbell life from 3-5 years to 15-25+ years
- Well-maintained barbells retain 70%+ resale value
- Bare steel bars require the most frequent attention — bi-weekly in humid climates
- Mineral spirits produce fumes — always use in a well-ventilated space
- Over-oiling creates a slippery shaft that compromises grip safety
- Neglected rust that reaches the bearing assembly requires professional service
- Cerakote touch-up for chips is difficult to match and apply at home
Power Rack Cleaning and Inspection
A quality power rack like the ULTRA FUEGO Power Cage, Mikolo F4, or Sportsroyals Power Cage is built from heavy-gauge steel with a powder coat finish. These racks are durable, but they are not invincible. Bolted connections loosen over time from vibration. Powder coat chips expose bare steel to moisture. J-cup liners wear down and start scratching your barbell.
Monthly Protocol
- Tighten all visible bolts using the correct wrench size. Start at the top and work down systematically so you do not miss any. Do not overtighten — you can crack weld joints or strip bolt holes by going too far. Snug plus a quarter turn is the standard.
- Inspect J-cups and safety bars. Check UHMW plastic liners for cracks, deep gouges, or excessive wear. Replace liners when the plastic is worn through to metal — a $10 replacement protects your $300 barbell from scratches.
- Check welds visually. Look at all weld points, especially where uprights meet the base and where pull-up bars attach to the frame. Weld cracks are rare on quality racks but catastrophic if missed under heavy load.
- Touch up powder coat scratches. Any scratch that exposes bare steel is a rust entry point. Clean the area with a damp cloth, let it dry, and apply a thin coat of rust-inhibiting spray paint (Rust-Oleum works well). Match the color as closely as possible.
- Clean all surfaces with a damp microfiber cloth. Pay attention to the inside of the uprights where chalk dust and grit accumulate.
Annual Deep Maintenance
- Re-tighten every bolt on the rack, including those hidden behind plates or accessories
- Replace all J-cup and safety bar UHMW liners regardless of visible wear
- Inspect the base for any signs of shifting or instability
- Apply fresh touch-up paint to any chips or scratches accumulated over the year
- If your rack is bolted to a platform, check the lag bolts for tightness
Weight Plate Care by Material Type
Cast Iron Plates
Cast iron plates are essentially indestructible under normal use, but the paint finish is their weak point. Chipped paint exposes raw iron to moisture, and iron rusts aggressively.
- Monthly: Wipe down with a dry cloth to remove chalk and dust
- As needed: Touch up paint chips with rust-inhibiting spray paint. Clean the area first, let it dry, apply one thin coat, let it cure 24 hours before use
- Storage: Store on a vertical plate tree or weight storage pegs. Stacking plates flat causes paint-to-paint friction damage
Rubber-Coated and Bumper Plates
Rubber plates from brands like Schwinn Airdyne, Rep Fitness, or budget options like Yes4All are low-maintenance but not zero-maintenance.
- Monthly: Wipe down with a damp cloth (water only — no soap, no solvents)
- Inspect steel inserts: On bumper plates, the steel hub can begin separating from the rubber over years of drop use. Visible gaps or wobble between the steel insert and rubber mean the plate should be retired from drop use
- UV protection: Never store rubber plates in direct sunlight for extended periods. Ultraviolet radiation degrades rubber compounds, causing cracking and brittleness. If your garage has windows, position plate storage away from direct sun exposure
Bench Maintenance: Pads, Frames, and Adjustment Mechanisms
Vinyl and Synthetic Leather Pads
Bench pads take more direct skin contact than any other piece of equipment. Sweat, body oils, and bacteria accumulate on the surface after every session.
- After every session: Wipe the entire pad surface with a damp microfiber cloth
- Weekly: Clean with a solution of mild dish soap (3 drops) in a spray bottle of warm water. Spray onto the cloth, not directly onto the pad. Wipe down, then follow with a clean damp cloth to remove soap residue
- Monthly: Inspect for tears, cracks, or delamination. Small tears can be repaired with a vinyl repair kit ($8 to $12) before they spread. Once a tear reaches 2 inches or more, pad replacement is usually more practical
- Never use: Alcohol-based cleaners, bleach, ammonia, or antibacterial wipes. These chemicals dry out vinyl and synthetic leather, causing premature cracking. This is the number one reason bench pads fail early
Frame and Adjustment Hardware
- Monthly: Check all bolts on adjustable benches, especially the pivot points for incline and decline positions. These experience significant stress and loosen faster than static connections
- Quarterly: Lubricate the adjustment mechanism (pop-pin, ladder, or lever system) with 2 to 3 drops of 3-in-1 oil. Wipe away excess immediately
- Annually: Inspect welds on the frame. Check the base feet or rubber pads for wear that could allow the bench to slide during use
Cardio Equipment Maintenance
Cardio machines have moving parts, electronics, and complex mechanisms that demand more attention than static strength equipment.
Treadmill Maintenance
Treadmills are the most maintenance-intensive piece of cardio equipment in any home gym.
- Weekly: Wipe down the console, handrails, and belt surface with a damp cloth. Vacuum or sweep around and under the unit to prevent dust accumulation in the motor housing
- Monthly: Vacuum underneath the deck. Dust and debris get pulled into the motor housing by the cooling fan and cause overheating. This is the number one cause of treadmill motor failure
- Every 3 to 6 months: Lubricate the belt per manufacturer specifications. Most residential treadmills use 100% silicone lubricant applied between the belt and deck. Lift the belt edge, apply lubricant in a zigzag pattern, and run the belt at low speed for 2 minutes to distribute
- Annually: Check belt tension and alignment. A properly tensioned belt should lift 2 to 3 inches off the deck at the center. A misaligned belt drifts to one side and wears unevenly
Rowing Machine Maintenance (Concept2 RowErg, Water Rowers)
- After every session: Wipe the seat rail with a dry cloth to prevent dust and sweat accumulation. Dust on the rail causes the seat rollers to grind and wear prematurely
- Monthly: Lubricate the chain with Concept2's recommended chain oil (or any 3-in-1 oil). Apply a few drops along the chain, then pull the handle through 10 full strokes to distribute. Wipe excess from the chain housing
- Quarterly: Clean the seat rollers and rail with a damp cloth. Inspect the shock cord (bungee) inside the flywheel housing for fraying or loss of tension
- Annually: Check the PM5 monitor battery. Inspect the handle grip for wear. On water rowers, check the water level and add a purification tablet if the water appears cloudy
Air Bike Maintenance (Sunny Health SF-B223018, Schwinn Airdyne Bike Series, Schwinn AD7)
- Monthly: Lubricate the drive chain with bicycle chain oil. Apply sparingly — excess oil attracts dust and creates grinding paste. Check chain tension and adjust if slack exceeds manufacturer specifications
- Quarterly: Inspect fan blades for cracks or damage. Tighten all pedal and handlebar connections. Clean the console contacts with electrical contact cleaner if the display is intermittent
- Annually: Full inspection of the frame, pedal bearings, and seat post for wear. Replace worn pedal straps
Cable Machine and Pulley System Care
If your rack includes a cable system (common on the Mikolo F4, Sportsroyals Power Cage, and similar all-in-one racks), the cable and pulleys require periodic attention.
- Monthly: Inspect the cable for fraying, kinks, or broken strands. A frayed cable under tension is a serious safety hazard. Replace immediately if any strand is broken
- Quarterly: Lubricate pulley wheels with a drop of 3-in-1 oil on each axle. Smooth pulley rotation is essential for consistent resistance
- Check cable routing after any accessory change. A misrouted cable wears against frame edges and fails prematurely
Rubber Gym Flooring Maintenance
Whether you installed horse stall mats, interlocking rubber tiles, or rolled rubber flooring, the maintenance protocol is straightforward. For help choosing flooring, see our gym flooring guide.
- Weekly: Sweep or vacuum to remove grit, chalk dust, and debris. Grit on rubber flooring acts like sandpaper under heavy plates and equipment feet
- Monthly: Mop with a solution of warm water and a small amount of mild dish soap. Rinse with clean water. Do not use bleach, ammonia, or harsh chemical cleaners on rubber — they break down the material
- As needed: Replace any sections that have torn, cracked, or developed permanent compression dents. Damaged flooring is a trip hazard and no longer provides adequate equipment protection
- Odor management: New rubber flooring (especially horse stall mats) off-gasses for 2 to 4 weeks. Maximize ventilation during this period. The odor is not harmful at residential exposure levels but is unpleasant
Climate Control: The Single Most Important Factor
You can follow every cleaning protocol in this guide perfectly and still lose equipment to corrosion if you do not control your gym environment. Humidity is the primary enemy of steel equipment.
Humidity Management
- Target range: Keep relative humidity between 30% and 50%. Above 60%, corrosion rates increase dramatically
- Use a dehumidifier in any uninsulated or poorly insulated garage. A 50-pint dehumidifier ($180 to $250) running in a two-car garage is the single best investment you can make in equipment longevity
- Monitor humidity with a digital hygrometer ($10 to $15). Place it at equipment level, not on a high shelf
- Seal the garage as much as possible. Weather stripping on the garage door, sealing gaps around service doors, and closing floor drains all reduce moisture intrusion
Temperature Management
- Avoid rapid temperature swings. When warm, humid air meets cold steel, condensation forms on the metal surface. This happens most often on spring and fall mornings. A ceiling fan circulating air helps equalize temperatures
- Insulation helps. Even basic insulation in the garage door and walls moderates temperature swings and reduces condensation events
- Never cover equipment with plastic tarps. Plastic traps moisture against metal and accelerates corrosion. If you must cover equipment, use breathable canvas or furniture covers
Storage Best Practices
- Store barbells horizontally on J-cups, wall-mounted barbell holders, or a dedicated barbell rack. Vertical storage over long periods can cause shaft warping, though this is primarily a concern with lower-quality bars
- Store plates vertically on a plate tree or wall-mounted storage pegs. Horizontal stacking causes paint-to-paint friction and edge damage
- Keep equipment off bare concrete. Concrete wicks moisture from the ground. Rubber flooring, wooden platforms, or even plastic furniture pads create a moisture barrier
- Position equipment away from garage doors. The garage door opening is the largest source of moisture, dust, and temperature fluctuation in the space
What Never to Do: Critical Mistakes That Destroy Equipment
Never Use Bleach or Ammonia on Any Equipment
These chemicals strip protective coatings, corrode metal, crack vinyl, and degrade rubber. Mild dish soap and water handle every cleaning task in a home gym.
Never Power-Wash Gym Equipment
High-pressure water forces moisture into barbell bearings, cable housings, electronic components, and sealed joints. Once inside, this moisture causes hidden corrosion that you will not discover until the component fails.
Never Ignore the First Sign of Rust
Surface rust can be removed in 30 seconds with a nylon brush and a drop of oil. Deep rust requires chemical treatment, extended effort, and may leave permanent pitting. There is no maintenance task with a better effort-to-reward ratio than addressing rust immediately.
Never Over-Oil a Barbell
A common mistake is saturating the barbell shaft with oil. Excess oil creates a slippery surface that compromises grip safety. The correct amount is 6 to 8 drops spread thin — the bar should feel dry after you wipe it down, with only a microscopic protective film remaining.
Never Over-Tighten Rack Bolts
Enthusiastic bolt-tightening cracks weld joints, strips threads in bolt holes, and can actually compromise structural integrity. Snug plus a quarter turn. That is the rule for every bolt on your rack.
Complete Maintenance Schedule
Here is the complete maintenance protocol consolidated into a single reference schedule.
After every session: Wipe down barbell shaft and bench pad. Wipe rower seat rail.
Weekly (15 minutes): Brush barbell knurling. Wipe all high-touch surfaces. Sweep the floor. Spot-check for rust. Quick bolt visual inspection.
Monthly (30 minutes): Oil barbell shaft and sleeves. Tighten rack bolts. Clean bench pad with soap solution. Vacuum under treadmill. Lube rower chain. Lube air bike chain. Wipe down plates. Inspect cables for fraying. Mop rubber flooring.
Quarterly (45 minutes): Deep clean barbell with mineral spirits if needed. Lubricate bench adjustment mechanisms. Lubricate treadmill belt. Clean rower seat rollers. Inspect air bike fan blades. Lubricate pulley axles. Touch up powder coat scratches.
Annually (1 to 2 hours): Replace J-cup UHMW liners. Re-tighten all rack bolts. Full treadmill belt inspection. Replace worn pedal straps on air bike. Full cable and pulley inspection. Inspect all welds. Deep clean all flooring.
Frequently Asked Questions
How often should I oil my barbell?
What is the best way to remove rust from a barbell?
Can I use Clorox or Lysol wipes on gym equipment?
How often should I tighten bolts on my power rack?
Do bumper plates need maintenance?
What should I do with a barbell I have not used in months?
Is WD-40 good for barbell maintenance?
How do I prevent mold and mildew in my garage gym?
Should I cover my equipment when not in use?
Additional Resources
Related Content
- Barbell Maintenance Guide
- How to Build a Garage Gym
- Winter Garage Gym Training
- Garage Gym Mistakes to Avoid
- Organizing Your Garage Gym
- Garage Gym Safety Guide
- How to Choose Gym Flooring
The Bottom Line
Equipment maintenance is the highest-ROI activity in any home gym. Fifteen minutes per week and thirty minutes per month protect thousands of dollars in equipment, prevent safety hazards, maintain hygiene, and preserve resale value. The core protocol is simple: wipe surfaces after use, brush and oil your barbells monthly, tighten bolts regularly, sweep the floor weekly, and control humidity in your space. Do these things consistently and the gym you are training in today will still be performing flawlessly when your kids are old enough to use it.
Derek Walsh
Strongman competitor and former commercial gym equipment salesman. Knows what survives heavy daily use.
Read full bioMore in Guides
Strength vs Hypertrophy: How to Program for Your Goals (2026)
The definitive guide to programming for strength vs size in your home gym. Rep ranges, volume, intensity, and complete programs for both goals.
The Complete Home Gym Warm-Up Guide (2026)
Stop skipping your warm-up. Complete warm-up protocols for every training style, plus the equipment that makes preparation effortless at home.
Home Gym Deload Guide: When and How to Back Off (2026)
Learn when and how to deload in your home gym. Science-backed protocols, recovery strategies, and signs you need a rest week.