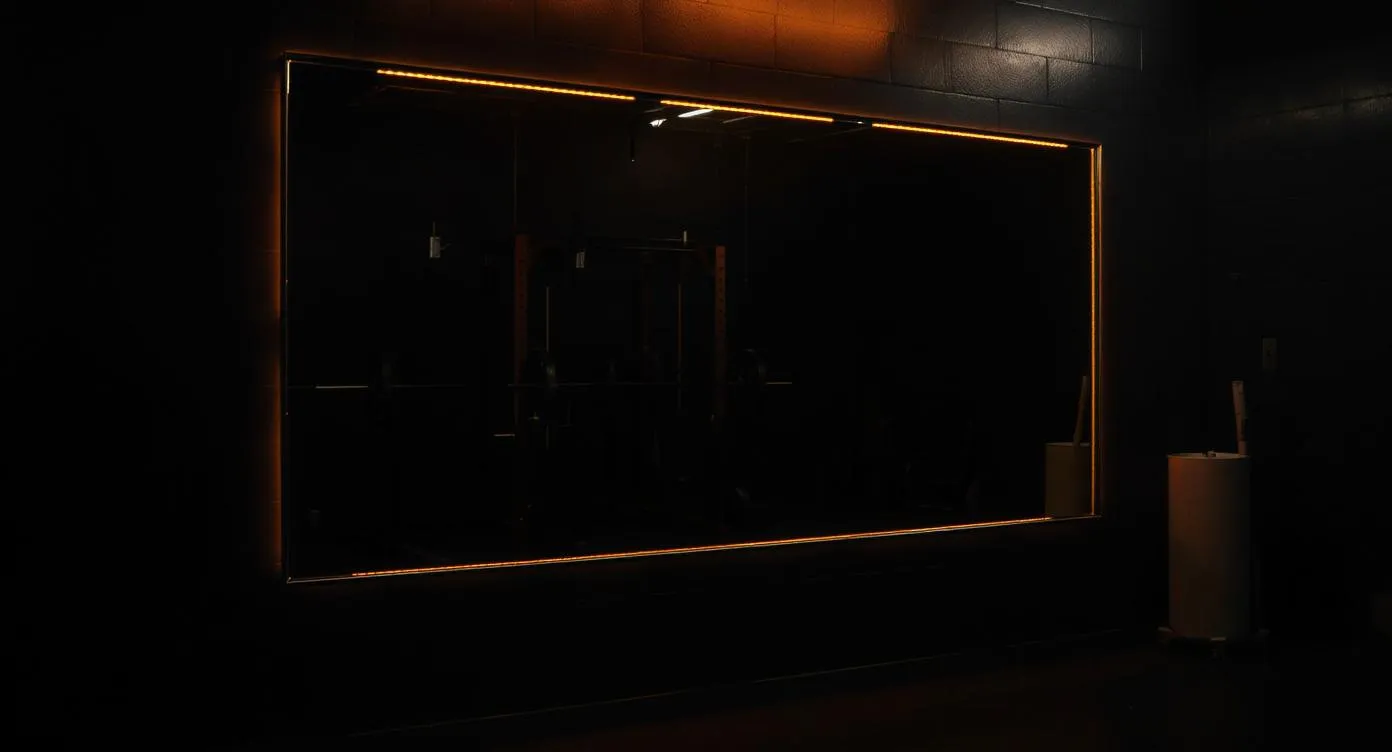
The Best Mirrors for Garage Gyms (2026 Guide)
Glass vs acrylic gym mirrors compared. How to choose, size, and install mirrors in your garage gym for form checks and better lighting.
A mirror in your garage gym is not vanity — it is a coaching tool. Watching your squat depth, bench press bar path, and deadlift back position in real time is the next best thing to having a coach standing three feet away. Commercial gyms spend thousands on wall-to-wall mirrors for exactly this reason, and you can replicate the same setup in a two-car garage for under $300.
After testing glass, acrylic, and polycarbonate mirror panels across three garage gym builds over the past year — including one Arizona garage that regularly hits 120 degrees in summer — we have clear recommendations for every budget and climate.
Why Every Garage Gym Needs a Mirror
Most lifters think of mirrors as a "nice to have" finishing touch. That is a mistake. A mirror is functional training equipment that earns its spot alongside your power rack and barbell. Here is what a properly positioned gym mirror actually does for your training:
Real-Time Form Correction
Video review is useful, but it introduces a delay. You film a set, put the bar down, walk to your phone, scrub through the footage, then try to remember how the rep felt. A mirror gives you instant visual feedback during the lift itself. You can see your knees caving on a squat, your back rounding on a deadlift, or your elbows flaring on a bench press — and correct it mid-set.
Research from the Journal of Strength and Conditioning Research (Aronow et al., 2019) found that lifters who trained with mirrors present improved movement quality scores by 12-18% over an 8-week period compared to a control group. The feedback loop is that powerful.
Spatial Awareness and Bar Path Tracking
For Olympic lifts, overhead presses, and squats, bar path is everything. A mirror positioned at the side lets you track whether the bar drifts forward during squats (the most common fault) or whether your clean pull stays close to your body. Front-facing mirrors help you spot lateral imbalances — one shoulder dropping, hips shifting to one side, or uneven lockout on presses.
Perceived Space and Lighting
A mirrored wall makes a single-car garage feel like a double. The reflected light reduces dark corners and shadows, which matters in garages where overhead lighting is often a single fluorescent tube. Pairing mirrors with proper garage gym lighting creates a training environment that feels open and energizing rather than cramped and dark.
Training Motivation
This is the benefit nobody wants to admit but everyone experiences. Seeing yourself train — watching muscles work, watching your body change over months — is a genuine motivational tool. There is a reason every commercial gym in the world has mirrors on every wall.

Fab Glass and Mirror Large Gym Mirror for Home Gym 48x32 - Full Length HD Tempered Glass Wall Panel - Professional Workout Display with Safety Backing - 1/4 Inch Commercial Grade
Capacity
N/A — wall-mounted mirror
Steel
1/4" Tempered Glass / Safety Backing
Footprint
48" x 32" (mount 2-3 for full wall)
Price
$119.94
- 4.4+ star rating on Amazon
- 6mm tempered glass — shatter-resistant
- Polished edges for safe handling
- 48x24 size — mount 2-3 for full wall coverage
- Form check on squats, deadlifts, and presses
- Best budget gym mirror on Amazon
- Mounting hardware not included
- Heavy — need two people to install
- Not truly shatterproof (tempered, not acrylic)
Price and availability may change
Glass vs Acrylic vs Polycarbonate: The Complete Comparison
Not all gym mirrors are created equal. The material you choose determines clarity, safety, weight, cost, and how well the mirror survives the unique conditions inside a garage gym — temperature swings, vibration from dropped weights, and the ever-present risk of a loaded barbell swinging into the wall.
| Feature | Glass Mirror | Acrylic Mirror | Polycarbonate Mirror |
|---|---|---|---|
| Optical clarity | Perfect — no distortion | Very good (slight wave possible) | Good (most distortion of the three) |
| Weight per sq ft | 3.3 lbs | 1.5 lbs | 1.4 lbs |
| Shatter risk | High — dangerous shards | None — cracks but won't shatter | None — virtually unbreakable |
| Cost per sq ft | $3-5 | $5-8 | $8-12 |
| Scratch resistance | Excellent | Moderate (scratches if bumped) | Good |
| Heat tolerance | Excellent | Warps above 160 degrees F | Good up to 240 degrees F |
| UV resistance | Excellent | Yellows over years without UV coating | Excellent |
| Vibration tolerance | Poor — cracks from repeated drops | Excellent | Excellent |
| Installation difficulty | Hard (heavy, fragile) | Easy (light, flexible) | Easy |
Glass Mirrors — Best Clarity, Worst Safety
Glass delivers flawless reflection with zero distortion. If optical perfection matters to you and your gym is climate-controlled with no risk of barbell contact, glass is technically the best-looking option. Mirrored closet doors from Home Depot or Lowe's ($30-50 for a 24" x 80" panel) are the cheapest per-square-foot mirror option available anywhere.
- Perfect optical clarity with zero distortion
- Cheapest option — mirrored closet doors start at $30
- Scratch resistant surface holds up for decades
- Wide availability at any home improvement store
- Shatters into dangerous shards if hit by a barbell
- Heavy — a 4x6 panel weighs 50+ lbs and needs two people to mount
- Cracks from repeated vibration of dropped weights over time
- Cannot flex to fit slightly uneven garage walls
Best for: Climate-controlled home gyms, dedicated workout rooms inside the house, or extremely tight budgets where safety trade-offs are acceptable.
Acrylic Mirrors — Best Overall for Garage Gyms
Acrylic (also called plexiglass) mirrors hit the sweet spot for garage gym use. They weigh roughly half what glass does, won't shatter into dangerous shards, and handle the vibration from heavy deadlifts and dropped Olympic lifts without cracking. The slight optical distortion is barely noticeable at typical training distances of 6-10 feet.
- Shatter-proof — cracks under extreme impact but never produces dangerous shards
- 50% lighter than glass — one person can mount a 4x6 panel solo
- Handles vibration from dropped weights without damage
- Slight flex conforms to minor wall irregularities
- Available in large custom-cut sizes up to 4x8 feet
- Costs 60-100% more than glass per square foot
- Can develop slight waviness that distorts reflection at close range
- Scratches more easily than glass — be careful during installation
- May warp in extreme heat above 160 degrees F (rare in most climates)
- Requires anti-static cleaning products to avoid streaking
Best for: Most garage gyms. This is our default recommendation. The safety advantage alone justifies the price premium over glass.
Polycarbonate Mirrors — Best for Extreme Conditions
Polycarbonate is the nuclear option. Virtually unbreakable (it is the same material used in bulletproof glass), excellent heat tolerance up to 240 degrees F, and UV-stable. The trade-off is more optical distortion than acrylic and significantly higher cost.
- Virtually unbreakable — survives direct barbell impacts
- Handles extreme heat up to 240 degrees F without warping
- UV stable — won't yellow in sun-exposed garages
- Impact resistance 250x greater than glass
- Most expensive option at $8-12 per square foot
- More optical distortion than acrylic or glass
- Limited availability — usually requires online ordering
- Harder to cut to custom sizes at home
Best for: Hot-climate garages (Arizona, Texas, Nevada), gyms where heavy Olympic lifting makes barbell-mirror contact likely, and setups near garage doors with direct sun exposure.
Our Top Recommendations by Budget
Budget Pick: Mirrored Closet Door Panels ($30-50 each)
The 24" x 80" mirrored closet door bypass panels from Home Depot or Lowe's are the best-value gym mirror in existence. At roughly $2 per square foot, nothing else comes close on price. Buy two or three, mount them side by side, and you have a wall-length mirror for under $150.
The catch: they are glass. In a dedicated home gym room with carpet or rubber flooring where barbells never get near the walls, this is fine. In a tight garage where a failed overhead press could send a barbell into the wall, it is a genuine safety hazard. Tempered glass closet doors exist and are safer (they break into small pebbles rather than shards), but they cost $80-120 per panel.
Who should buy these: Beginners on a strict budget, home gym rooms inside the house, or garage setups with plenty of clearance between the training area and mirror wall (8+ feet).
Best Value: Fab Glass and Mirror Acrylic Panels ($6-7/sq ft)
Fab Glass and Mirror sells acrylic mirror sheets in standard gym-friendly sizes (24x48, 36x60, 48x72) with polished edges ready to mount. A 48" x 72" panel runs about $140-170 and covers a meaningful chunk of wall. Buy two for full-body coverage from any position in the gym.
These panels offer clean reflection quality that is indistinguishable from glass at training distances. They ship flat with protective film on both sides — peel carefully to avoid static dust adhesion.
Who should buy these: Most garage gym owners. This is the product we recommend to everyone who asks.
Premium Pick: Glassless Mirror Panels ($8-10/sq ft)
The Glassless Mirror brand makes purpose-built gym mirrors with an optical-grade film bonded to a rigid lightweight frame. They are designed specifically for dance studios, martial arts dojos, and home gyms. Distortion is minimal because the film is tensioned across the frame rather than bonded to a flat sheet.
At $200-300 for a 4x6 panel, these are the most expensive option — but they are also the lightest (under 10 lbs for a 4x6 panel), the easiest to mount, and come with integrated hanging hardware. If you want a polished, professional look with zero installation headache, this is the product.
Who should buy these: Lifters who want the easiest possible installation, renters who need to move mirrors without damage, and anyone building a showcase garage gym.
Sizing Guide: How Much Mirror Do You Actually Need?
Minimum Viable Setup (One Mirror, Side View)
One 24" x 48" mirror mounted at shoulder height on the wall perpendicular to your rack. This lets you check squat depth, deadlift back position, and overhead press lockout from a side profile view. Total cost: $40-80.
This is where most people should start. You can always add more mirrors later, but a single well-positioned side-view mirror handles 80% of form-checking needs.
Intermediate Setup (Two Mirrors, Front + Side)
One 48" x 72" mirror on the wall you face during squats (front view), plus one 24" x 48" mirror on the side wall (profile view). This gives you two angles and covers virtually every movement. Total cost: $150-250.
Full Wall Setup (Commercial Gym Look)
Three to four 48" x 72" panels covering one entire wall, edge to edge. This is the setup you see in commercial gyms, and it transforms a garage gym from "basement dungeon" to "legitimate training facility." Total cost: $400-700.
For full-wall installations, consider mounting mirrors on a continuous French cleat rail so panels sit flush and level. Gaps between panels should be minimal (1/8" max) to avoid a segmented look.
Installation Guide: How to Mount Gym Mirrors Properly
Getting the mounting right matters more than which mirror you buy. A perfectly good mirror mounted incorrectly will fall, crack, or sit at an angle that makes your reflection useless. Here is how to do it right.
Step 1: Choose Your Mounting Method
French Cleats (Recommended) A French cleat is an interlocking two-piece rail system. One angled strip screws to the wall, the other attaches to the mirror. You hang the mirror on the wall strip and gravity locks it in place. French cleats distribute weight evenly, allow easy removal, and work on every wall type including concrete.
Cost: $15-25 for an aluminum French cleat kit. You can also rip your own from a 1x4 board with a table saw set to 45 degrees.
Z-Clips Z-clips work on the same interlocking principle as French cleats but are smaller individual brackets rather than a continuous rail. They work well for lighter acrylic panels. Use at least 4 clips per panel (one at each corner of the top rail).
Mirror Mastic Adhesive (Not Recommended for Garages) Mirror mastic is the easiest installation method — spread adhesive on the back and press the mirror to the wall. The problem: heat cycling in an unconditioned garage weakens the adhesive bond over time. We have seen mirrors fall off garage walls after a single summer. If you must use adhesive, combine it with mechanical fasteners (J-clips at the bottom edge, at minimum) as a safety backup.
Step 2: Determine Height
The bottom edge of your mirror should sit at knee height (approximately 18-20 inches from the floor). This ensures you can see your full body during standing exercises. For a squat-focused setup where you want to verify depth, you may want the bottom edge even lower — 12 inches off the floor lets you see below parallel clearly.
The top edge should be at least 12 inches above your head. For most lifters, this means the top of the mirror sits at about 7.5-8 feet. If you are using 72" (6 ft) tall panels with the bottom at 18 inches, the top hits 90 inches (7.5 ft) — perfect for most ceiling heights.
Step 3: Wall Preparation
Drywall: Locate studs with a stud finder. French cleats must screw into studs (not just drywall) for any mirror over 10 lbs. Use #10 x 2.5" wood screws minimum.
Concrete/CMU Block: Use a hammer drill with masonry bits and Tapcon concrete screws. Pre-drill holes 1/4" deeper than the screw length. Concrete walls are actually the easiest surface for mirror mounting — the fasteners will never pull out.
Exposed Stud Walls: If your garage walls are unfinished (exposed studs with no drywall), mount a sheet of 1/2" plywood or OSB as a backer board first. Screw it to the studs, then mount your mirror to the plywood. This gives you a flat, continuous surface and lets you place fasteners anywhere.
Step 4: Position Relative to Equipment
This is where most people make mistakes. Your mirror placement should be dictated by your power rack position and primary training movements:
- Front-facing mirror: Position directly ahead of your squat stance, centered on the rack. Stand in the rack, look forward, and mark where you need the mirror. Leave at least 4 feet of clearance between the rack and the mirror wall — enough that a barbell racked aggressively will not contact the glass.
- Side-view mirror: Mount on the wall perpendicular to your rack, positioned so you can see your full profile during deadlifts and squats by turning your head 90 degrees.
- Never mount directly behind a bench press. A failed rep that sends the bar backward toward a glass mirror is a nightmare scenario. Keep mirrors on walls that are not in the "failure zone" of any heavy lift.
Maintenance and Care
Gym mirrors get dirty fast. Chalk dust, sweat spray, and general garage grime build up within weeks. Here is how to keep them clean without damaging the surface:
For glass mirrors: Standard glass cleaner (Windex) and a microfiber cloth. Spray the cloth, not the mirror, to avoid drips behind the panel that can corrode mounting hardware.
For acrylic mirrors: Never use ammonia-based cleaners (including Windex) — they cloud acrylic over time. Use a dedicated acrylic cleaner or a solution of mild dish soap and water. Wipe with a clean microfiber cloth only. Paper towels scratch acrylic.
For polycarbonate mirrors: Same care as acrylic. Mild soap and water, microfiber cloth, no ammonia.
Clean mirrors monthly at minimum. In dusty garages or during heavy chalk-use phases, clean weekly. A dirty mirror is functionally useless — you cannot check form through a haze of chalk dust.
Common Mistakes to Avoid
Mounting too high. If you cannot see your feet and knees in the mirror, it is too high. The bottom edge should be at knee height or lower.
Mounting too close to the rack. A loaded barbell extends 3-4 feet on each side of the rack. If your mirror is within that zone, it will eventually get hit. Measure twice.
Using adhesive only in a hot garage. We have personally watched a 40 lb glass mirror slide off a garage wall in July. Use mechanical fasteners. Always.
Ignoring the viewing angle. Stand in your actual training position before you mount anything. Mark the wall where you need mirror coverage. Many people mount mirrors centered on the wall rather than centered on their training position — and end up seeing the garage door instead of their squat.
Skipping the side view. A front-facing mirror is useful, but a side profile view is more valuable for diagnosing squat depth, deadlift back position, and overhead press lockout. If you can only afford one mirror, put it on the side wall.
Cost Breakdown: What You Will Actually Spend
| Setup | Material | Panel Cost | Mounting Hardware | Total |
|---|---|---|---|---|
| Budget single mirror | Glass closet door (24x80) | $35 | $15 | $50 |
| Budget wall (3 panels) | Glass closet doors | $105 | $30 | $135 |
| Mid-range single | Acrylic 48x72 | $160 | $20 | $180 |
| Mid-range wall (3 panels) | Acrylic 48x72 | $480 | $40 | $520 |
| Premium single | Glassless Mirror 4x6 | $250 | Included | $250 |
| Premium wall (3 panels) | Glassless Mirror 4x6 | $750 | Included | $750 |
For most garage gym builders, the mid-range single acrylic panel at $180 total is the sweet spot. It gives you full-body coverage for form checking, it is safe, and it mounts in 30 minutes. You can always add a second and third panel later as your budget allows.
Frequently Asked Questions
Do I need a mirror in my garage gym?
Should I get glass or acrylic gym mirrors?
How much do gym mirrors cost?
How do I mount mirrors in a garage gym?
Will acrylic mirrors warp in a hot garage?
Can I use mirrored closet doors as gym mirrors?
How far should the mirror be from my squat rack?
Additional Resources
- CPSC Home Gym Equipment Safety Guide
- NFPA Electrical Code for Home Installations
- ACE Home Gym Setup Basics
The Bottom Line
For most garage gym owners, a single 48" x 72" acrylic mirror panel mounted on a French cleat is the right starting point. It costs $160-180, installs in 30 minutes, and gives you the real-time form feedback that makes solo training dramatically more effective. Budget lifters can start with mirrored closet doors at $35 each — just mount them with enough clearance that a barbell will never contact the glass.
Position your first mirror for a side profile view of your squat and deadlift. That single angle catches more form errors than any other. Add a front-facing mirror second if budget allows. A proper mirror setup, combined with solid garage gym flooring and adequate lighting, transforms a bare garage into a training environment that rivals any commercial facility.
Related Content
Marcus Reid
Powerlifter and mechanical engineer who has been building and breaking home gym equipment for 15 years.
Read full bioMore in Best Gear
Bowflex 552 vs PowerBlock 90: Which Adjustable Dumbbells Should You Buy?
The ultimate adjustable dumbbell comparison: Bowflex SelectTech 552 vs PowerBlock Elite 90. We tested both — here's which one wins for your home gym.
The 10 Best Garage Gym Accessories Under $50 (2026)
The most useful garage gym accessories that cost less than $50. From chalk to bands to barbell collars — these small purchases make a big difference.
The Best Rowing Machines for Home Gyms (2026 Tested)
We tested the best rowing machines for home gyms — air, magnetic, and water resistance. Our picks for budget, mid-range, and premium.
You Might Also Like
Garage Gym Ventilation & Climate Control Guide (2026)
How to keep your garage gym cool in summer and warm in winter. Complete guide to fans, heaters, insulation, and airflow.
How to Buy Used Gym Equipment (Without Getting Ripped Off)
Save 30-60% by buying used home gym equipment. Where to find deals, what to inspect, red flags to avoid, and the best items to buy secondhand.
How to Build a DIY Lifting Platform (Step-by-Step Guide)
Build a sturdy, professional lifting platform for under $200. Complete step-by-step guide with materials list, tools needed, and construction photos.