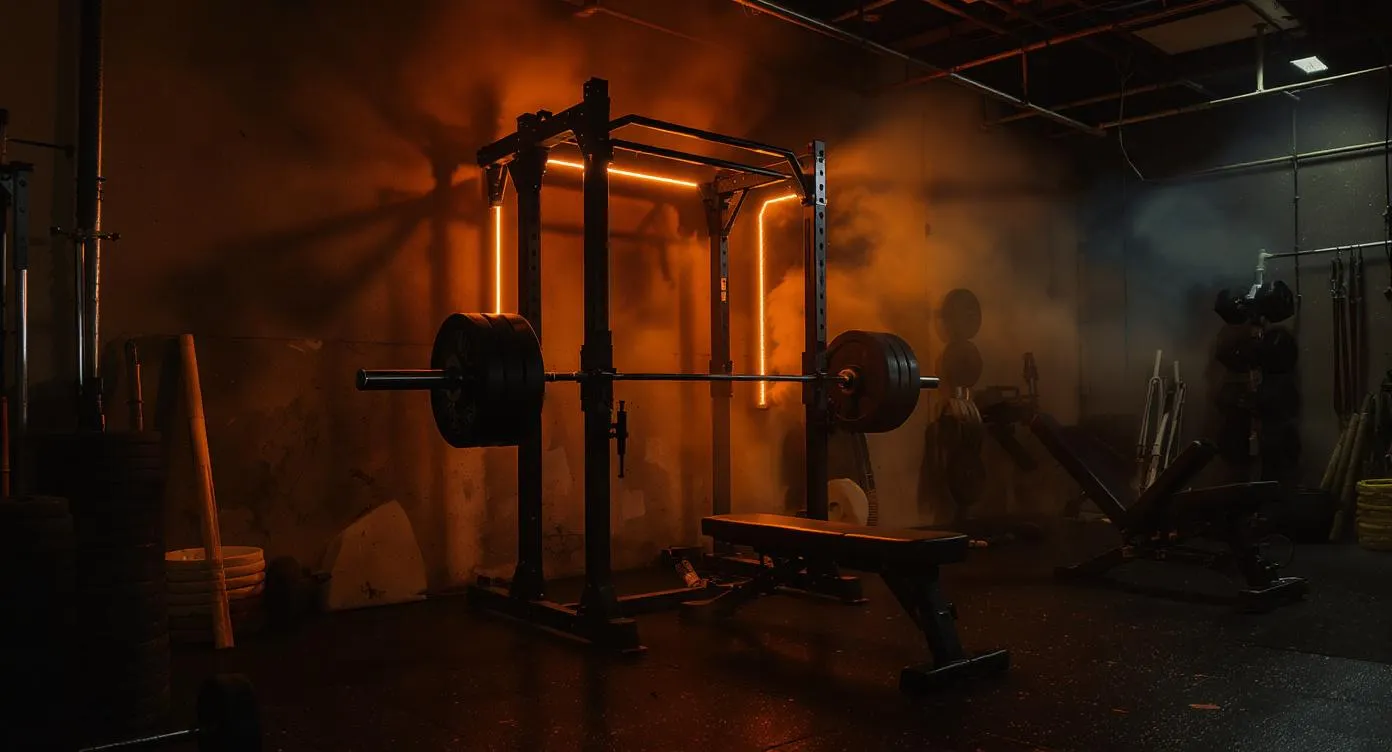
Home Gym Under $1,050: The Smart Sweet Spot Build (2026)
How to build a complete home gym for under $1,050. Power rack, barbell, plates, bench, and accessories — all Amazon verified.
Building a home gym at the $1,050 price point is arguably the smartest investment a beginner or intermediate lifter can make. After spending years testing equipment across every budget tier and helping hundreds of readers plan their builds, I keep coming back to this number. The $1,050 sweet spot delivers genuine training capability without the compromises forced by tighter budgets or the diminishing returns that creep in above $1,500.
At $750, you are making painful trade-offs: the cheapest possible squat stand instead of a full power rack, or no bench at all. At $1,500, you gain incremental quality but much of that extra spending goes toward nice-to-haves rather than need-to-haves. The $1,050 tier hits the inflection point where every dollar buys something that directly impacts your training. You get a legitimate power rack with proper safety bars, a complete Olympic weight set with enough plates to progress for a full year, a quality adjustable bench, and protective flooring. That covers every compound barbell movement in existence and most accessory work besides.
This guide walks through exactly what to buy, in what order, how to set it up, and how to train with it for maximum results. If you are considering a cheaper starting point, check our home gym under $750 build first to see where budget constraints start to bite.
Why $1,050 Is the Ideal Starting Budget for a Home Gym
The economics of home gym equipment follow a clear pattern. Below roughly $800, manufacturers cut corners on structural integrity, weight capacity ratings, and finish quality. Above $1,500, you start paying premium prices for marginal improvements in knurling texture, powder coat thickness, or brand cachet. The $1,000-1,100 range is where mass-market manufacturers compete hardest on value, and that competition benefits buyers enormously.
Here is what $1,050 actually buys you compared to cheaper and more expensive tiers:
- Full-size power rack with rated safety bars, not a squat stand or half rack
- Complete 300 lb Olympic weight set with a 7-foot bar and enough plates to train for 12+ months
- Adjustable flat-to-incline bench with 800 lb capacity
- Protective rubber flooring under the entire training area
- Multi-grip pull-up bar integrated into the rack
- Enough budget remaining for one strategic accessory or upgrade
- No adjustable dumbbells at this budget (add later for $150-430)
- No cable or pulley system for isolation work
- Cast iron plates rather than rubber bumper plates
- Starter-grade barbell that may need upgrading after 12-18 months
- No dedicated cardio equipment
The equipment gaps listed above are real, but none of them prevent effective training. Every major barbell program ever written, from Starting Strength to 5/3/1 to GZCLP, runs perfectly on exactly this equipment list. You will not outgrow the training potential of this setup for at least two to three years, and by then your knowledge and budget will guide smarter upgrades.
Complete Equipment List With Pricing Breakdown
I have verified every price listed below against current Amazon listings as of early 2026. Prices fluctuate, but these represent typical non-sale pricing. I will cover strategies for reducing the total cost in the budget optimization section below.
1. Power Rack: ULTRA FUEGO Power Cage — $389.99

ULTRA FUEGO Power Cage, Multi-Functional Power Rack
Capacity
800 lbs
Steel
2x2" 14-Gauge Steel
Footprint
50.5" L x 46.5" W x 83.5" H
Price
$389.98
- 4.5+ star rating on Amazon with 5,000+ reviews
- Excellent value under $350
- 800 lb weight capacity
- Includes multi-grip pull-up bar
- Standard 2x2 hole spacing for attachments
- Optional lat pulldown attachment available
- 14-gauge steel is thinner than premium racks
- Plastic J-cup liners can wear over time
- Not ideal for lifters squatting 600+ lbs
Price and availability may change
The ULTRA FUEGO Power Cage remains the gold standard for budget power racks in 2026, and for good reason. With an 800 lb weight capacity, 2x2-inch steel uprights with standard hole spacing, two solid steel safety bars, and a multi-grip pull-up bar, it delivers the core features that matter for safe barbell training. Over 5,000 Amazon reviews averaging 4.5 stars confirm its reliability. The rack accepts standard J-hooks and most aftermarket attachments designed for 2x2 hole patterns, giving you an upgrade path without replacing the entire rack.
The ULTRA FUEGO footprint measures approximately 50.5 inches wide by 46.5 inches deep by 83.5 inches tall. This fits in most standard garages and basement spaces, but measure your ceiling height before ordering. You need the rack height plus at least 12 inches of clearance for overhead pressing inside the rack. For a deeper comparison of budget racks, see our power rack buying guide.
Key specifications:
- Weight capacity: 800 lb
- Upright size: 2x2-inch 14-gauge steel
- Hole spacing: 2 inches on center
- Pull-up bar: Multi-grip with neutral and wide options
- Safety bars: Two solid steel pin-pipe safeties
- Footprint: 50.5 x 46.5 x 83.5 inches
- Weight: 133 lb (ships in two boxes)
Assembly takes two to three hours with a partner. Do not attempt it alone since holding uprights plumb while tightening bolts requires four hands. Use a torque wrench and tighten all bolts to spec rather than just hand-tight. A loose rack is a dangerous rack. Read our full ULTRA FUEGO Power Cage review for detailed assembly photos and tips.
2. Olympic Weight Set: CAP Barbell 300 lb Olympic Set — $499.99

CAP Barbell 300-Pound Olympic Set (Includes 7 Feet Bar)
Capacity
300 lbs total (255 lbs plates + 45 lb bar)
Steel
Cast Iron Plates / Chrome Bar
Footprint
7ft Olympic Bar (28mm shaft)
Price
$499.99
- 4.5+ star rating with 8,000+ reviews
- Complete barbell + plate set in one purchase
- Standard Olympic 2" sleeves fit all racks
- Includes: 2x45, 2x35, 2x25, 2x10, 4x5, 2x2.5 lb plates
- Cast iron plates are durable and accurate
- Best value starter weight set available
- Bar is entry-level (bushing sleeves, mild knurling)
- Plates are not calibrated for competition use
- No bumper plates — not safe to drop on concrete
- Chrome plating on bar chips over time
Price and availability may change
The CAP Barbell 300 lb Olympic Set bundles everything a beginner needs in a single purchase: a 7-foot Olympic barbell, 255 lb of cast iron plates, and spring clip collars. Buying this as a set saves roughly $80-120 compared to purchasing the bar and plates separately, and it eliminates the compatibility guesswork that trips up first-time buyers.
Plate breakdown included in the set:
- 2x 45 lb plates (90 lb total)
- 2x 35 lb plates (70 lb total)
- 2x 25 lb plates (50 lb total)
- 2x 10 lb plates (20 lb total)
- 4x 5 lb plates (20 lb total)
- 2x 2.5 lb plates (5 lb total)
This distribution is well thought out for progressive loading. The 2.5 lb plates allow 5 lb jumps on upper body lifts, which is critical for sustained progress on bench press and overhead press. You can load the bar from 45 lb (empty bar) up to 300 lb in meaningful increments, which covers beginner through early intermediate strength levels on every lift.
The included barbell is a standard chrome-finished Olympic bar with 28mm shaft diameter and composite bushings. It is not a precision powerlifting bar, but it handles deadlifts up to 400+ lb without permanent deformation and provides adequate knurling for a solid grip. Most lifters upgrade the bar before the plates, and the good news is that every Olympic plate fits every Olympic bar. Your plate investment carries forward indefinitely. Read our detailed CAP Barbell 300 review for load testing results.
3. Adjustable Bench: FLYBIRD Adjustable Weight Bench — $110

FLYBIRD WB2 Weight Bench, Utility Adjustable Weight Bench
Capacity
800 lbs (ASTM Certified)
Steel
Commercial-Grade Steel Frame
Footprint
48.4" L x 16.5" W x 17" H (folded)
Price
$109.99
- 4.6+ star rating on Amazon with 25,000+ reviews
- Unbeatable value under $120
- ASTM-certified 800 lb weight capacity
- 8 backrest angles (90° to -30° FID)
- Folds flat for easy storage in small spaces
- Quick 10-minute assembly
- Gap between seat and backrest at steep inclines
- No decline position on some variants
- Pad is narrower (10.2") than premium benches (12")
- Feet can slide on smooth concrete without rubber mats
Price and availability may change
The FLYBIRD adjustable bench dominates the sub-$150 bench category with an 800 lb weight capacity, eight backrest positions ranging from flat to 90 degrees upright, three seat positions, and a folding design for compact storage. At under 30 lb, it is easy to move in and out of the rack between exercises. The triangular frame design provides solid lateral stability under load, and the high-density foam padding strikes a good balance between comfort and firm support for bench press.
The FLYBIRD is not a commercial bench. It lacks a dedicated decline position, the pad width is slightly narrower than competition spec at roughly 10 inches, and the upholstery will eventually crack after years of heavy use. But for a $1,050 build, these are acceptable trade-offs. You would need to spend $300 or more on a REP FB-5000 or Rogue Flat Utility Bench to get meaningfully better construction, and that budget is better spent elsewhere at this stage. Read our FLYBIRD bench review for long-term durability observations.
4. Rubber Gym Flooring — $50
Three to four horse stall mats from Tractor Supply Co., priced at $45-60 total, provide superior protection compared to puzzle-tile gym flooring at a fraction of the cost. Each 4x6-foot mat is 3/4-inch thick solid rubber that absorbs dropped weights, protects your concrete or subfloor, dampens noise, and provides stable footing for heavy lifts. Cut them with a utility knife to fit precisely under and around your rack.
Position the mats to cover the entire area under the rack plus 12-18 inches in front for deadlifts and behind for bench press setup. You need approximately 8x8 feet of coverage minimum, which two mats handle if placed side by side. A third mat extends the deadlift landing zone. For a complete breakdown of flooring options and installation methods, see our garage gym flooring guide.
Flooring installation tips:
- Let mats off-gas outdoors for 48-72 hours before bringing them inside (the rubber smell is strong initially)
- Clean your concrete floor thoroughly before laying mats to prevent trapped moisture
- Butt mats tightly together; they are heavy enough to stay in place without adhesive
- Cut with a fresh utility blade and a straightedge; mark your cut line with chalk
Full Build Cost Summary
The raw total comes to $1,050 at full retail prices. The next section covers three proven strategies to bring the cost down if needed.
Three Strategies to Reduce the Cost
Option A: Phase the Bench Purchase (Recommended)
Build cost: $940
Buy the rack, weight set, and flooring on day one for $940. Train for four to six weeks using only standing and floor-based movements: squats, deadlifts, overhead press, barbell rows, pull-ups, and floor press. These exercises alone build tremendous strength. Add the FLYBIRD bench in month two when you have saved an additional $110.
This is the approach I recommend for most builders because it gets you training immediately with zero compromises on the equipment that matters most. The power rack and barbell are the foundation of every program; the bench, while important, is not urgent.
Option B: Source One Item Used
Build cost: ~$850-950
Buy the weight set, bench, and flooring new, but find a used power rack on Facebook Marketplace, Craigslist, or OfferUp. Used racks in good condition typically sell for $150-250, saving $140-240 off the new price. Steel does not lose structural integrity from prior use, and cosmetic scratches are irrelevant. Inspect welds for cracks, test the safety pins for smooth insertion, and confirm all hardware is included. Read our buying used gym equipment guide for red flags to watch for.
Option C: Time Your Purchase Around Sales Events
Build cost: $840-950
Major retail sales events consistently discount home gym equipment by 15-30 percent:
- Amazon Prime Day (July): Historically 15-25% off power racks, CAP, and FLYBIRD products
- Black Friday / Cyber Monday (November): The deepest discounts of the year, often 25-35% off power racks and weight sets
- Memorial Day and Labor Day: 10-20% off most fitness gear on Amazon
- New Year (January): Moderate discounts driven by resolution-season demand
If you can wait four to eight weeks for a sale window, the entire $1,050 list can drop to $840-950 without any compromises.
Space Requirements and Gym Layout
The minimum usable space for this build is 8 feet wide by 10 feet deep by 7.5 feet tall. Here is how those dimensions break down:
Width: The rack is 50.5 inches wide, plus you need 12 inches of clearance on each side for plate loading. That totals approximately 74 inches, or just over 6 feet. An 8-foot width gives comfortable working room.
Depth: The rack is 46.5 inches deep. You need 36 inches in front for deadlifts and barbell rows pulled from the floor, plus 24 inches behind for bench press positioning and reracking. That totals approximately 106 inches, or about 9 feet. A 10-foot depth provides margin.
Height: The rack is 83.5 inches tall (just under 7 feet). Overhead pressing inside the rack requires your standing reach height plus 6 inches of barbell clearance above your head. For most lifters under 6 feet tall, an 8-foot ceiling works. Taller lifters should press outside the rack or seated.
For a single-car garage (roughly 10x20 feet), this setup occupies less than half the floor space and leaves room for a car on the other side. For a two-car garage, you have space for a full training area plus future equipment expansion.
Assembly Order and Setup Guide
Tackle the build in this sequence for maximum efficiency:
Step 1: Flooring first (30 minutes). Lay the stall mats before anything else. Moving a loaded rack off bare concrete onto mats later is miserable.
Step 2: Rack assembly (2-3 hours). Follow the ULTRA FUEGO manual precisely. Lay out all hardware before starting and sort by bag number. Tighten bolts in stages: finger-tight first on all joints, then wrench-tight once the full structure is standing and squared. Check that the rack is level and plumb before final tightening. If your garage floor slopes, use thin rubber shims under the low-side feet.
Step 3: Unbox and inspect the weight set (30 minutes). Lay every plate out, verify the count against the packing list, and inspect for casting defects or cracks. Slide each plate onto the bar to confirm the bore diameter is correct. Report any issues to the retailer before assembling further.
Step 4: Bench positioning (10 minutes). Place the bench inside the rack for bench press. The bar path should align directly over your mid-chest at the bottom and over your shoulders at lockout. Adjust the J-hook height so that you can unrack with a slight elbow bend while lying flat.
Step 5: Safety bar height calibration (15 minutes). This is the most important safety step. Load an empty bar, set it on the safeties, and lie on the bench. The bar on the safeties should sit approximately one inch below your chest at the bottom of the bench press range of motion. For squats, set safeties at the height your bar reaches at the bottom of a full-depth squat. Err on the side of one hole lower rather than higher since a safety bar that is too high teaches you to cut depth short.
Complete 12-Week Beginner Training Program
This program uses only the equipment in the $1,050 build. It follows a linear progression model inspired by proven programs like Starting Strength and Greyskull LP, adapted for the home gym environment where you train alone and must rely on safety bars rather than spotters.
Weeks 1-4: Foundation Phase
Train three days per week with at least one rest day between sessions. Alternate between Workout A and Workout B.
Workout A (Monday / Friday of Week 1):
- Back Squat: 3 sets x 5 reps
- Bench Press: 3 sets x 5 reps
- Bent-Over Barbell Row: 3 sets x 5 reps
- Plank: 3 sets x 30 seconds
Workout B (Wednesday of Week 1):
- Back Squat: 3 sets x 5 reps
- Overhead Press: 3 sets x 5 reps
- Deadlift: 1 set x 5 reps
- Pull-Ups or Dead Hangs: 3 sets to near failure
Progression: Add 5 lb to squat and deadlift each session. Add 2.5 lb to bench press and overhead press each session (use the 2.5 lb plates from the CAP set on each side). If you fail a set, repeat the same weight next session before adding.
Weeks 5-8: Volume Phase
Increase to four sets on main lifts and introduce one accessory movement per session.
Workout A:
- Back Squat: 4 sets x 5 reps
- Bench Press: 4 sets x 5 reps
- Bent-Over Row: 4 sets x 5 reps
- Barbell Curl: 3 sets x 10 reps
- Plank: 3 sets x 45 seconds
Workout B:
- Back Squat: 4 sets x 5 reps
- Overhead Press: 4 sets x 5 reps
- Deadlift: 2 sets x 5 reps
- Romanian Deadlift: 3 sets x 8 reps
- Pull-Ups: 3 sets to near failure
Weeks 9-12: Intensification Phase
Introduce heavier top sets and expand accessory work. Continue three sessions per week.
Workout A:
- Back Squat: Work up to 1 heavy set of 5, then 3 sets x 5 at 90% of that weight
- Bench Press: Same structure as squat
- Bent-Over Row: 4 sets x 5 reps
- Barbell Curl: 3 sets x 10 reps
- Close-Grip Bench Press: 3 sets x 8 reps
Workout B:
- Deadlift: Work up to 1 heavy set of 5, then 2 sets x 3 at 90%
- Overhead Press: 4 sets x 5 reps
- Front Squat: 3 sets x 5 reps (lighter, focus on form)
- Bulgarian Split Squat: 3 sets x 8 each leg
- Pull-Ups: 4 sets to near failure
After completing this 12-week cycle, most lifters have added 60-100 lb to their squat, 30-50 lb to their bench press, and 80-120 lb to their deadlift. At that point, transition to an intermediate program like 5/3/1 or GZCLP. Our home gym programming guide covers program selection in detail.
Equipment Maintenance for Longevity
Proper care extends the life of budget equipment significantly, often doubling or tripling its usable lifespan.
Barbell maintenance (monthly): Wipe down the bar shaft with a nylon brush and 3-in-1 oil to prevent rust on the chrome finish. Clean the sleeves with a dry cloth. If you train in a garage without climate control, the bar is especially vulnerable to humidity. Store it horizontally on the J-hooks rather than standing vertically in a corner where moisture collects at the base. For a complete maintenance protocol, see our barbell maintenance guide.
Plate maintenance (quarterly): Cast iron plates develop surface rust in humid environments. A wire brush removes light oxidation, and a thin coat of truck bed liner spray provides lasting protection. Alternatively, a coat of Rust-Oleum paint refreshes plates cosmetically and prevents further corrosion.
Rack maintenance (biannually): Check all bolts for tightness every six months. Steel racks in unconditioned garages can develop rust at weld points. Sand any spots with fine-grit sandpaper and touch up with matching spray paint. Lubricate the safety pin holes with dry silicone spray if the pins begin to stick.
Bench maintenance (as needed): Wipe the pad with a mild disinfectant after sweaty sessions. The vinyl cover on budget benches cracks faster when allowed to stay damp. Store the bench folded if you are not training daily to reduce UV exposure from garage windows.
Flooring maintenance (monthly): Sweep or vacuum the rubber mats regularly. Mop with warm water and a mild detergent quarterly. Rubber mats are nearly indestructible under normal training loads, but avoid using harsh solvents that can break down the material.
Strategic Upgrade Path: Where to Spend Your Next $250-500
Once you have trained consistently for three to six months on the base $1,050 build, you will have a clear sense of your training priorities. Here is the optimal upgrade sequence ranked by training impact per dollar:
Upgrade 1 — Adjustable Dumbbells ($150-430): A set of adjustable dumbbells unlocks unilateral training, better isolation work, and dozens of accessory movements. The Bowflex SelectTech 552 at $430 is the premium option with 5-52.5 lb range and instant dial adjustment. Budget alternatives like the Yes4All adjustable set start around $100-150. This is the single highest-impact addition you can make after the base build.
Upgrade 2 — Barbell Upgrade ($299.99-200): The CAP bar that comes with the 300 lb set serves its purpose, but a dedicated Synergee Olympic Barbell with needle bearings and better knurling transforms the feel of every lift. Your existing plates transfer directly to the new bar.
Upgrade 3 — Specialty Bar ($299.99-300): A hex trap bar is the most versatile specialty bar, enabling trap bar deadlifts (easier on the lower back), farmer carries, and shrugs. A safety squat bar is the second choice if you have shoulder mobility limitations.
Upgrade 4 — Cable Pulley Attachment ($100-150): A wall-mounted pulley system or rack-mounted lat pulldown attachment opens up cable rows, tricep pushdowns, face pulls, and lat pulldowns. These isolation movements are difficult to replicate with barbell-only training.
Upgrade 5 — Cardio ($329.98-750): If conditioning is a priority, a Sunny rowing machine at $289 or a Concept2 RowErg at $990 adds full-body cardio capability to your gym. For our full comparison, visit the home gym under $1,000 build which integrates a cardio piece into the budget.
Common Mistakes to Avoid at This Budget
Buying plates individually instead of a set. Loose plates on Amazon cost $1.50-2.00 per pound. The CAP 300 lb set works out to roughly $1.67 per pound including the bar. Always buy sets when available.
Skipping flooring to save $50. Dropping a loaded bar onto bare concrete cracks the concrete, damages the plates, and creates an unsafe training surface. The $50 for stall mats is non-negotiable. Your landlord, homeowner's insurance, and joints will thank you.
Buying bumper plates at this budget. Rubber bumper plates cost $1.75-2.50 per pound compared to $0.80-1.15 per pound for cast iron. At $1,050, every dollar of plate budget should go toward maximizing total weight. Add a pair of 45 lb bumpers later specifically for deadlifts if you train on a second floor or need to drop the bar.
Ignoring ceiling height. Measure before you buy. An 84-inch rack in a room with 85-inch ceilings means you cannot do pull-ups or overhead press inside the rack. The ULTRA FUEGO Power Cage requires a minimum 96-inch (8-foot) ceiling for full functionality.
Over-accessorizing before mastering basics. Resistance bands, ab wheels, kettlebells, and specialty attachments are all useful eventually. But for the first three to six months, the barbell and rack are all you need. Master the squat, bench, deadlift, overhead press, and row before adding complexity.
Frequently Asked Questions
Can I really build a complete home gym for under $1,050?
Should I buy the bench first or skip it to save money?
Is the FLYBIRD adjustable bench durable enough for serious training?
Should I buy bumper plates instead of cast iron at this budget?
How long does the full assembly take?
Can I upgrade the barbell later without replacing the plates?
What if I have $1,200-1,500 to spend instead?
Is this setup safe for training alone without a spotter?
Additional Resources
- NSCA Home Gym Design Principles
- CPSC Home Gym Equipment Safety Guide
- ACE Strength Training Fundamentals
The Bottom Line
The $1,050 home gym is the definitive sweet spot for lifters who want to train seriously at home without overspending. An ULTRA FUEGO Power Cage, CAP Barbell 300 lb Olympic set, FLYBIRD adjustable bench, and rubber stall mat flooring provide everything you need for a comprehensive barbell strength training program. This setup handles every compound lift, supports progressive overload for one to three years of continuous gains, and serves as a rock-solid foundation for future upgrades.
The math favors home gym ownership decisively at this price point. A typical commercial gym membership runs $40-60 per month, meaning the $1,050 build pays for itself within 18-26 months. After that, every training session is free. Factor in the eliminated commute time, zero wait for equipment, and the freedom to train at any hour, and the value proposition is overwhelming.
Start with the rack and weights, add the bench when you can, follow the 12-week program outlined above, and you will build more strength in your first year than most commercial gym members achieve in three. The equipment is the easy part. Consistency is what builds the physique. Now go train.
Marcus Reid
Powerlifter and mechanical engineer who has been building and breaking home gym equipment for 15 years.
Read full bioMore in Budget Builds
Women's Home Gym Build: Complete Equipment Guide (2026)
Build the perfect home gym for women. Glute-focused equipment, strength training essentials, and space-efficient picks for every budget.
Olympic Weightlifting Home Gym Build (2026)
Build a home gym for Olympic weightlifting. Platform specs, bar selection, bumper plates, and everything you need to snatch and clean at home.
The Best Home Gym Build for Seniors (2026)
Build a safe, effective home gym for seniors. Joint-friendly equipment picks, fall-prevention features, and age-appropriate training programs.