The Best Home Gym Build for Seniors (2026)
Build a safe, effective home gym for seniors. Joint-friendly equipment picks, fall-prevention features, and age-appropriate training programs.
After age 60, the gym stops being optional and becomes one of the most important rooms in your life. Sarcopenia — the age-related loss of muscle mass — begins accelerating in your sixties, stripping roughly 3% of your strength every year you do nothing about it. Falls become the leading cause of injury-related death for adults over 65, according to the CDC. Bone density drops, joint stiffness increases, and independence narrows unless you actively fight back.
A home gym is the best weapon you have. No driving in bad weather. No navigating crowded weight rooms full of 25-year-olds slamming plates. No gym memberships you stop using after February. Just a safe, well-designed training space ten steps from your kitchen, available on your schedule, built around your body.
I have helped dozens of clients over 60 set up home training spaces, and the build below represents the safest, most effective setup you can create for under $800. Every piece of equipment was selected for joint friendliness, stability, ease of use, and fall-prevention potential. Nothing in this build requires you to get on the floor unless you choose to, and every exercise can be modified for limited mobility.
If you are between 40 and 60, our home gym over 40 guide covers the transition from peak-performance training to longevity-focused programming. If you want a deeper dive into exercise selection for older adults, read our home gym for seniors guide. And if safety is your primary concern — as it should be — our garage gym safety guide covers solo training protocols in detail.
Why a Home Gym Is Non-Negotiable After 60
The research is overwhelming. The American College of Sports Medicine (ACSM) recommends that adults over 65 perform strength training at least two days per week, plus balance and flexibility work. The National Strength and Conditioning Association (NSCA) has published extensively on resistance training as the single most effective intervention for age-related functional decline. Yet fewer than 15% of adults over 60 meet these guidelines.
The barriers are predictable: gym intimidation, transportation difficulty, weather, cost, and the simple friction of leaving the house. A home gym eliminates every single one of these barriers.
Here is what consistent strength training does for you after 60:
- Reduces fall risk by up to 40%. Stronger legs and better balance are the two most reliable predictors of fall avoidance. Every exercise in this program targets one or both.
- Maintains and rebuilds bone density. Resistance training applies mechanical stress to bones, stimulating the osteoblasts that rebuild bone tissue. This is the primary non-pharmaceutical intervention for osteoporosis.
- Preserves independence. Getting off the toilet, carrying groceries, climbing stairs, opening jars — these daily tasks depend on a baseline of strength that erodes without training. A structured program keeps you above that threshold for decades longer.
- Improves cognitive function. The link between resistance training and reduced dementia risk is one of the most robust findings in exercise science over the past decade.
- Reduces chronic pain. Properly loaded movement reduces joint stiffness, improves circulation, and strengthens the muscles that support arthritic joints. Inactivity makes arthritis worse, not better.
The goal is not to build a bodybuilder's physique. The goal is to stay strong enough to live on your own terms for as long as possible. This build is engineered for exactly that.
The Complete Senior Home Gym Build (~$800 Budget)
Every product below was chosen for three criteria: safety, joint friendliness, and ease of use. No Olympic barbells. No heavy plate loading. No equipment that requires you to lie flat on your back under a loaded bar without a spotter.
| Equipment | Product | Cost |
|---|---|---|
| Adjustable Bench | FLYBIRD Adjustable Bench | $110 |
| Resistance Bands | Bodylastics Stackable Set | $60 |
| Non-Slip Flooring | BalanceFrom Puzzle Mat (24 sq ft) | $35 |
| Foam Roller | TriggerPoint Grid 1.0 | $34.46 |
| Yoga Mat | Gaiam Premium Yoga Mat | $25 |
| Doorway Pull-Up Bar | Iron Gym Total Upper Body | $30 |
| Light Dumbbells (5-25 lb set) | CAP Neoprene Set (local purchase) | $120 |
| Grab Bars (2x bathroom-style) | Stainless Steel Grab Bars | $50 |
| Resistance Chair or Sturdy Chair | Heavy Dining or Folding Chair | $0-80 |
| Wall Mirror (safety check) | 36x60 Gym Mirror | $60 |
| Ankle Weights (pair, 5 lb each) | Adjustable Ankle Weights | $25 |
| Balance Pad | StrongTek Balance Pad | $30 |
| Total | ~$660-$740 |
The remaining budget gives you $60-140 for grab bar installation hardware, extra resistance bands, or a blood pressure monitor for training-day tracking. This build intentionally costs less than heavier builds because the equipment is lighter, smaller, and more specialized — and because expensive power racks and barbells are not the right tools for most seniors.
Equipment Breakdown
FLYBIRD Adjustable Bench — $110

FLYBIRD WB2 Weight Bench, Utility Adjustable Weight Bench
Capacity
800 lbs (ASTM Certified)
Steel
Commercial-Grade Steel Frame
Footprint
48.4" L x 16.5" W x 17" H (folded)
Price
$109.99
- 4.6+ star rating on Amazon with 25,000+ reviews
- Unbeatable value under $120
- ASTM-certified 800 lb weight capacity
- 8 backrest angles (90° to -30° FID)
- Folds flat for easy storage in small spaces
- Quick 10-minute assembly
- Gap between seat and backrest at steep inclines
- No decline position on some variants
- Pad is narrower (10.2") than premium benches (12")
- Feet can slide on smooth concrete without rubber mats
Price and availability may change
The bench is the centerpiece of this build, but not for bench pressing. For seniors, the adjustable bench serves as a stable seated platform for dumbbell work, an incline support for rows and presses that reduce lower-back strain, and a step-up surface for balance training. The FLYBIRD's eight back positions let you train at angles that keep joints comfortable. Its 800 lb weight capacity means it is absolutely rock-solid when you sit, stand from, or brace against it.
The folding design matters here too. When training is done, fold the bench flat and slide it against the wall to maintain clear walking paths — a critical safety requirement for any senior living space.
- Eight adjustable positions allow joint-friendly training angles
- Folds flat for storage to keep walking paths clear
- 800 lb capacity provides total stability for sit-to-stand exercises
- Lightweight at 32 lbs so it is easy to reposition
- Low seat height makes sitting down and standing up comfortable
- No built-in handles for assisted standing (add grab bar nearby)
- Vinyl padding can be slippery without a towel
- 12-inch pad width may feel narrow for larger individuals
Bodylastics Resistance Bands — $60

Bodylastics PRO Series Resistance Band Set (6 Bands, 280 lbs)
Capacity
6 bands stackable to 280 lbs
Steel
Anti-Snap Natural Latex Tubing
Footprint
Handles, ankle straps, door anchor + carry bag
Price
$61.97
- 4.6 star rating on Amazon with 2,600+ reviews
- Patented anti-snap inner cord for safety
- 6 bands stackable up to 280 lbs total resistance
- Includes handles, ankle straps, and door anchor
- Lifetime replacement on bands
- Travel-friendly storage bag
- Resistance feels different than free weights
- Door anchor requires an inward-opening door
- Handles wear faster than the bands
Price and availability may change
Resistance bands are the single best training tool for seniors, period. They provide smooth, joint-friendly resistance without the impact stress of free weights. The Bodylastics stackable system lets you adjust resistance from 5 lbs to over 100 lbs by clipping different bands together, and the door anchor turns any doorway into a cable machine.
For seniors specifically, bands offer two massive advantages over dumbbells: accommodating resistance (the load increases as you extend, matching your strength curve and reducing joint stress at the weakest point of each movement) and zero drop risk (you physically cannot drop a band on your foot).
BalanceFrom Puzzle Mat Flooring — $35

BalanceFrom Puzzle Exercise Mat 1/2' Thick, EVA Interlocking Foam Floor Tiles for Home Gym, Mat for Home Workout Equipment, Floor Padding for Kids, Black, 24 in x 24 in x 1/2 in, 24 Sq Ft - 6 Tiles
Capacity
N/A — flooring
Steel
High-Density EVA Foam (1/2" thick)
Footprint
24 sq ft (6 tiles)
Price
$25.99
- 4.5+ star rating on Amazon with 40,000+ reviews
- 24 sq ft covers a full lifting platform area
- 1/2 inch thick EVA foam absorbs impact and noise
- Interlocking design — no adhesive needed
- Easy to cut for custom fit around racks
- Best budget gym flooring on Amazon
- Puzzle seams can separate under heavy racks
- Not as durable as horse stall mats for deadlifts
- Slight chemical smell for first few days
Price and availability may change
Non-slip flooring is not optional in a senior gym. It is the single most important safety feature in the entire build. The BalanceFrom puzzle mats interlock to cover your training area with a cushioned, non-slip surface that reduces fall impact and provides stable footing for every exercise. At 3/4-inch thickness, they provide meaningful cushioning if you do go down, while remaining firm enough for stable balance work.
Cover the entire training area — a minimum of 6x8 feet. No gaps. No bare concrete or hardwood edges to trip on. This is where most of your $35 goes and it is the best $35 you will spend.
TriggerPoint Grid 1.0 Foam Roller — $34.46

TriggerPoint Grid 1.0 Foam Roller - 13" Multi-Density Massage Roller for Deep Tissue & Muscle Recovery - Relieves Tight, Sore Muscles & Kinks, Improves Mobility & Circulation - Targets Key Body Parts
Capacity
500 lbs
Steel
EVA Foam / Rigid Hollow Core
Footprint
13" x 5.5" diameter
Price
$32.92
- 4.7+ star rating on Amazon with 20,000+ reviews
- Multi-density GRID surface targets muscles differently
- Rigid hollow core won't flatten over time
- 500 lb weight capacity — built to last
- Compact 13" size for travel
- The gold standard in foam rollers
- Pricier than basic smooth rollers
- 13 inches too short for full-back rolling
- Firm surface may be intense for beginners
Price and availability may change
Foam rolling before and after training reduces muscle stiffness, improves circulation, and helps maintain the range of motion that naturally declines with age. The TriggerPoint Grid 1.0 uses a multi-density EVA foam surface with three distinct zone patterns that mimic finger, palm, and fingertip pressure — firm enough for effective myofascial release without the bruising intensity of a solid high-density roller. Its hollow core construction holds up under repeated use far longer than solid foam alternatives. Use it on your calves, quads, hamstrings, upper back, and IT bands as part of every warm-up.
Gaiam Yoga Mat — $25
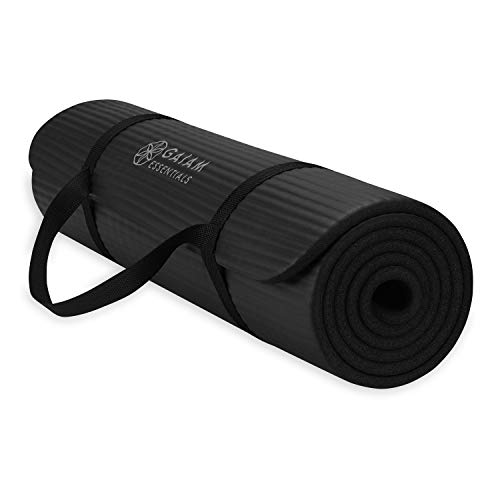
Gaiam Yoga Mat, Pilates & Exercise Mat, Thick 2/5" (10mm) Workout Mat with Easy-Cinch Carrying Strap for Home & Gym Workouts
Capacity
N/A — exercise mat
Steel
NBR Foam / Non-Slip Surface
Footprint
72" x 24" x 10mm thick
Price
$23.07
- 4.5+ star rating on Amazon with 50,000+ reviews
- Extra thick 10mm cushioning for joint protection
- Non-slip textured surface
- Includes carry strap for portability
- Great for stretching, ab work, and yoga
- Best budget exercise mat on Amazon
- Not firm enough for standing balance poses
- Absorbs sweat — needs regular cleaning
- 10mm thickness makes balance poses harder
Price and availability may change
The yoga mat serves double duty: seated and kneeling stretches, and a designated space for balance training and floor-based mobility work. The Gaiam Premium mat is 6mm thick, providing enough cushion for arthritic knees during kneeling exercises. It also rolls up quickly for storage.
Iron Gym Doorway Pull-Up Bar — $30

Iron Gym Pull-Up Bar, Total Upper Body Workout Bar for Doorway
Capacity
300 lbs user weight
Steel
Steel / Foam Grips
Footprint
Fits doorways 24-32 inches wide
Price
$26.00
- 4.5+ star rating on Amazon with 60,000+ reviews
- No screws or installation required
- Multiple grip positions (wide, narrow, neutral)
- Removable for door access
- Best-selling doorway pull-up bar on Amazon
- Cheapest entry into upper body training
- Limited to 300 lb user weight
- Cannot be used for kipping or muscle-ups
- Can damage doorframe trim with heavy use
- Width restricted to standard doorways
Price and availability may change
This is not for doing pull-ups — at least not initially. For seniors, a doorway pull-up bar serves three purposes: assisted standing (grab the bar and use your arms to help stand from a seated position below it), dead hangs for shoulder mobility and grip strength (hang with feet touching the floor, supporting partial bodyweight), and eventually band-assisted pull-ups for back strength. The Iron Gym supports 300 lbs and installs without drilling.
Safety Features: The Non-Negotiables
Safety is not a section you skim. It is the foundation of every equipment choice, every layout decision, and every exercise in this guide.
Non-Slip Flooring Coverage
Cover the entire training area with interlocking puzzle mats. No exceptions. Extend the mats 12 inches beyond your equipment footprint in every direction. If you train on a concrete garage floor or hardwood living room, bare surfaces become hazardous the moment you sweat. Puzzle mats eliminate this risk.
Grab Bars and Support Rails
Install two bathroom-style stainless steel grab bars on the wall nearest your training area. Position one at standing hip height (approximately 34 inches from the floor) and one at shoulder height (approximately 54 inches). These serve as balance supports during standing exercises, assist with sit-to-stand transitions, and provide an emergency handhold if you lose balance. Use proper wall anchors — toggle bolts into drywall, or lag screws into studs. A grab bar that pulls out of the wall is worse than no grab bar.
Clear Pathways
Maintain a minimum 36-inch clear walkway on all sides of your training area. No dumbbells on the floor. No resistance bands draped across walking paths. No bench legs jutting into the walkway. After every session, return all equipment to a designated storage area. Trip hazards are the number-one preventable cause of falls in home environments.
Adequate Lighting
Ensure the training area has bright, even lighting with no shadows across the floor. Shadows obscure tripping hazards and reduce depth perception. Overhead LED panels or shop lights are inexpensive and dramatically improve safety. If you train in a garage, add lighting before you add any equipment.
Wall Mirror
A 36x60 inch mirror mounted at standing height serves two purposes: form checking during exercises (critical for maintaining safe posture) and spatial awareness during movement. Being able to see your surroundings while training reduces fall risk during exercises that challenge balance.
Emergency Accessibility
Keep a phone within arm's reach during every session. If you use a smartwatch with fall detection, wear it while training. Consider a medical alert device if you train alone. Tell someone your training schedule so they know when to expect you to be done.
The Senior Strength and Mobility Program (3 Days Per Week)
This program follows ACSM guidelines for older adults: resistance training two to three days per week, balance training at least two days per week, and flexibility work daily. Each session takes 45-60 minutes and follows a consistent structure: warm-up, mobility, strength, balance, cool-down.
Day 1: Upper Body + Balance
Warm-up (10 minutes):
- 3 minutes walking in place or seated marching
- Foam rolling: upper back (1 min), shoulders (1 min per side)
- Arm circles: 10 forward, 10 backward
- Band pull-aparts: 2 sets of 10
Strength Circuit (25 minutes):
- Seated dumbbell shoulder press — 3 sets of 10 reps (start with 5 lbs)
- Band-assisted lat pulldowns (door anchor high) — 3 sets of 12
- Seated dumbbell bicep curls — 2 sets of 12
- Band tricep pushdowns (door anchor high) — 2 sets of 12
- Seated dumbbell lateral raises — 2 sets of 10 (start with 3-5 lbs)
- Band face pulls — 2 sets of 15
Balance Training (10 minutes):
- Single-leg stand (hand on grab bar): 3 x 20 seconds per leg
- Heel-to-toe walking: 3 lengths of 10 feet
- Balance pad standing: 2 x 30 seconds
Cool-down (5 minutes):
- Doorway chest stretch: 30 seconds per side
- Overhead tricep stretch: 30 seconds per arm
- Neck rotations: 5 per direction
Day 2: Lower Body + Core
Warm-up (10 minutes):
- 3 minutes walking in place or stationary cycling
- Foam rolling: quads (1 min per side), calves (1 min per side)
- Bodyweight squats to bench (sit and stand): 2 sets of 8
- Ankle circles: 10 per direction per ankle
Strength Circuit (25 minutes):
- Bench sit-to-stand (bodyweight, then holding dumbbells) — 3 sets of 10
- Band-resisted side steps — 3 sets of 10 per direction
- Dumbbell Romanian deadlifts (light weight, focus on hip hinge) — 3 sets of 8
- Standing calf raises (hand on grab bar) — 3 sets of 15
- Seated band leg extensions — 2 sets of 12 per leg
- Standing band hip abductions — 2 sets of 12 per leg
Core Work (10 minutes):
- Seated band rotations (Pallof press) — 2 sets of 10 per side
- Dead bugs (on yoga mat) — 2 sets of 8 per side
- Bird dogs — 2 sets of 8 per side
Cool-down (5 minutes):
- Seated hamstring stretch: 30 seconds per leg
- Figure-four hip stretch (seated): 30 seconds per side
- Standing quad stretch (hand on grab bar): 30 seconds per leg
Day 3: Full Body + Mobility Focus
Warm-up (10 minutes):
- 5 minutes of band-resisted walking or marching
- Full-body foam rolling: 5 minutes
Strength Circuit (20 minutes):
- Incline dumbbell press (bench at 45 degrees) — 3 sets of 10
- Band rows (door anchor mid-height) — 3 sets of 12
- Goblet squat to bench — 3 sets of 8
- Band pull-aparts — 2 sets of 15
- Ankle weight leg raises (seated) — 2 sets of 10 per leg
- Wall push-ups — 2 sets of 12
Extended Balance and Mobility (15 minutes):
- Balance pad single-leg stands: 3 x 30 seconds per leg
- Tandem (heel-to-toe) stance: 3 x 20 seconds
- Seated spinal rotations: 10 per side
- Cat-cow stretches (on yoga mat or standing): 10 reps
- Band-assisted shoulder dislocates: 2 sets of 10
Cool-down (5 minutes):
- Full-body stretching sequence on yoga mat
- Diaphragmatic breathing: 2 minutes
Progressive Overload for Seniors
Progression looks different after 60. Forget adding 5 lbs every week. Instead, progress through these stages:
- Increase reps first. Move from 8 reps to 12 reps at the same weight before increasing load.
- Add one set. Once you handle 3 sets of 12 comfortably, add a fourth set.
- Increase weight by the smallest increment available. Jump from 5 lb dumbbells to 8 lb dumbbells, not to 10. Use wrist weights or ankle weights to create half-pound increments on band exercises.
- Reduce rest time. Shortening rest from 90 seconds to 60 seconds increases training density without increasing load.
- Add a balance challenge. Perform a standing exercise on the balance pad once you have mastered it on solid ground.
Never increase more than one variable at a time. If the exercise feels strained in your joints rather than your muscles, reduce the load immediately. Muscle soreness is normal. Joint pain is a signal to modify.
Equipment Maintenance
Senior gym equipment takes less abuse than powerlifting gear, but maintenance still matters for safety and longevity.
After every session:
- Wipe down the bench padding and yoga mat with a mild disinfectant
- Return all dumbbells to the rack or storage area (never leave them on the floor)
- Coil resistance bands loosely and hang them — do not leave them stretched or crumpled
- Check that the walking path is completely clear before leaving the training area
Weekly:
- Inspect resistance bands for nicks, tears, or discoloration near the carabiner clips — a snapped band at full extension can cause injury
- Wipe down foam roller with a damp cloth
- Check puzzle mat edges and seams for lifting or separation
- Confirm grab bars are securely mounted (give each one a firm pull)
Monthly:
- Inspect the doorway pull-up bar mounting points for wear on the door frame
- Check all dumbbell handles for looseness (spin-lock collars in particular)
- Clean the wall mirror with glass cleaner for clear visibility
- Test all band door anchors for secure engagement
Quarterly:
- Replace any resistance bands showing visible wear (bands are inexpensive and should be treated as consumables with a 6-12 month lifespan under regular use)
- Inspect puzzle mat flooring for compression or smoothing that could reduce grip
- Check lighting fixtures and replace any flickering bulbs immediately
Upgrade Path: What to Add When Ready
Once you have trained consistently for three to six months, consider these additions in priority order:
Tier 1 ($50-100):
- Adjustable ankle weights (heavier set, up to 10 lbs) for progressive lower-body loading
- A set of mini-bands (hip circles) for glute activation and warm-ups
- A stability ball for seated core work and thoracic mobility
Tier 2 ($100-300):
- A recumbent exercise bike for low-impact cardio on non-strength days
- PowerBlock or Bowflex adjustable dumbbells to replace fixed sets and expand your weight range
- A suspension trainer (TRX) for bodyweight exercises at adjustable difficulty
Tier 3 ($300-500):
- A cable pulley system for smooth, joint-friendly resistance on dozens of exercises
- A seated leg press machine for heavy quad training without spinal loading
- An under-desk elliptical for daily low-impact movement
Do not rush upgrades. The base build in this guide provides everything you need for at least the first year of training. Equipment collecting is not the same as training.
Common Mistakes Seniors Make With Home Gyms
Starting too heavy. Your ego remembers what you lifted at 35. Your joints do not care. Start with the lightest weight available and increase only when the movement is smooth, controlled, and pain-free.
Skipping the warm-up. At 25, you could walk into the gym and start pressing. At 65, a cold muscle is an injury waiting to happen. The 10-minute warm-up is not optional. It is your insurance policy.
Ignoring balance training. Strength without balance is like horsepower without steering. Every session in this program includes dedicated balance work because preventing falls is just as important as building muscle.
Training through joint pain. Muscle soreness and joint pain are two completely different signals. Muscle soreness means you worked hard. Joint pain means something is wrong. Stop the exercise, reduce the weight, or substitute a different movement. Consult a physician or physical therapist if joint pain persists.
Cluttered training space. A dumbbell on the floor is a broken hip waiting to happen. Keep your space clean, organized, and clear at all times. This is a safety rule, not a tidiness preference.
Budget Comparison: Home Gym vs. Gym Membership for Seniors
A senior-focused gym membership (Silver Sneakers qualifying facility, personal training included) typically costs $60-100 per month. Many Medicare Advantage plans cover Silver Sneakers, but not all, and coverage is not guaranteed year to year.
This $740 home gym build pays for itself within 7-12 months compared to a paid gym membership. After that, your ongoing cost is zero except for occasional band replacements ($10-15 per year). Factor in the elimination of driving (gas, parking, weather risk), the convenience of training in your own home, and the removal of every psychological barrier to getting started — and the home gym wins decisively for most seniors.
For a more detailed cost analysis, check our home gym under $1,000 build which breaks down the long-term economics in detail.
Frequently Asked Questions
Is it safe for seniors to strength train at home without a trainer?
What if I have arthritis? Can I still use this equipment?
How much space do I need for this senior home gym?
I have never lifted weights before. Is 60 too old to start?
Do I need to do cardio in addition to this program?
What if I fall during training?
Can my spouse and I share this home gym?
How often should I replace resistance bands?
Additional Resources
- ACSM Physical Activity Guidelines for Older Adults
- NSCA Resistance Training for Older Adults
- CDC Falls Prevention Resources
Related Content
Lena Park
Former NCAA Division I rower and USA Weightlifting coach. Specializes in conditioning equipment and women's training.
Read full bioMore in Budget Builds
Women's Home Gym Build: Complete Equipment Guide (2026)
Build the perfect home gym for women. Glute-focused equipment, strength training essentials, and space-efficient picks for every budget.
Olympic Weightlifting Home Gym Build (2026)
Build a home gym for Olympic weightlifting. Platform specs, bar selection, bumper plates, and everything you need to snatch and clean at home.
The Complete Beginner Home Gym Build (2026)
Your first home gym, done right. A tested beginner build with exactly what you need, nothing you don't, and a plan to grow.